Tile That Dungeon! – Part 4
By G. Bruce MacKenzie
This is the fourth article in the Tile That Dungeon! series. Before presenting some templates to work with I at least couldn’t begin without solving a few problems of scope. The tiles have to be flexible enough to permit the construction of small and large spaces. I realized also that the tiles were themselves the map. The tiles do not easily replicate existing dungeon maps and perhaps that should therefore not be one of the projects goals.
Having given some thought therefore to the history and past use of tiles, in this article I will attempt to set out some practical guidelines for using tiles systematically. The idea behind this is that an organized method actually promotes informal use. Of course the real challenge here is not to make this boring and I have to confess that is my secret power… Bear with me however as I believe the reader will find that the journey is well worthwhile.
LICENSE
Tile That Dungeon! – Part 4 © 2018 by Gregory Bruce MacKenzie. Tile That Dungeon! – Part 4 is made available under a Creative Commons Attribution-ShareAlike 4.0 International License. Creative Commons Attribution-ShareAlike 4.0 International License.
The text and artwork of this article are made available under the above license. This licensing will I hope both promote sharing of map tiles and allow others to build upon each contributor’s work.
Overview
The layout of a dungeon map, or any other map for that matter, may be written out in a Layout Table. This may not seem intuitive but since we aren’t actually drawing a map each cell of the table must necessarily contain a notation which describes a tile. The idea behind this is to provide a means of describing a map, identifying its map tiles, and then placing and orienting individual map tiles. The Layout Table is itself keyed for additional reference for use with the Layout Form included below.
The Game Judge uses a layout form to “record” a map rather than actually drawing.
On the Layout Form the Game Judge writes information about the map layout and each tile. The tiles themselves will have keys for each square and this makes it easy to assign content to specific locations.The Game Judge may also print out any of map tiles they use and annotate them with secret information; then include these drawings with the Layout Form.During game play the Game Judge refers to the Layout Table and places each identified map tile on the playing table as required for use with tokens or miniatures.
The Layout Table
Aspects of the forms described hereafter are presented at the bottom of the article. The Layout Table is a grid of of 5 x 5 tiles, that is 25 possible tiles. Each layout square has a grid reference, the first top left square being A1 and the bottom right square being E5.

Example of a Layout Table
Each square is marked with the word “Blank” if no map tile is used; or a reference to a map tile such as “X0001N” which means; “X” cross 4 exits, “001” the tile’s ID number, and “N” meaning orient the tile North.
Global Layout Table
If the layout area of 5 x 5 tiles is insufficient, it must connect to another layout, a Global Layout Table is then provided. If the foregoing 5 x 5 Layout Table was recorded as C3, this would place it in the middle of the global Grid. C4 would be the next 5 x 5 layout to the (right) East.
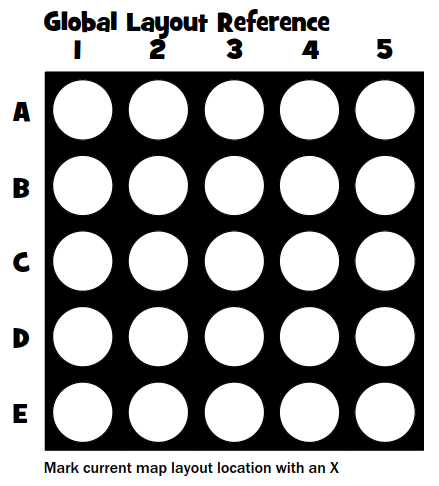
Example of a Global Layout Table
The Game Judge might wish to refer to a specific map tile in the adjacent layout and an example of such a reference would be “C4-A1-X001N”, where “C4” is the Global Reference, “A1” refers to the position of the map tile in the map layout of C4, “X001N” is the map tile reference. One can even refer to a specific square in that tile if so desired by appending a map tile square reference such as “D4”, thus the entire reference to that map tile square would be “C4-A1-X001N-D4”. The notations for a tile of “X” (cross type) are indicated below:
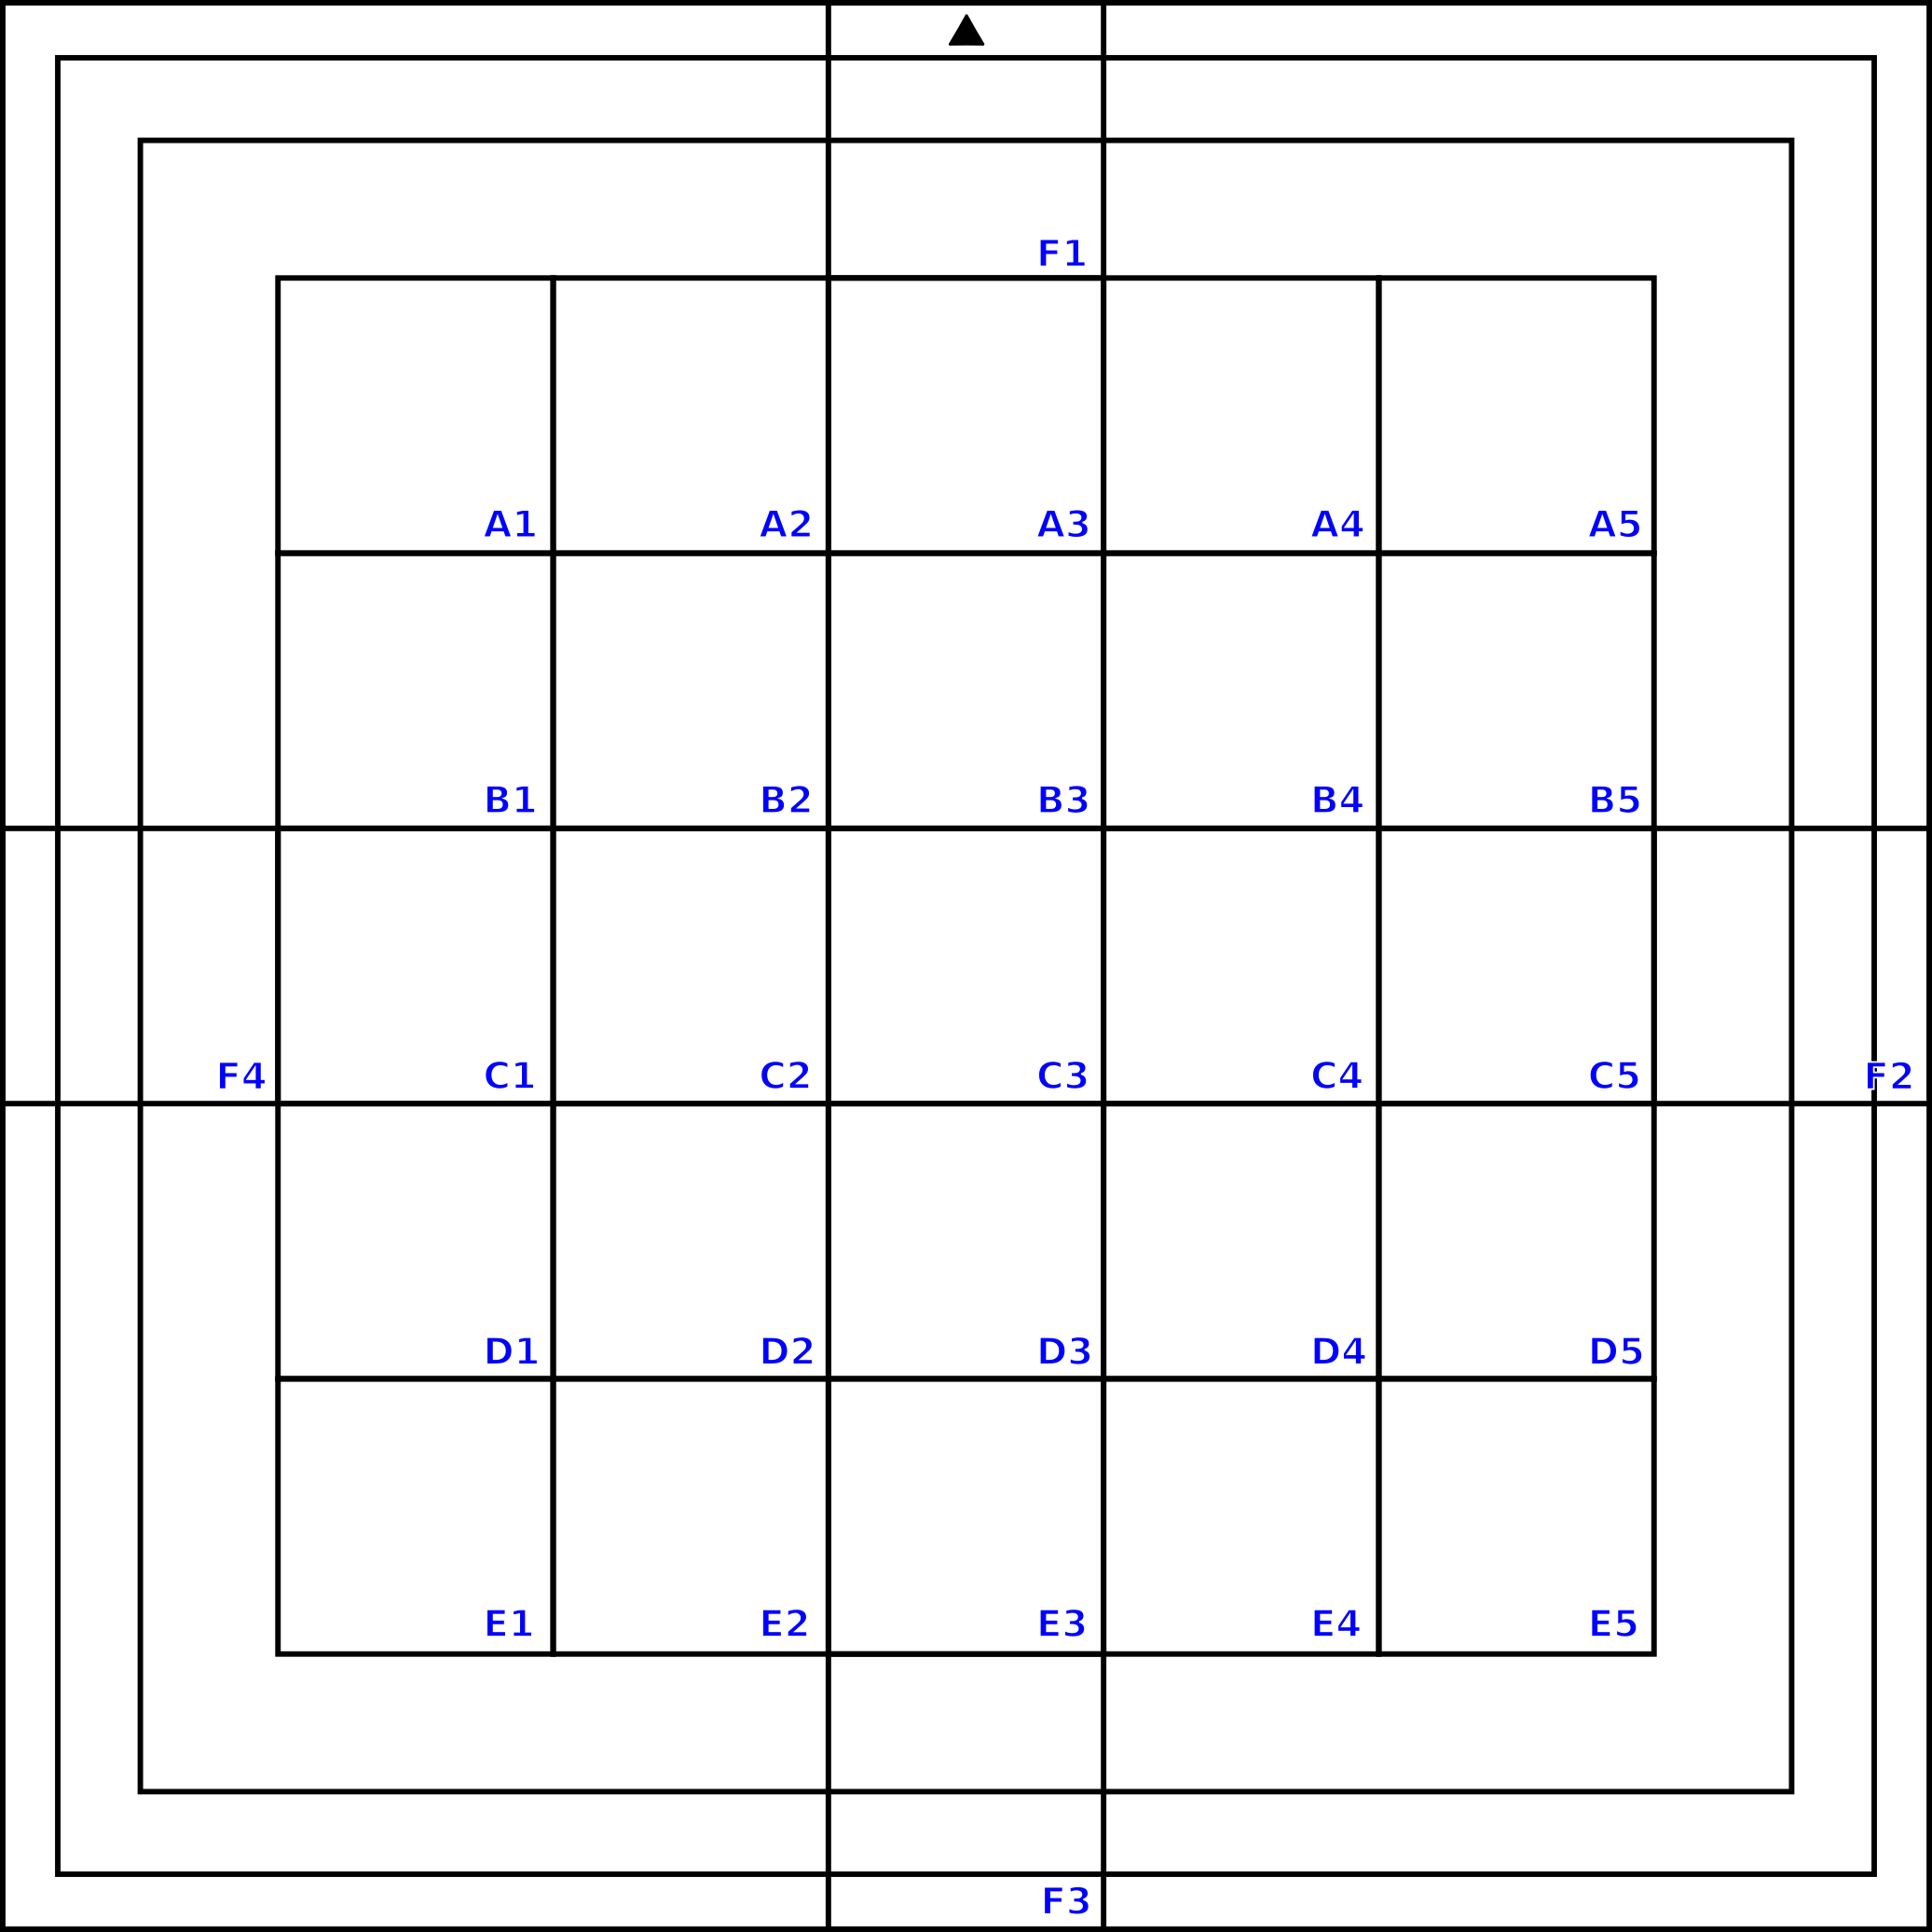
Examples of References to Individual Squares
Here is an example of such a reference in use:
Read the following to the Players: Your search reveals half of a silver key which is undoubtedly worth 50 silver coins; it is the handle, in the shape of a leaf, but the other half of the key with the wards is missing, it looks like the remaining half of the key is designed to slide and lock into this one and you wonder where it might be? What door does it open?
Game Judge Info: The other half of the key with the wards is located at C4-A1-X001N-D4, and when combined with the first half it opens the West Door at (F2) which is currently locked.
The layout and system of reference allow the Game Judge to locate exactly the material they want from the heap of illustrations they will undoubtedly have. The intention is not to overwhelm the user but to provide a clear concise method of reference.
Illustration
It should be noted that ultimately the intention is that the map tile templates allow an author to create their own illustrated settings. The tile and layout system supports a mysterious forest path just as easily as it does a dungeon.
Creating Your Own Tiles
The guidelines which follow are intended to set out a framework enabling the Game Judge to create their own unique tiles from templates, they may print out the basic tile set and draw on them,and/or they may use computer applications to create tiles.
GIMP Template
Wikipedia describes GIMP as follows:
GIMP is a free and open-source raster graphics editor used for image retouching and editing, free-form drawing, converting between different image formats, and more specialized tasks.
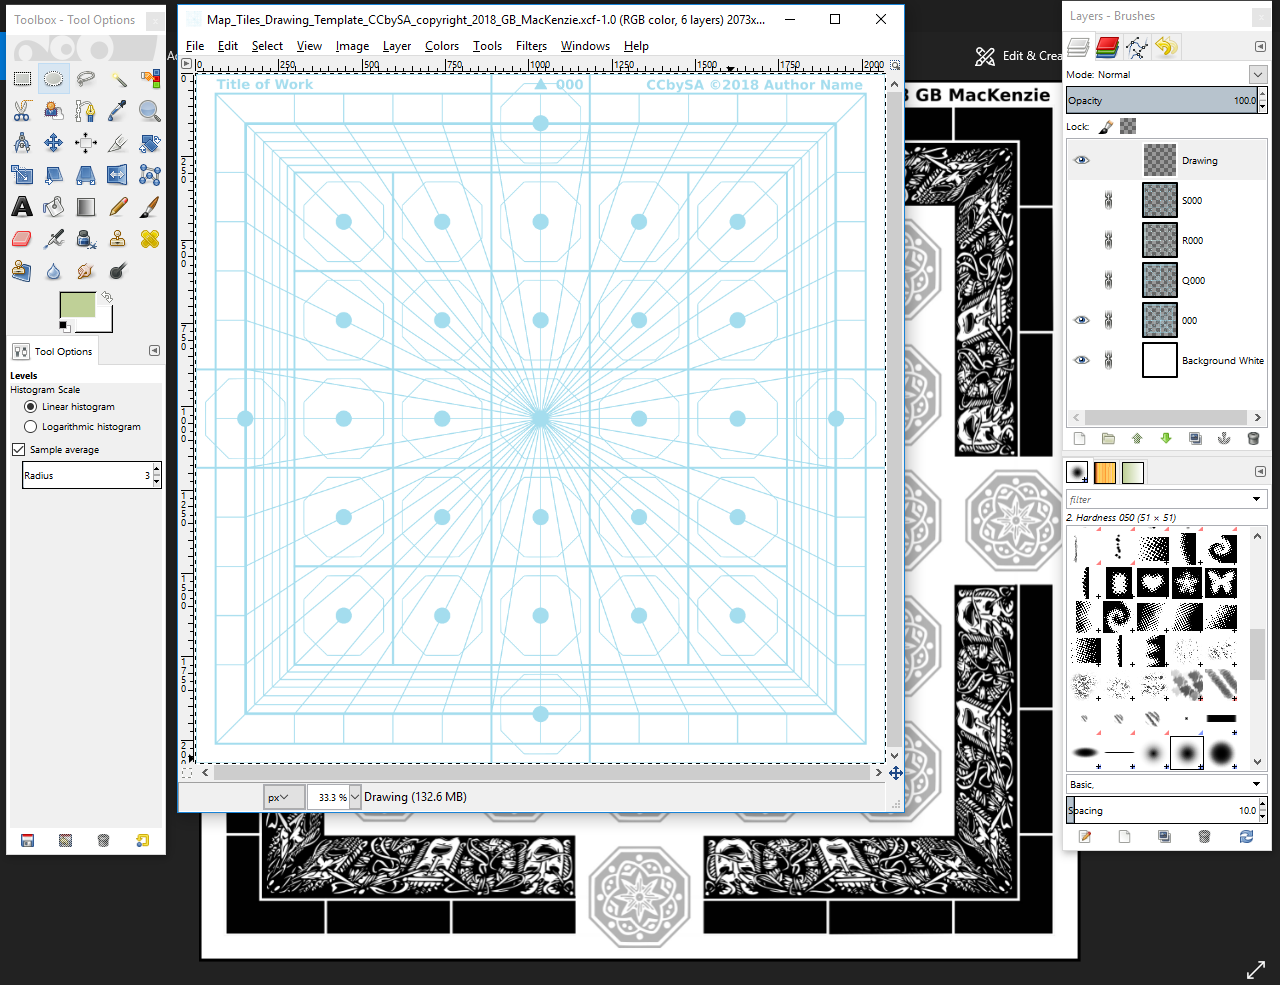
In order to make use of the Map Tile GIMP Template creators will have to download the application from www.gimp.org GIMP Template – The template allows the Game Judge to illustrate map tiles. Each template has a non printing layer as a guide over which the user may create hand drawn illustrations. The Map Tile Template in GIMP format may be found below at the bottom of this article.
|
|
|
The GIMP Template |
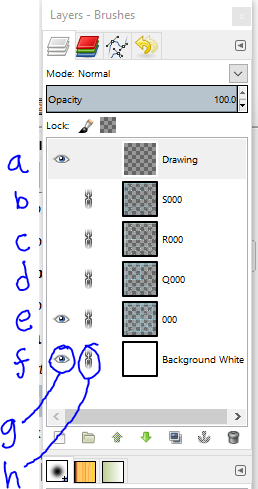
What is important to the user is that the drawing layer and the base tiles are prepared on separate layers. In the layer palette the layers are set as follows:
|
|
|
a. This is the current drawing layer. This layer is transparent. A creator draws on this layer which is not locked. The layers below this one are visible but locked. Layer “e” is the currently visible template. At the bottom of the layers background white is also visible. |
|
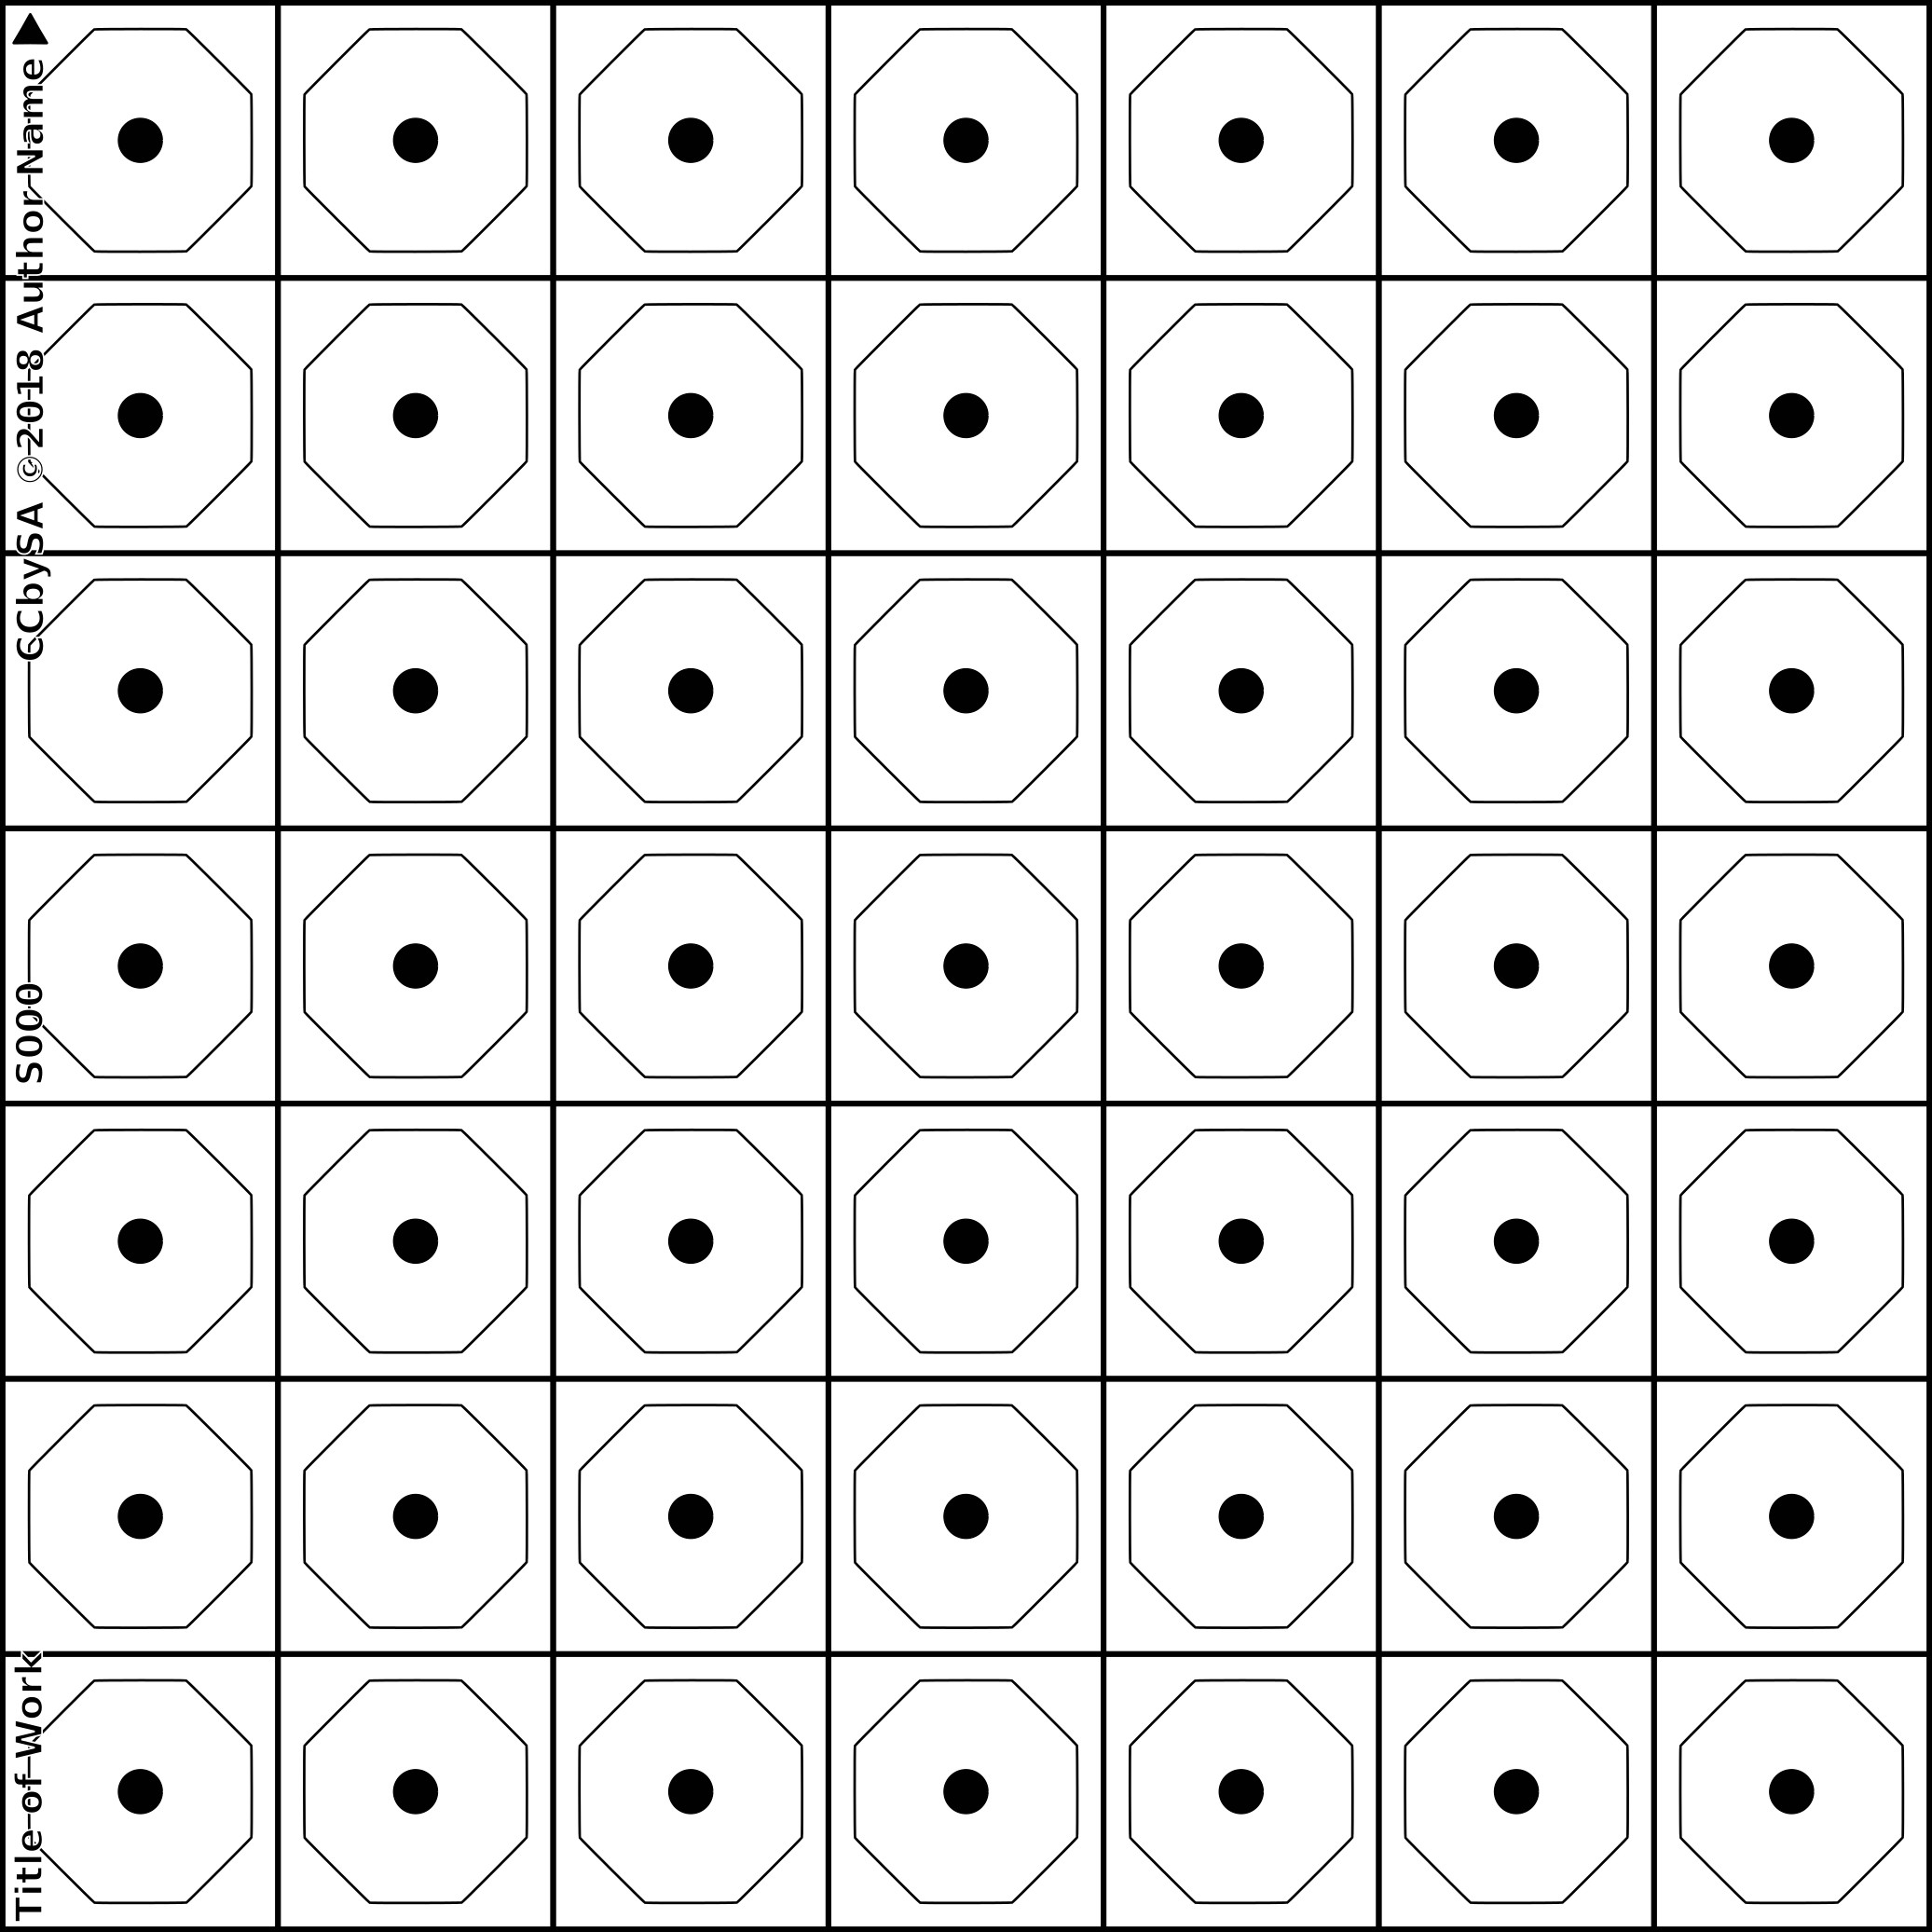
b. S000 is a block 7 x 7 for use with the leafs Q and R. This layer is transparent. This layer is currently not visible and locked. |
|
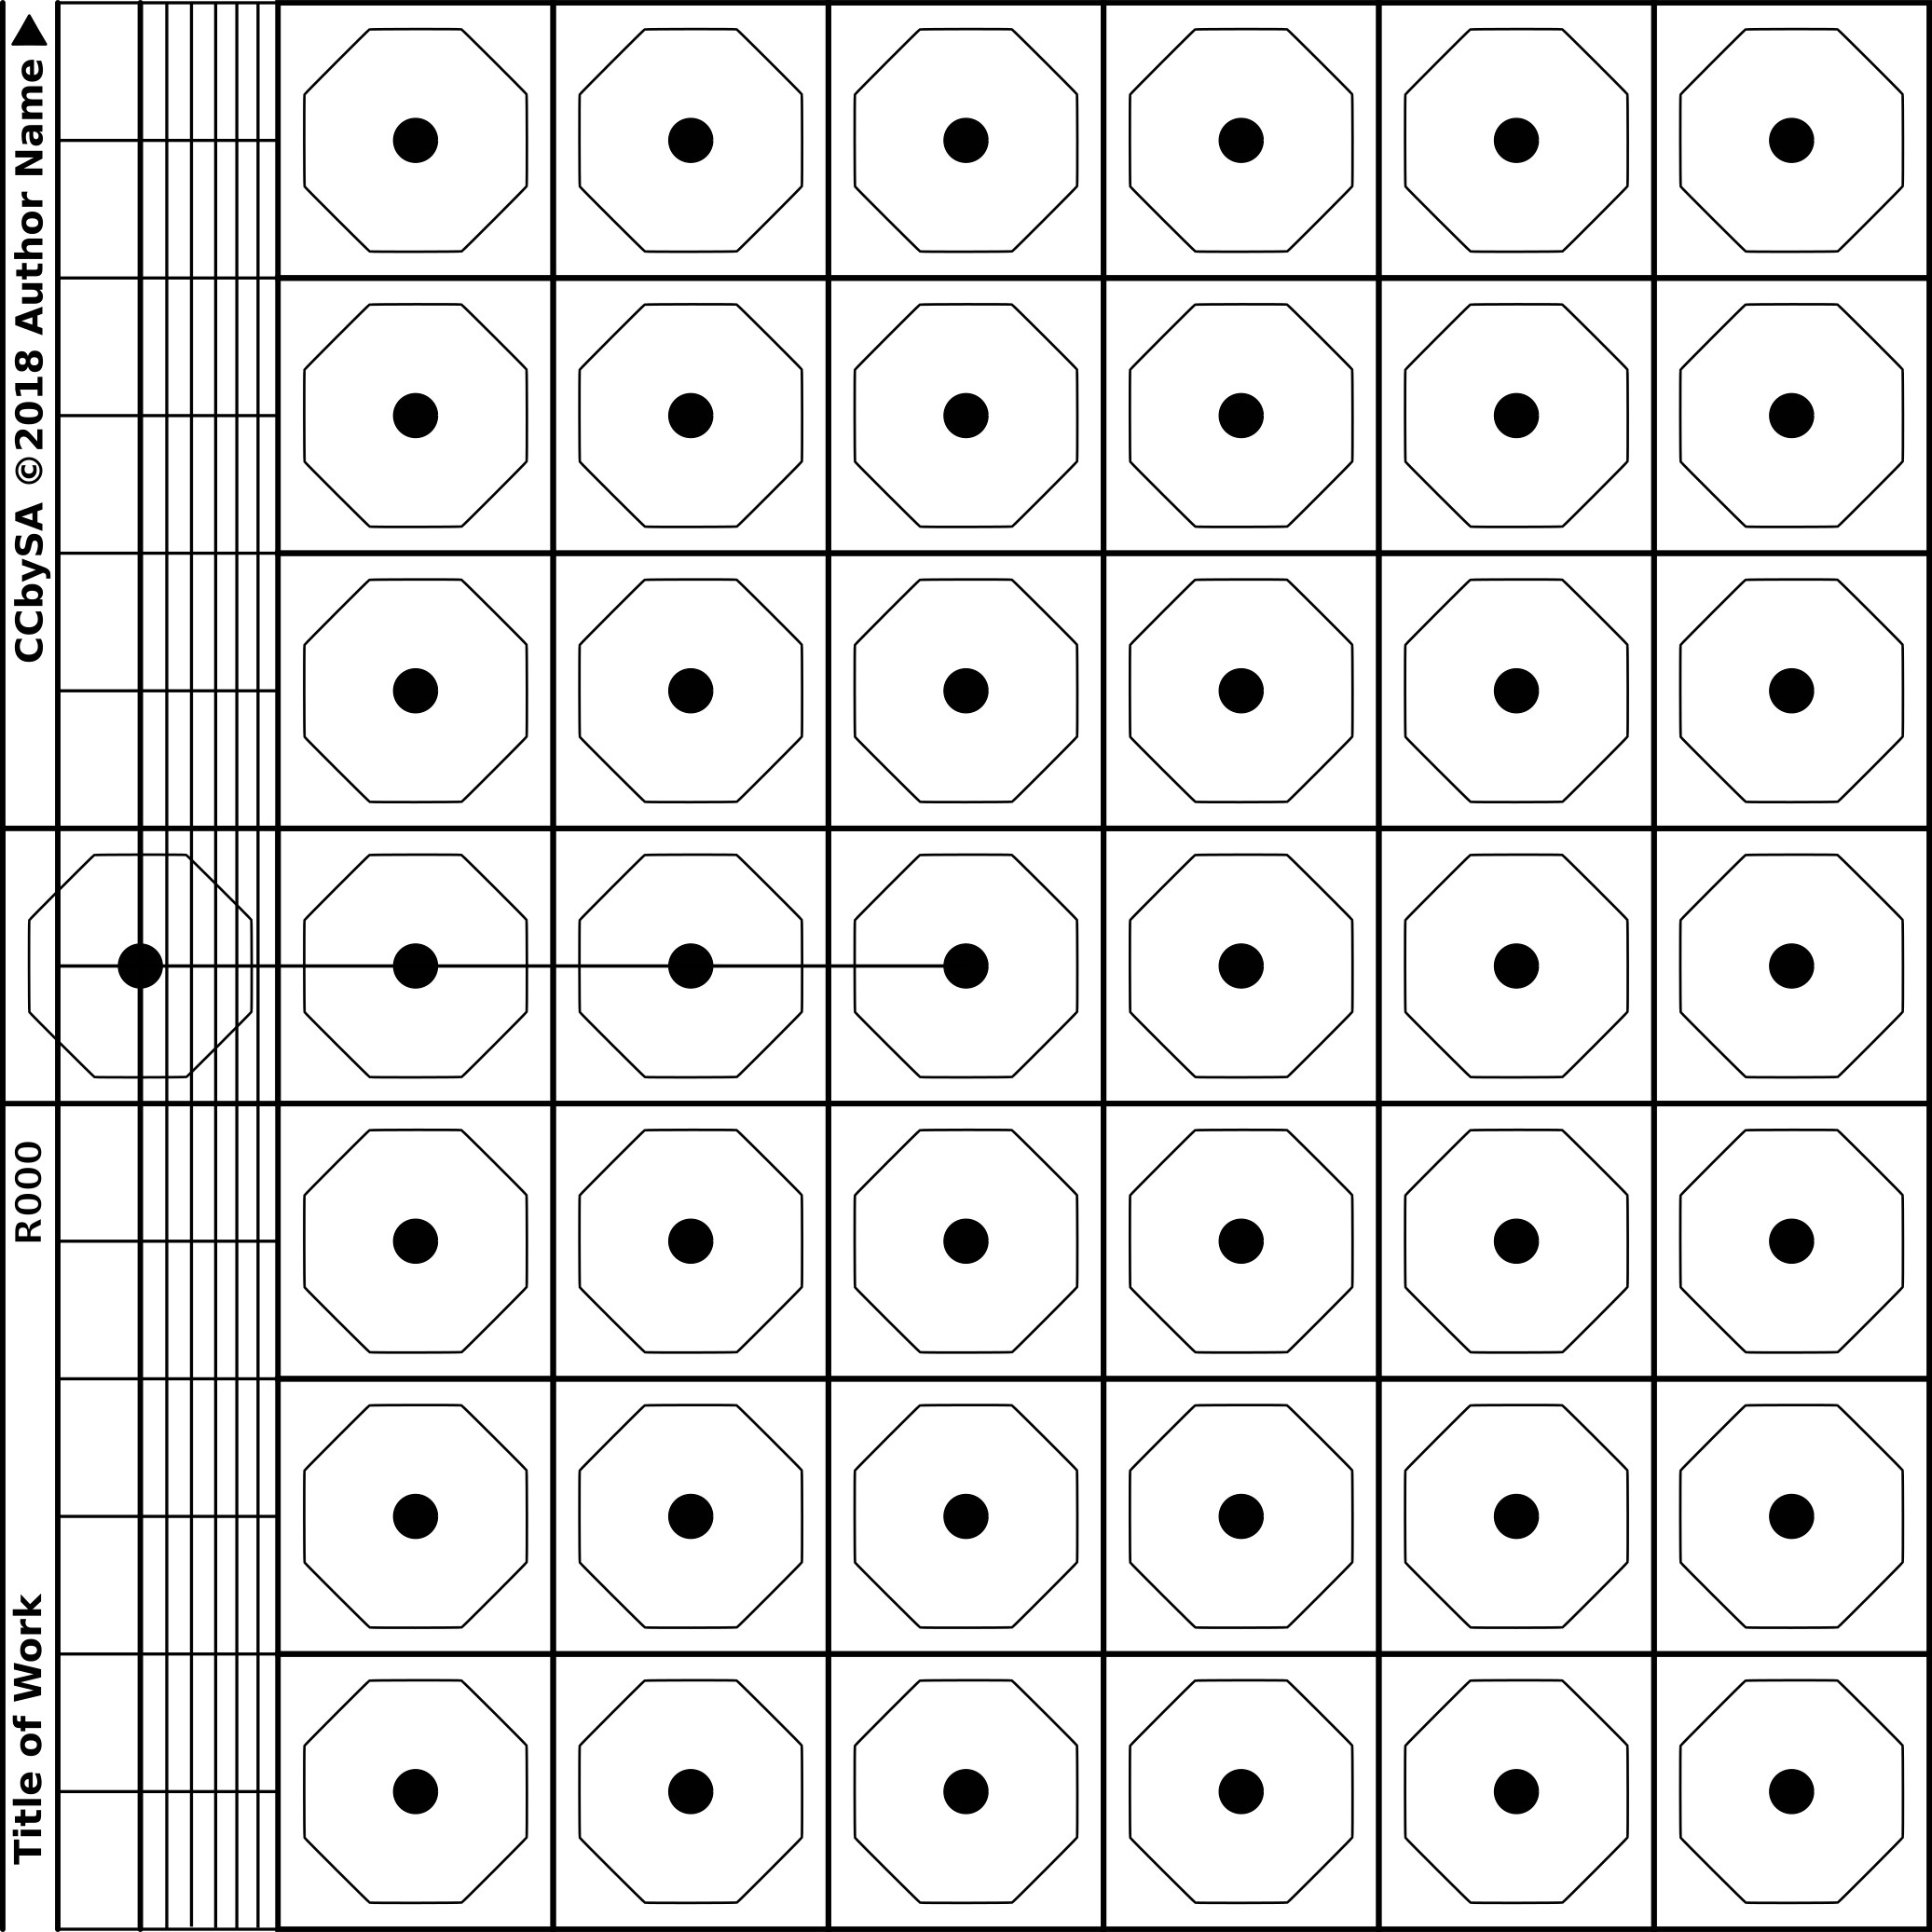
c. R000 is a side leaf 6 x 6 for use with the leafs Q and S. This layer is transparent. This layer is currently not visible and locked. |
|
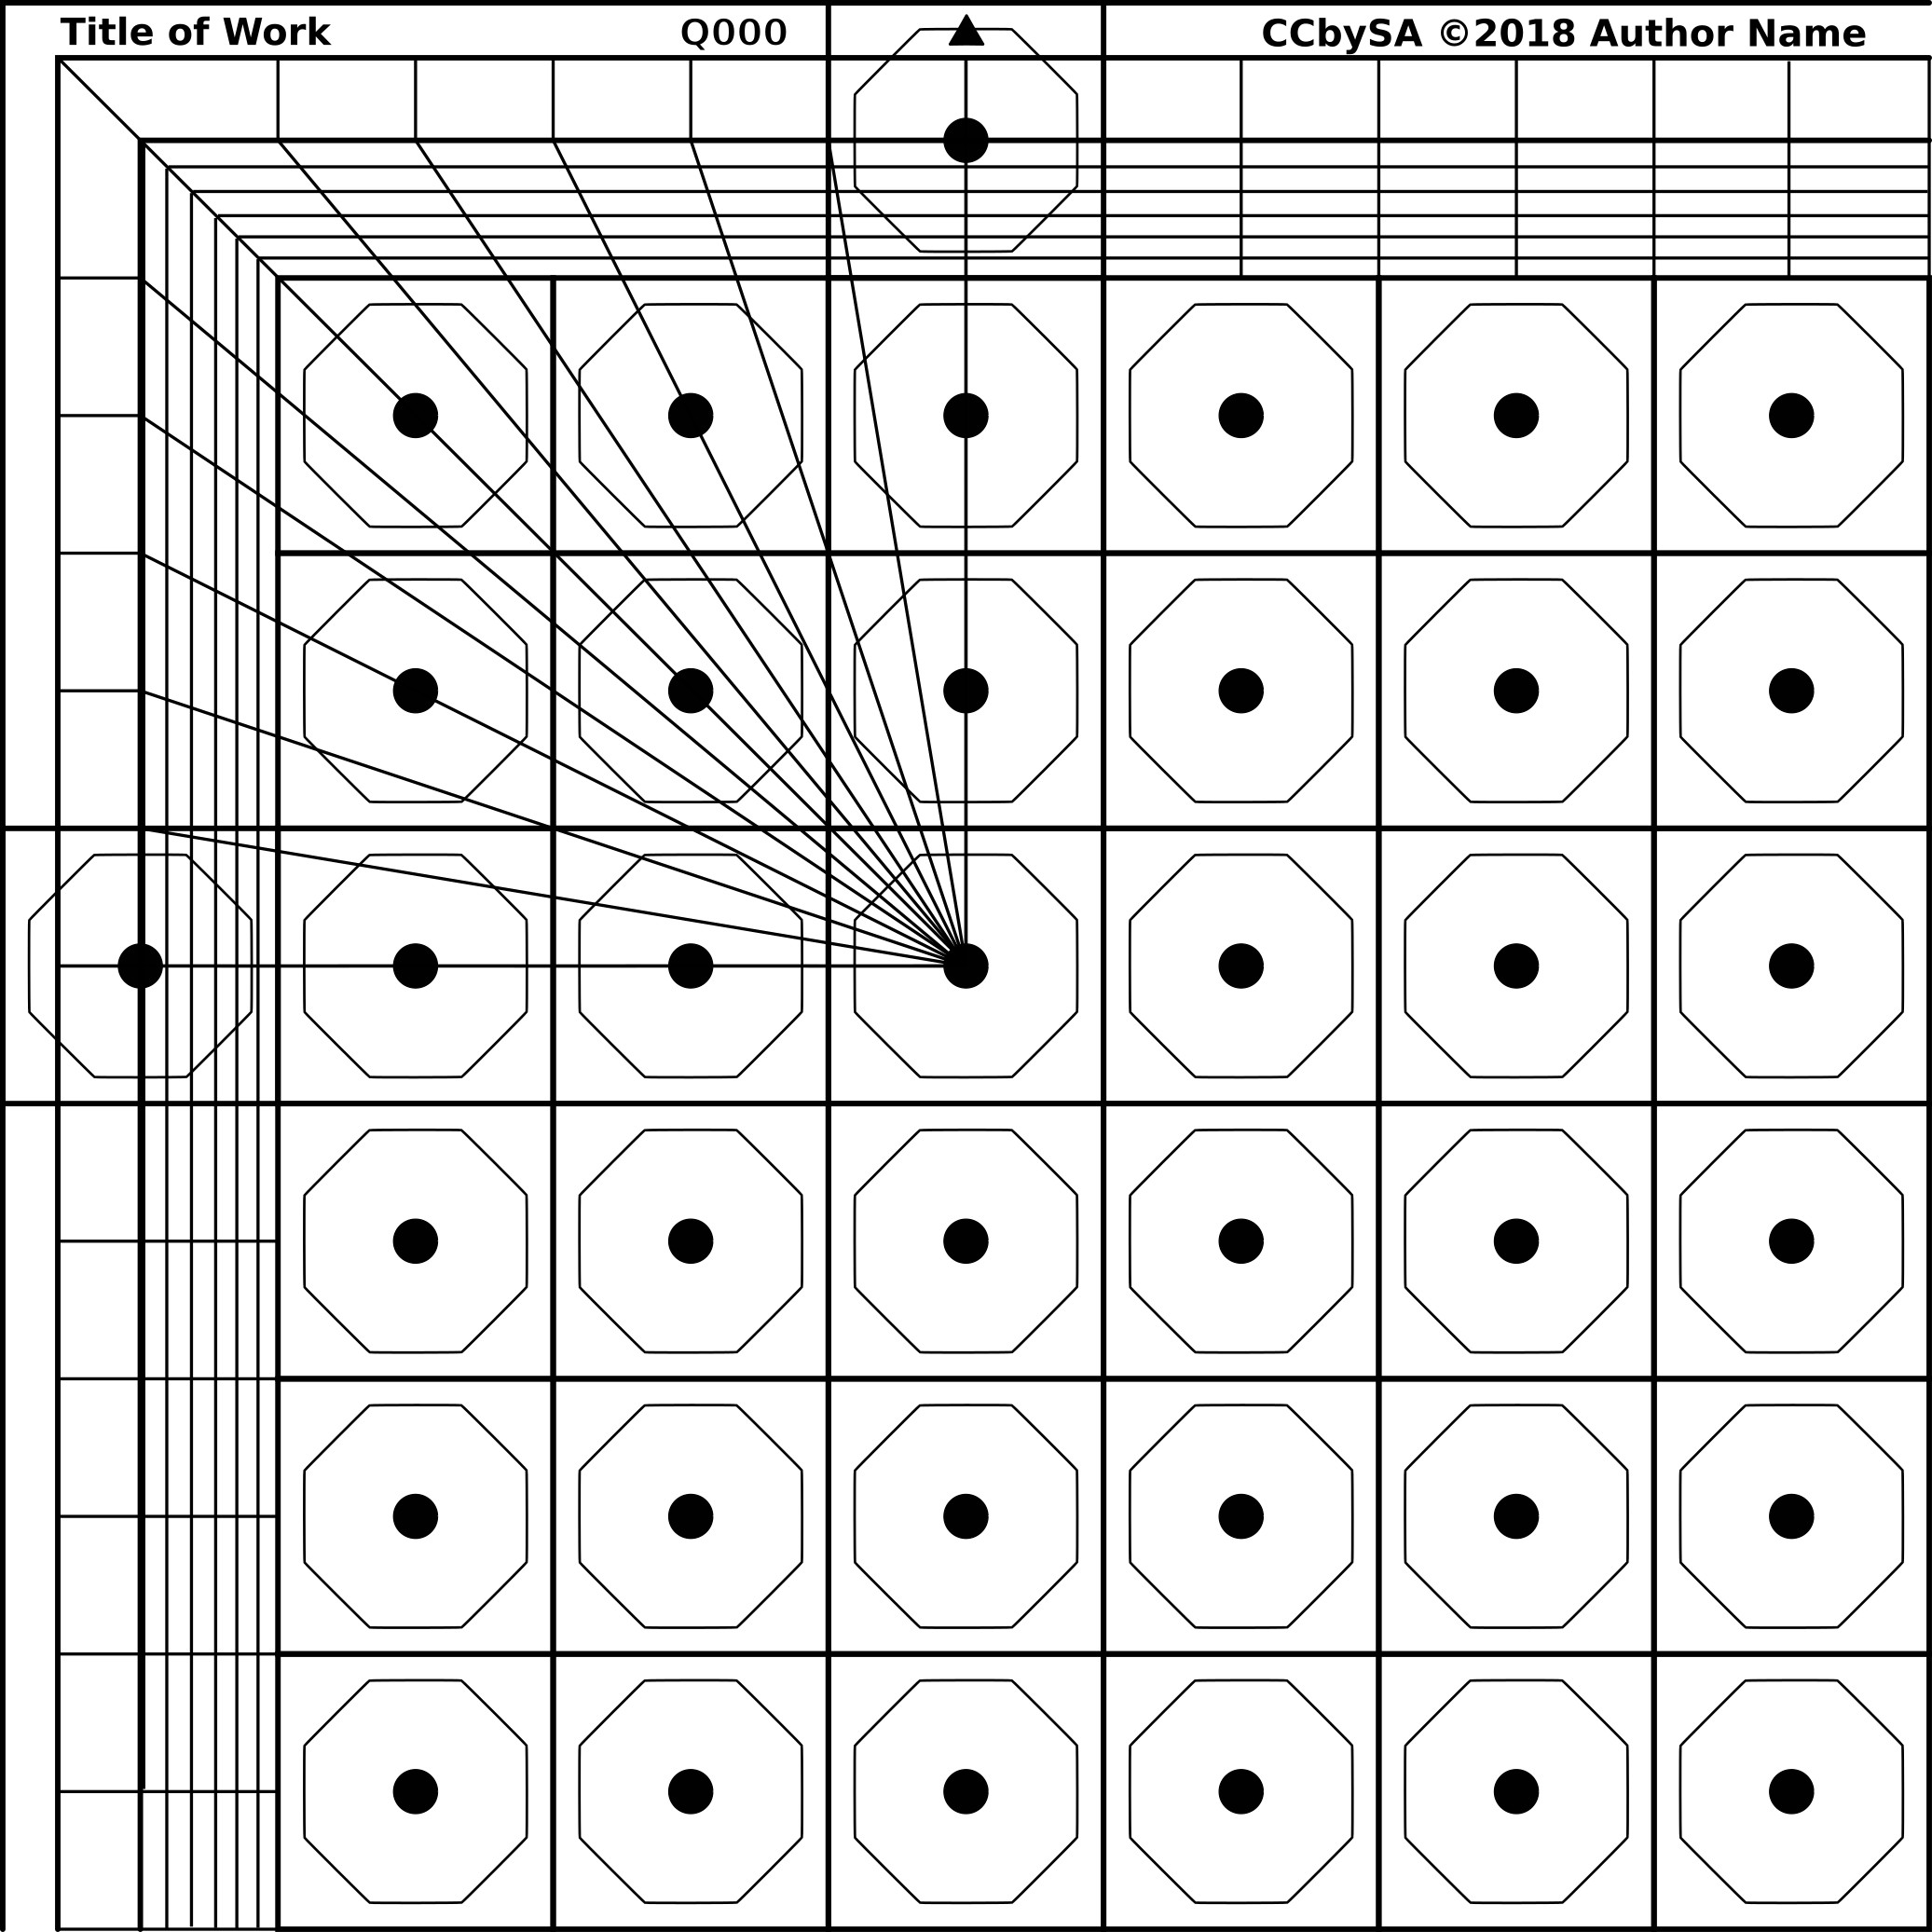
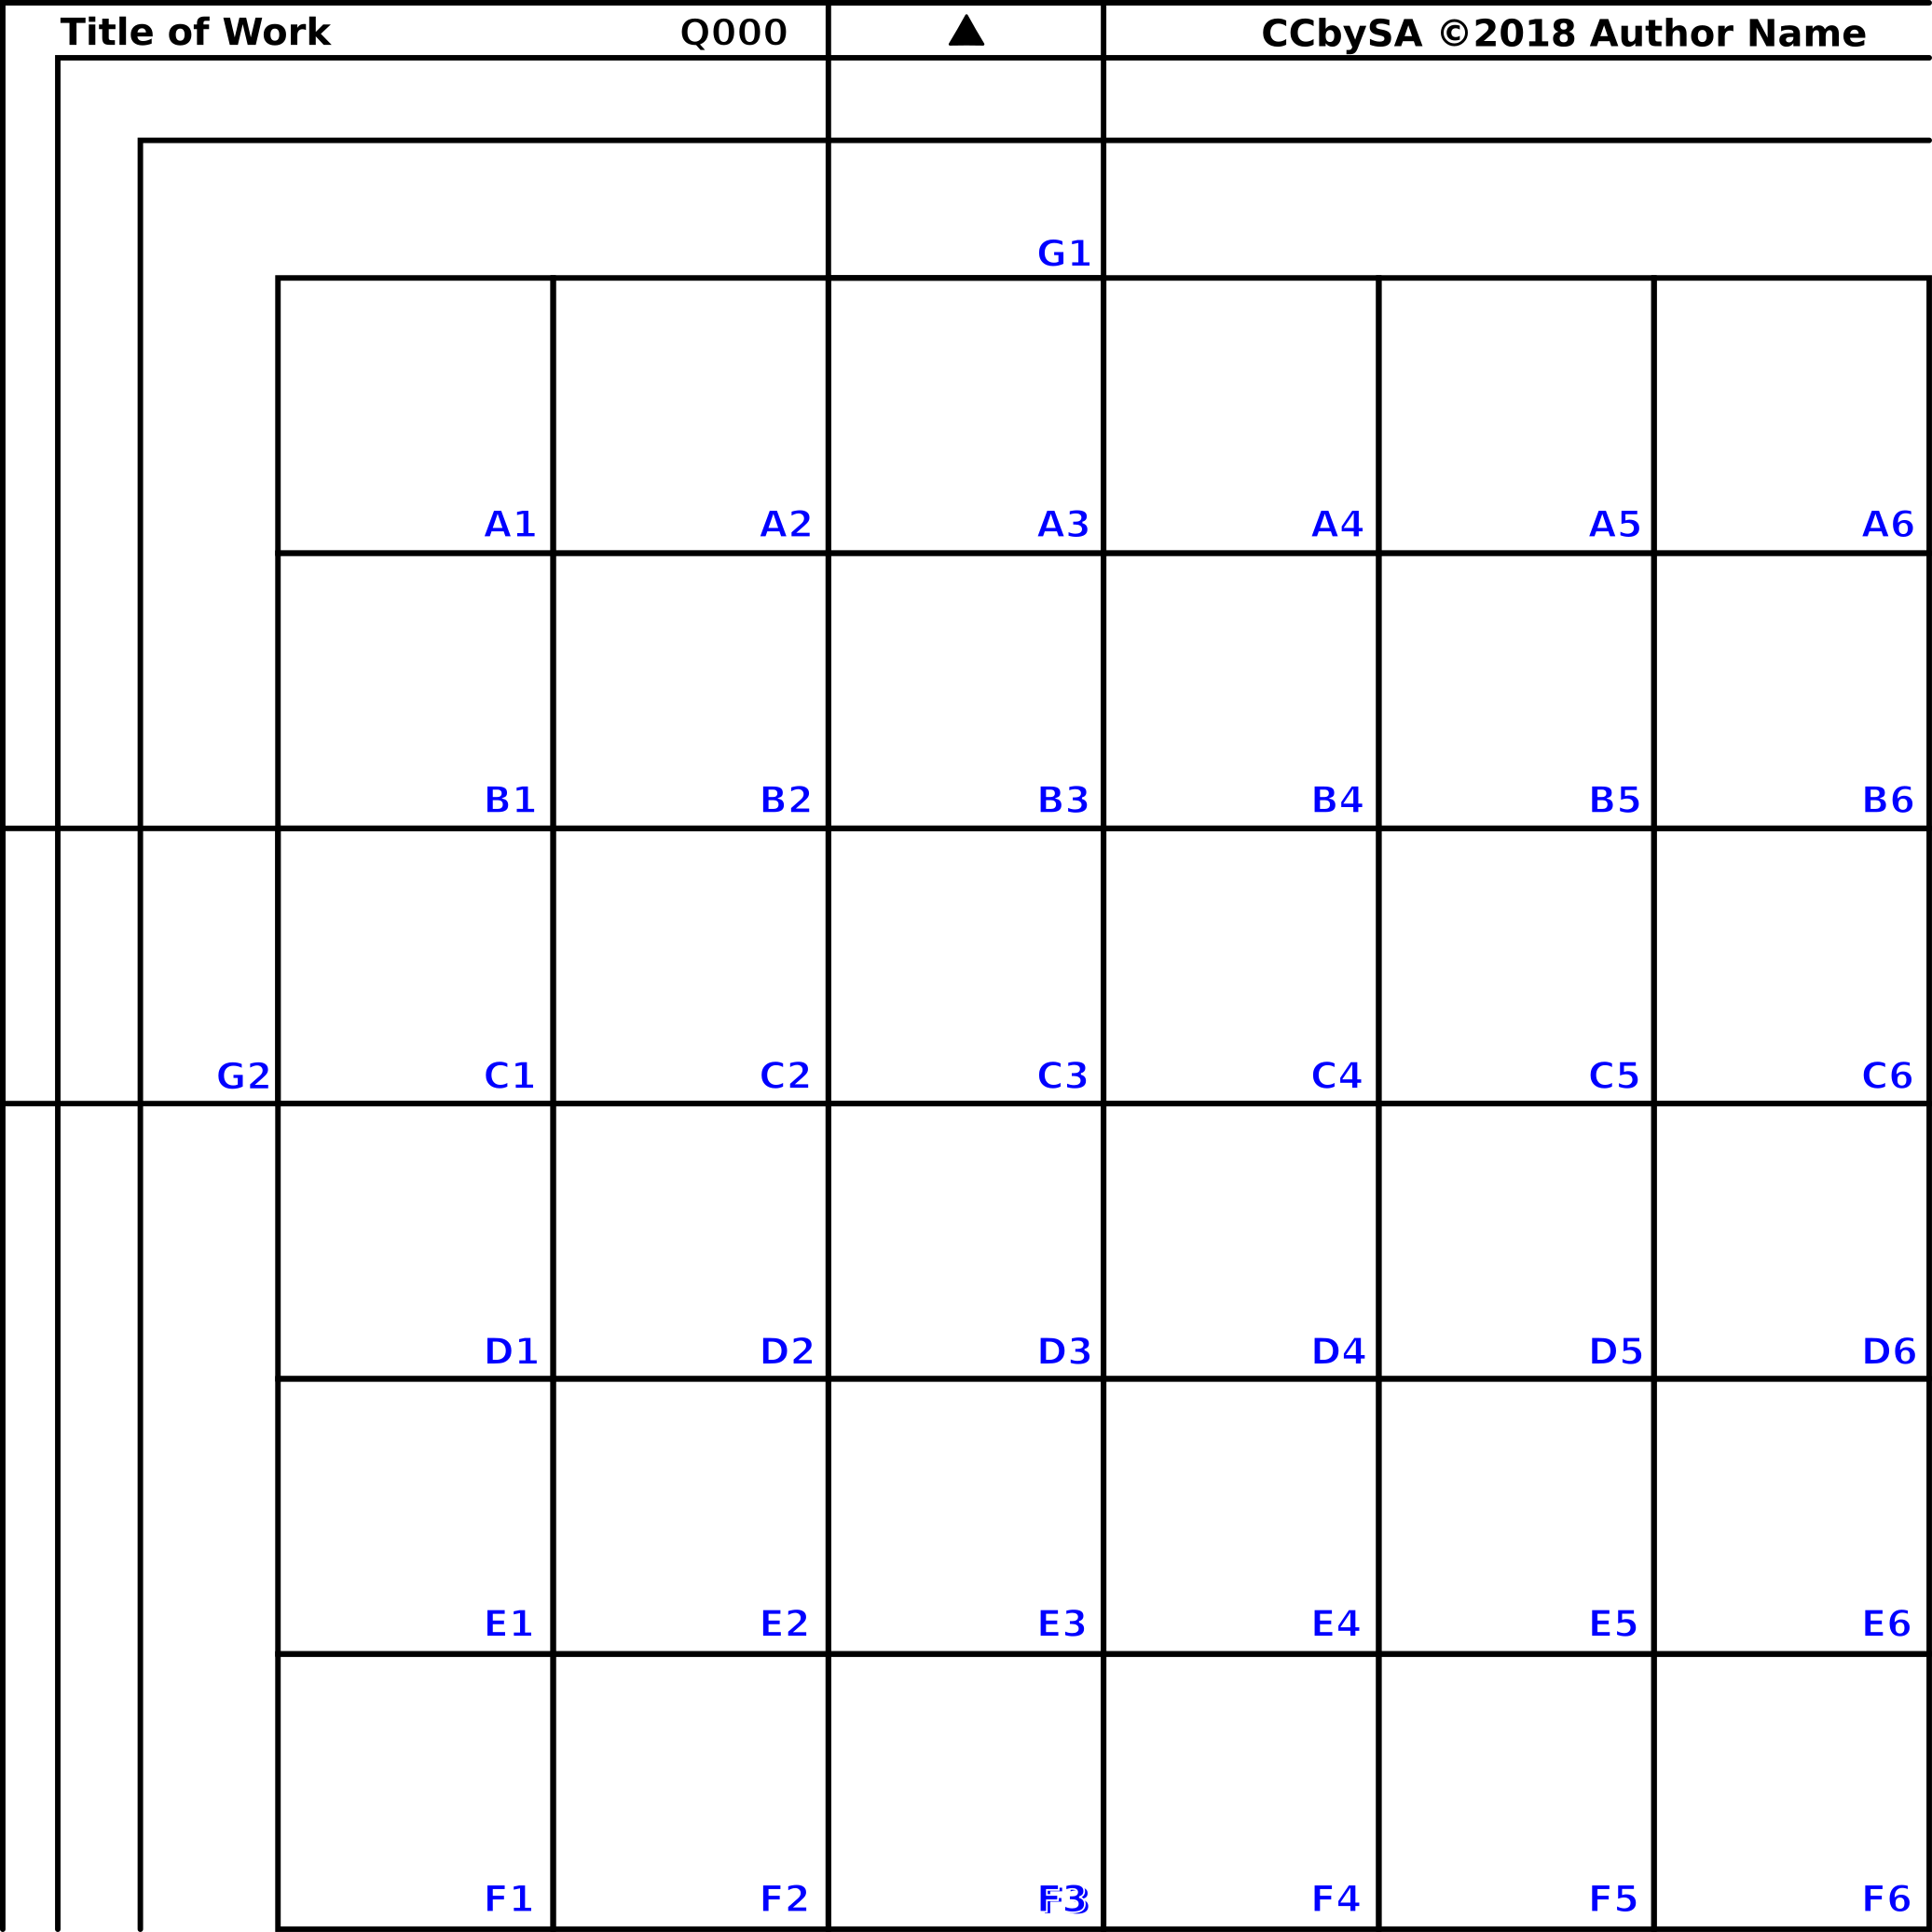
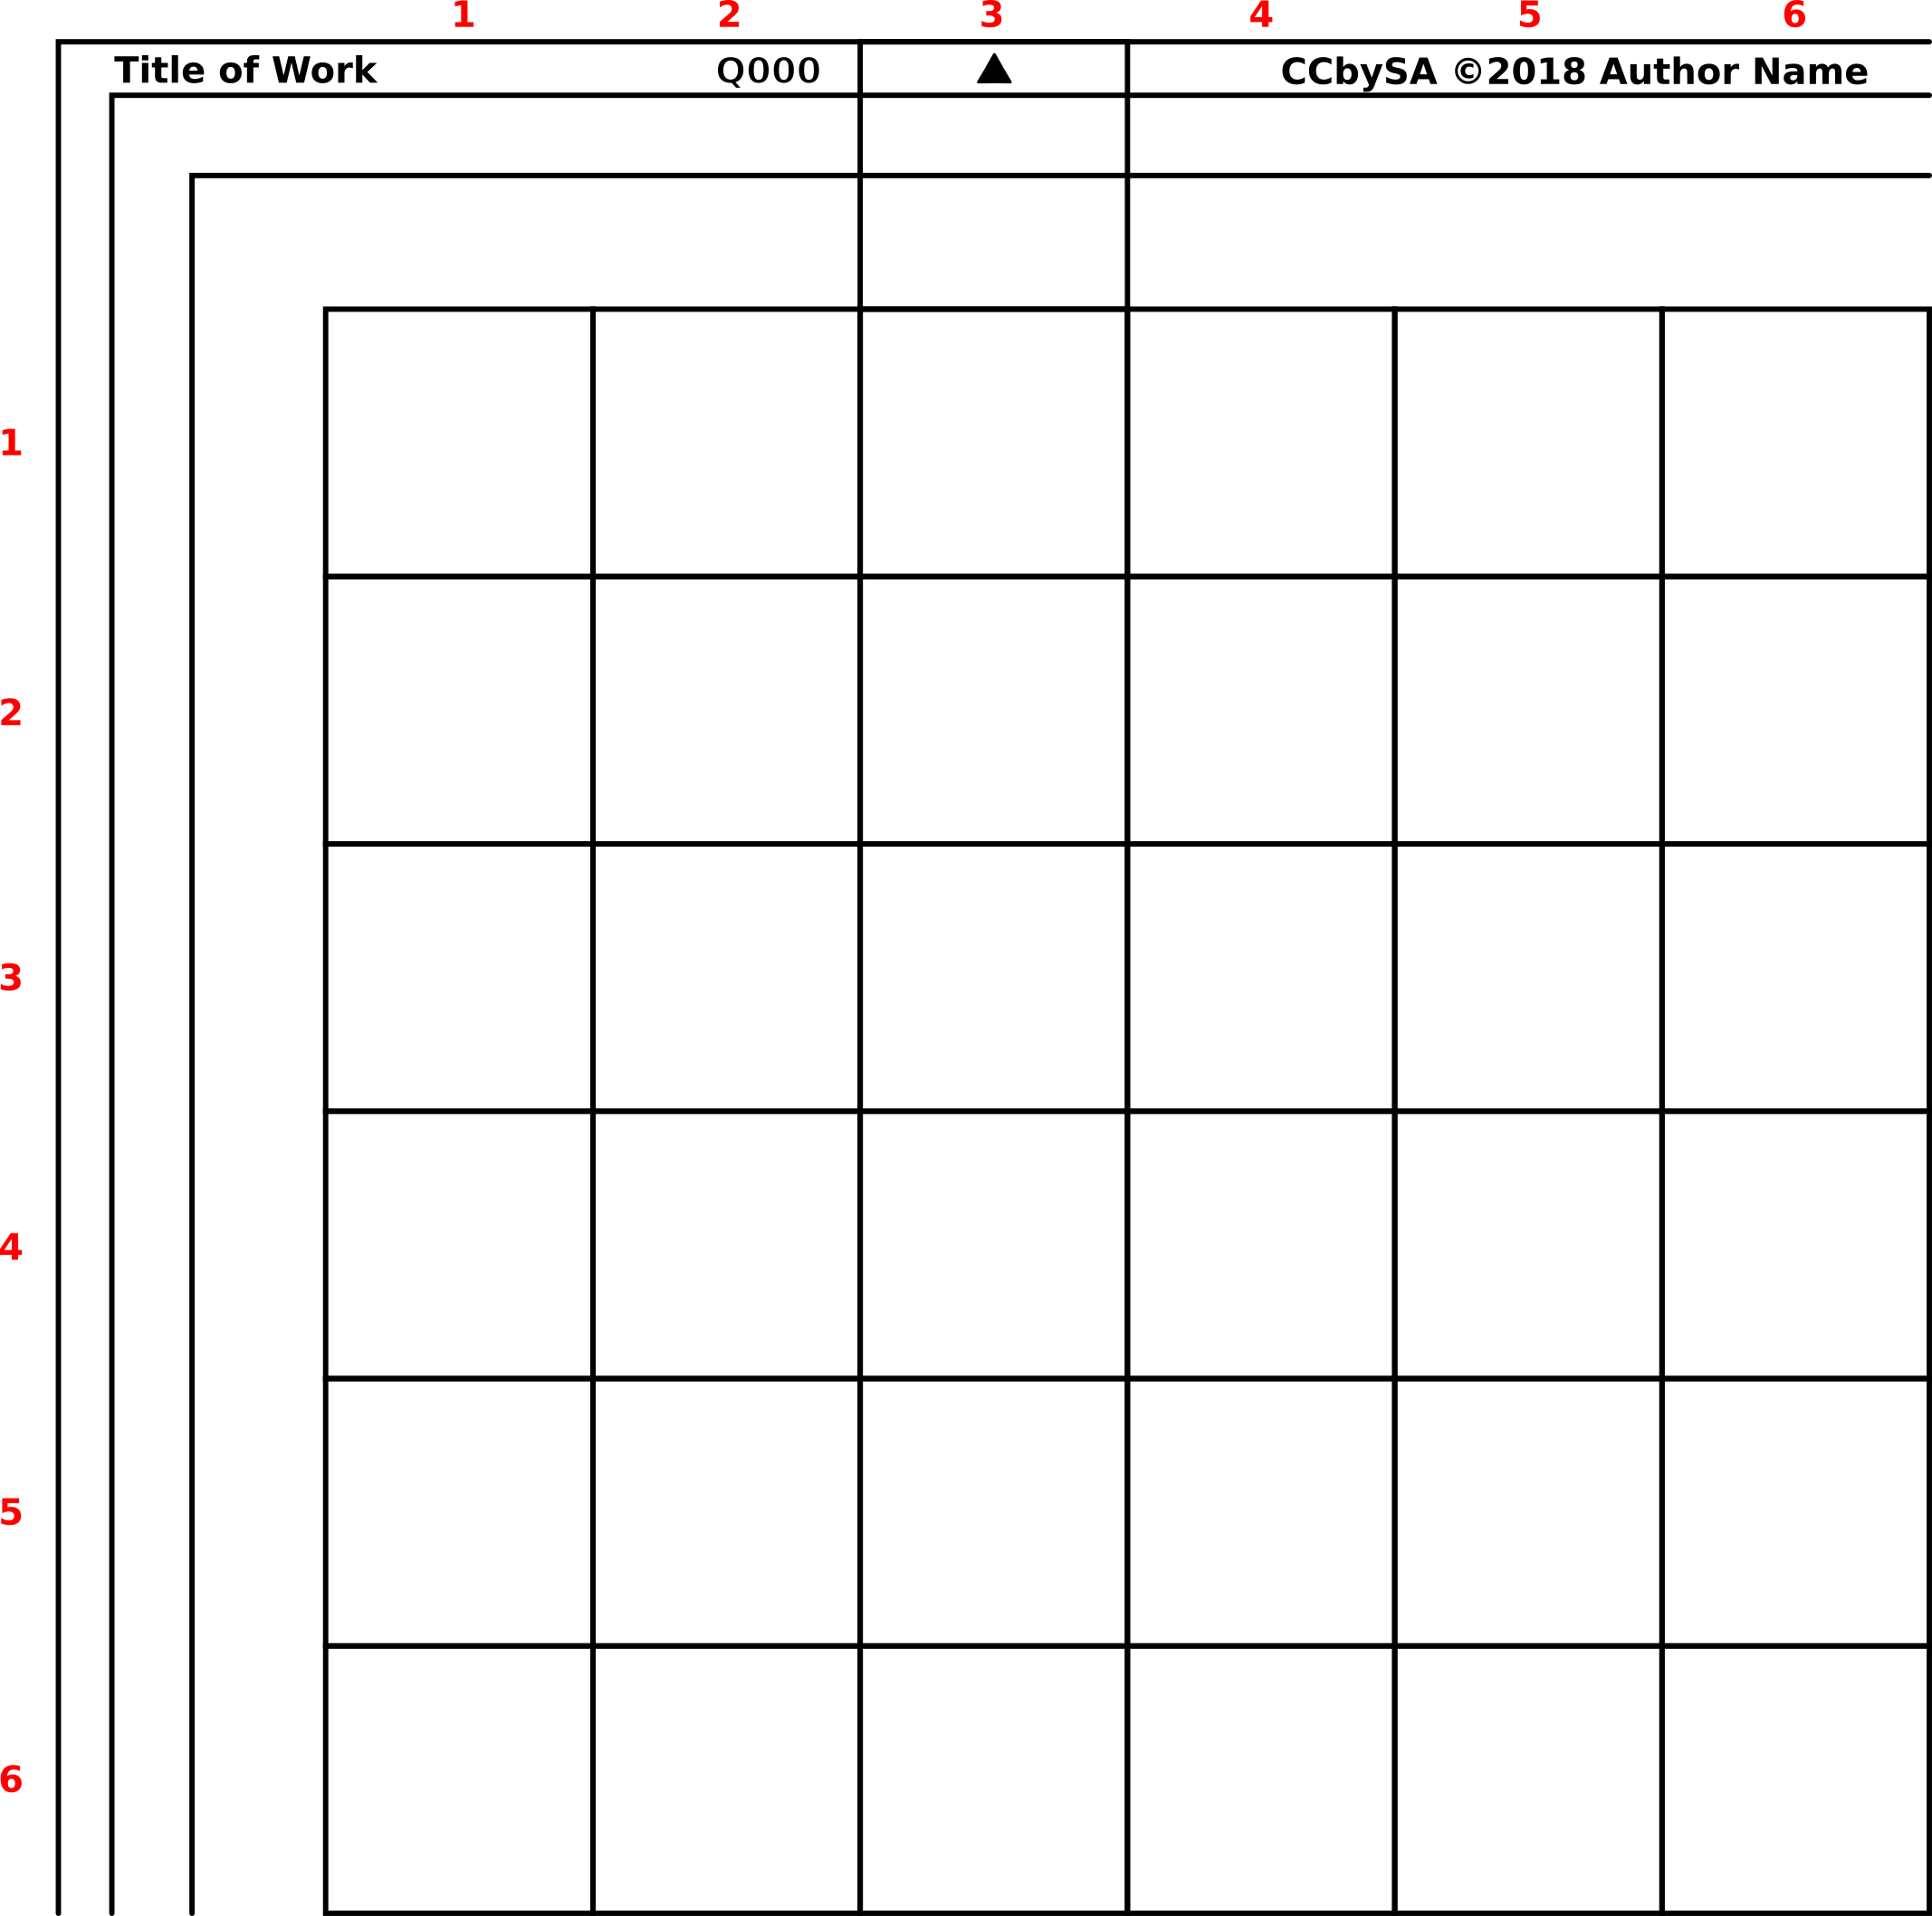
d. Q000 is a corner leaf 6 x6 for use with the leafs R and S. This layer is transparent. This layer is currently not visible and locked. |
|
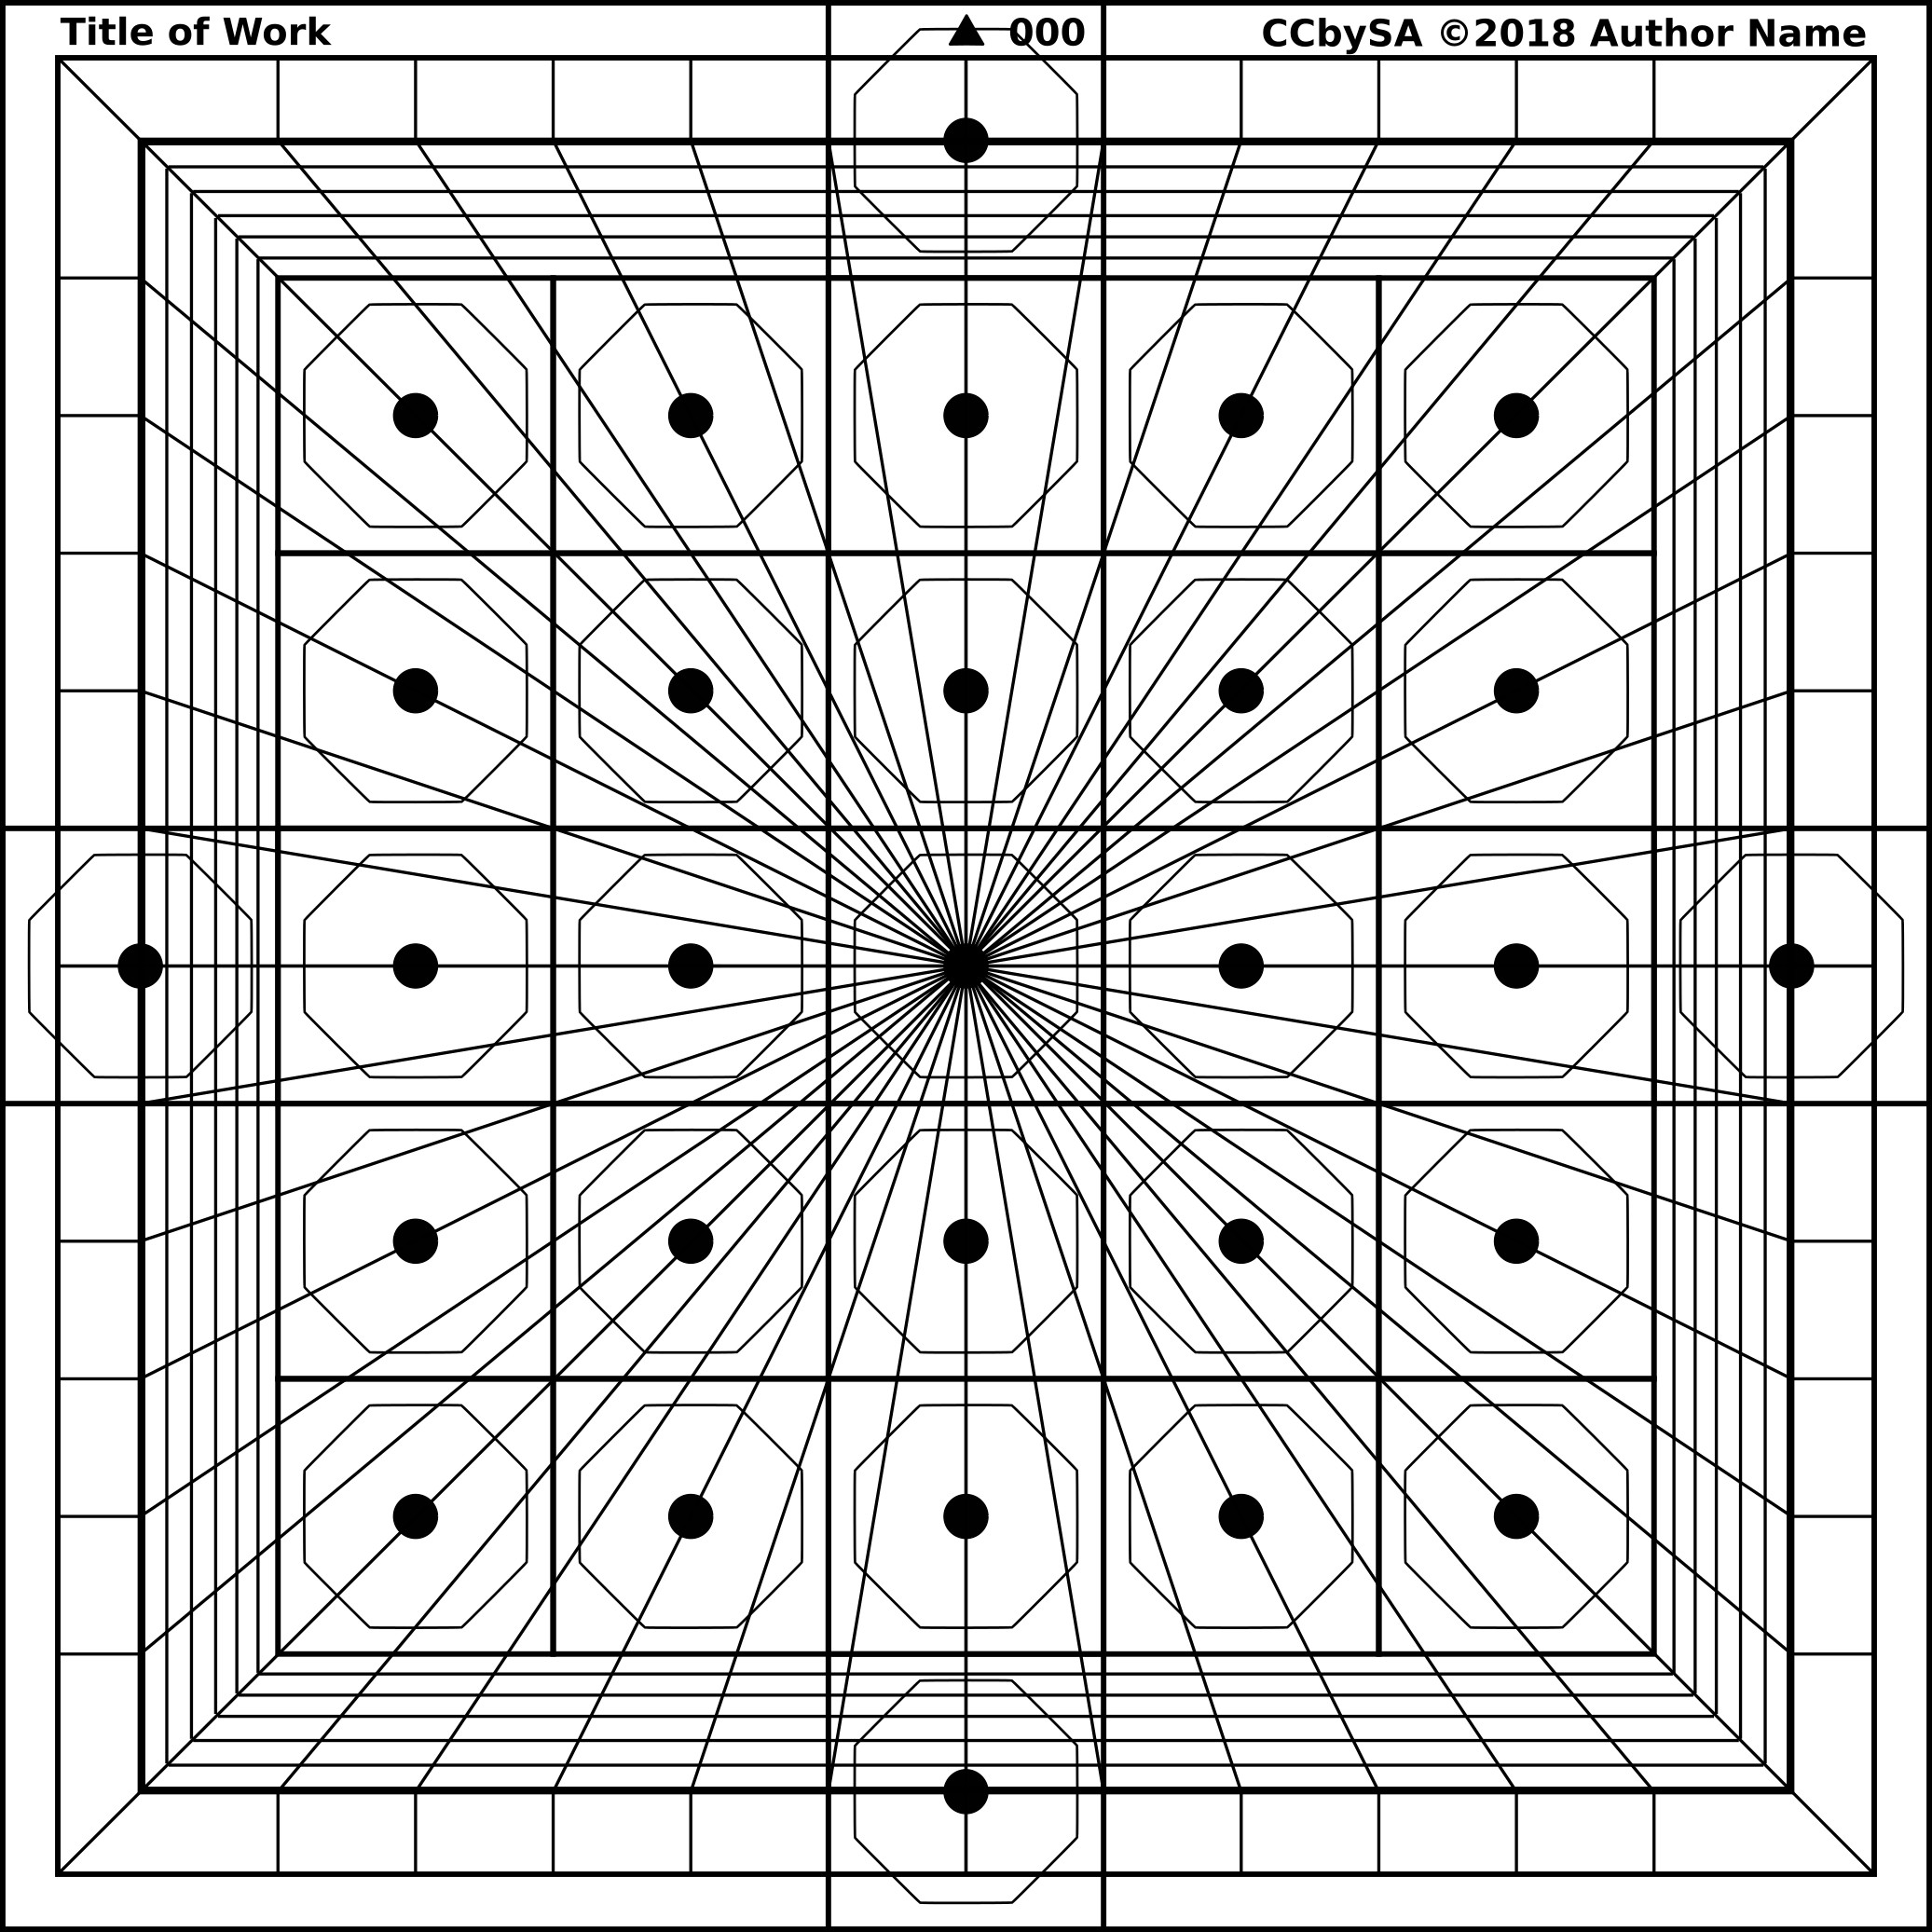
e. 000 is the base 5 x 5 tile designed to create the Root Join Types:X, T, L, P, and C. This layer is transparent. This layer is currently visible. |
|
f. Background white. The background is visible in all other layers. |
|
g. Visibility toggle, clicking on this icon turns the visibility of the layer on or off, for example “f” is visible |
|
h. Lock, clicking on this icon toggles the lock on or off. A layer that is locked cannot be edited. |
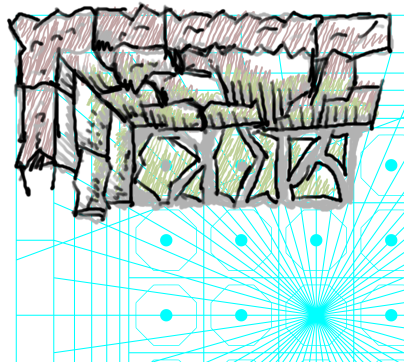
A drawing tutorial on layer “a” is beyond the scope of this immediate article but the following illustrations provide an example of the intended usage. Here is an example of a test drawing.When a drawing is completed the template layer is hidden and the currently visible layers are then exported to JPG or PNG formats.
|
|
|
Example of a test drawing over a template |
|
|
|
Example of an exported test drawing |
The following illustrations show the form of the templates on each layer.
|
000,Base 5 x 5 Tile |
“Q000”Quarter of Large Format Tile 6 x 6 |
|
|
|
|
“R000”Edge Leaf Tile 6 x 6 |
“S000”Block Leaf Tile 7 x 7 |
|
|
|
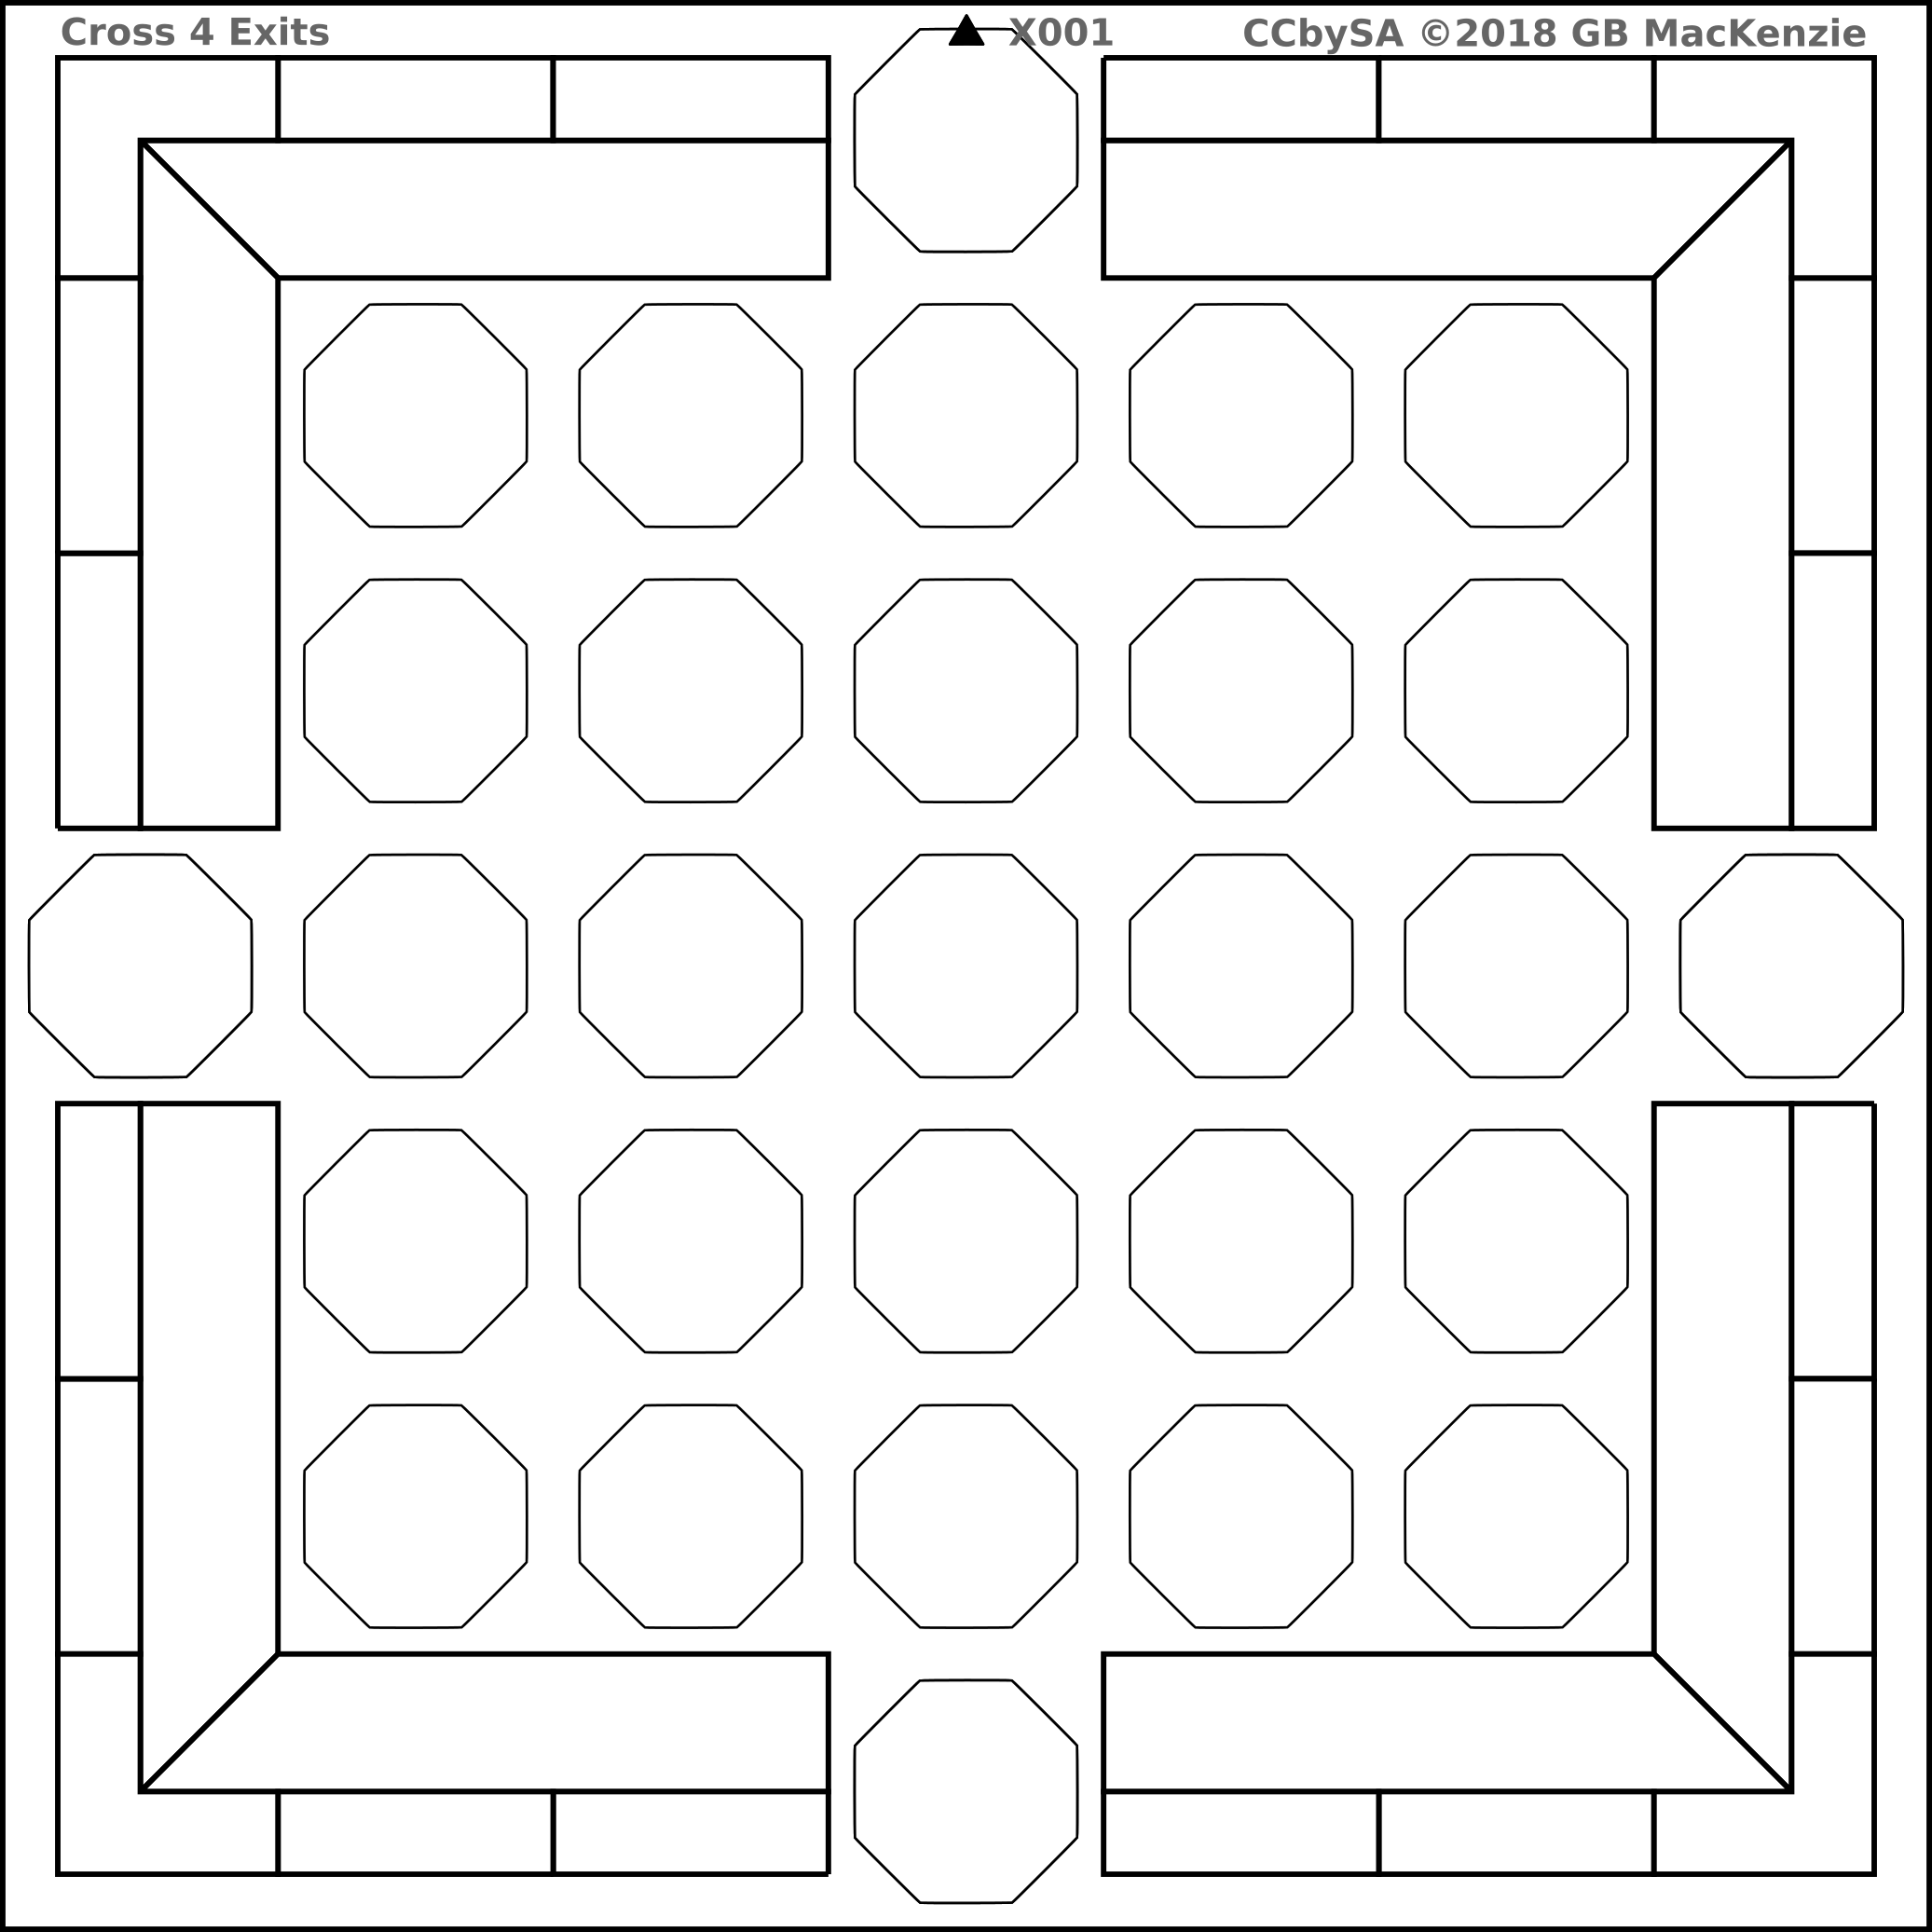
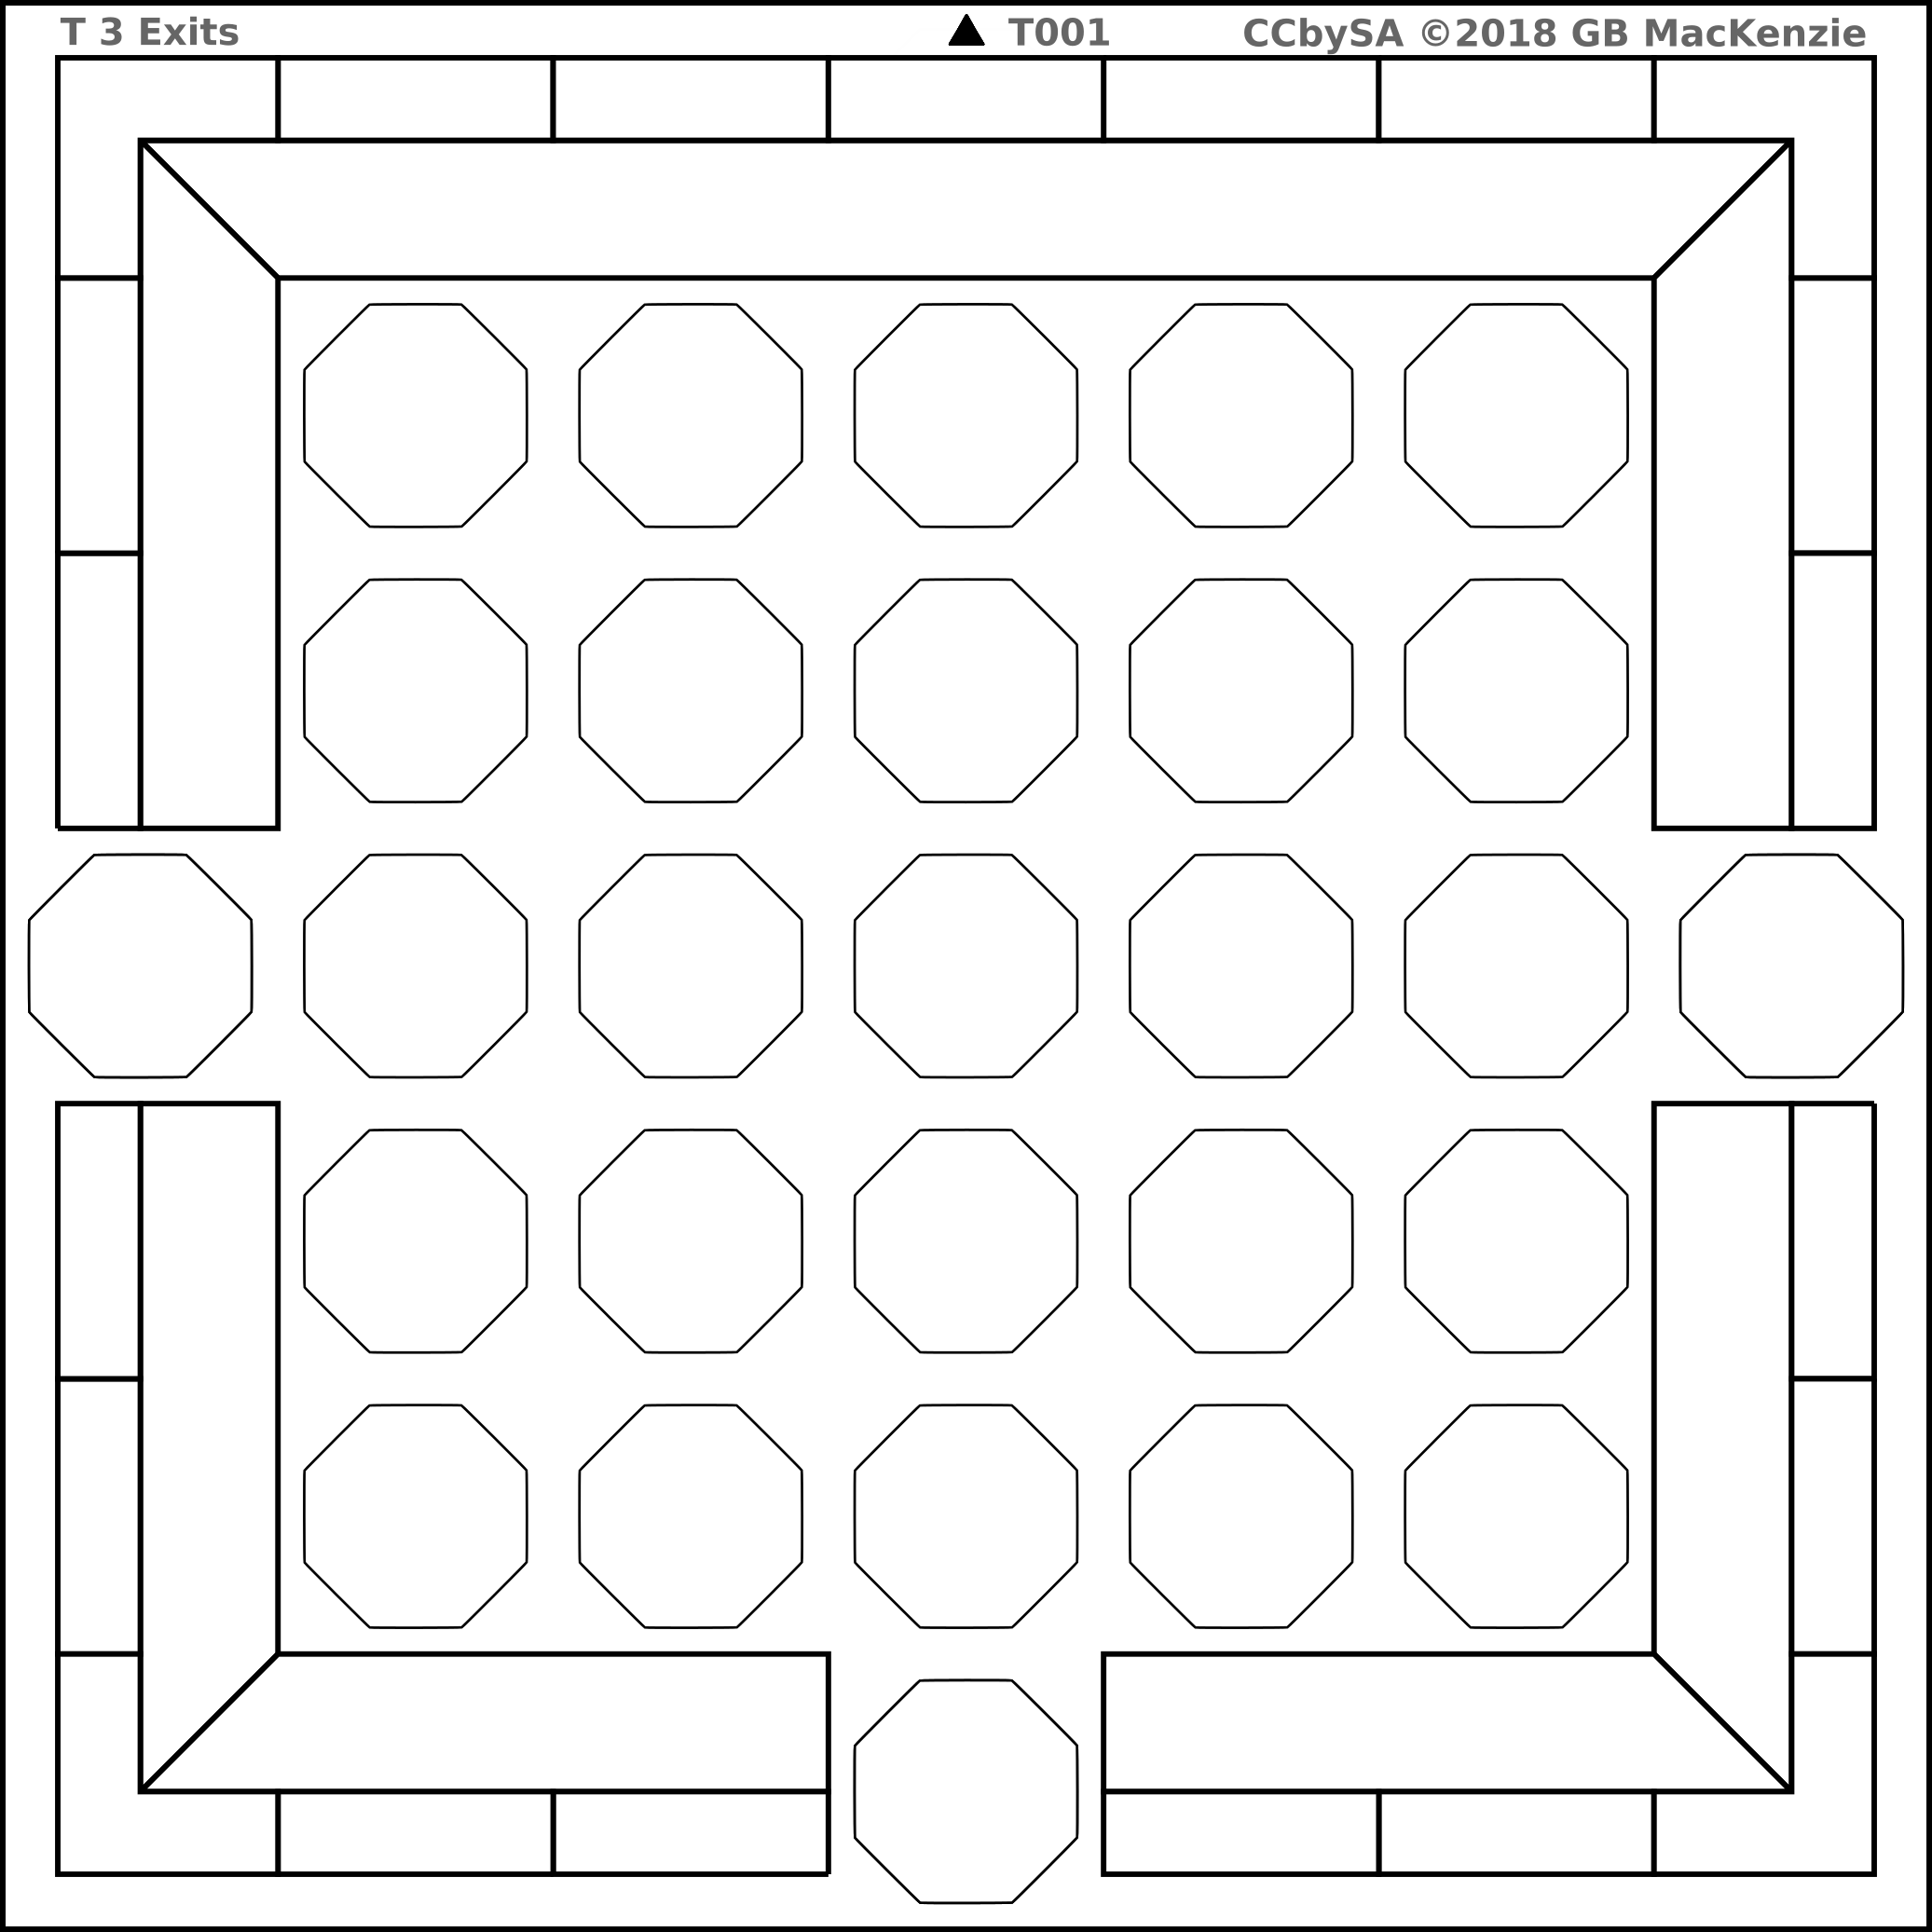
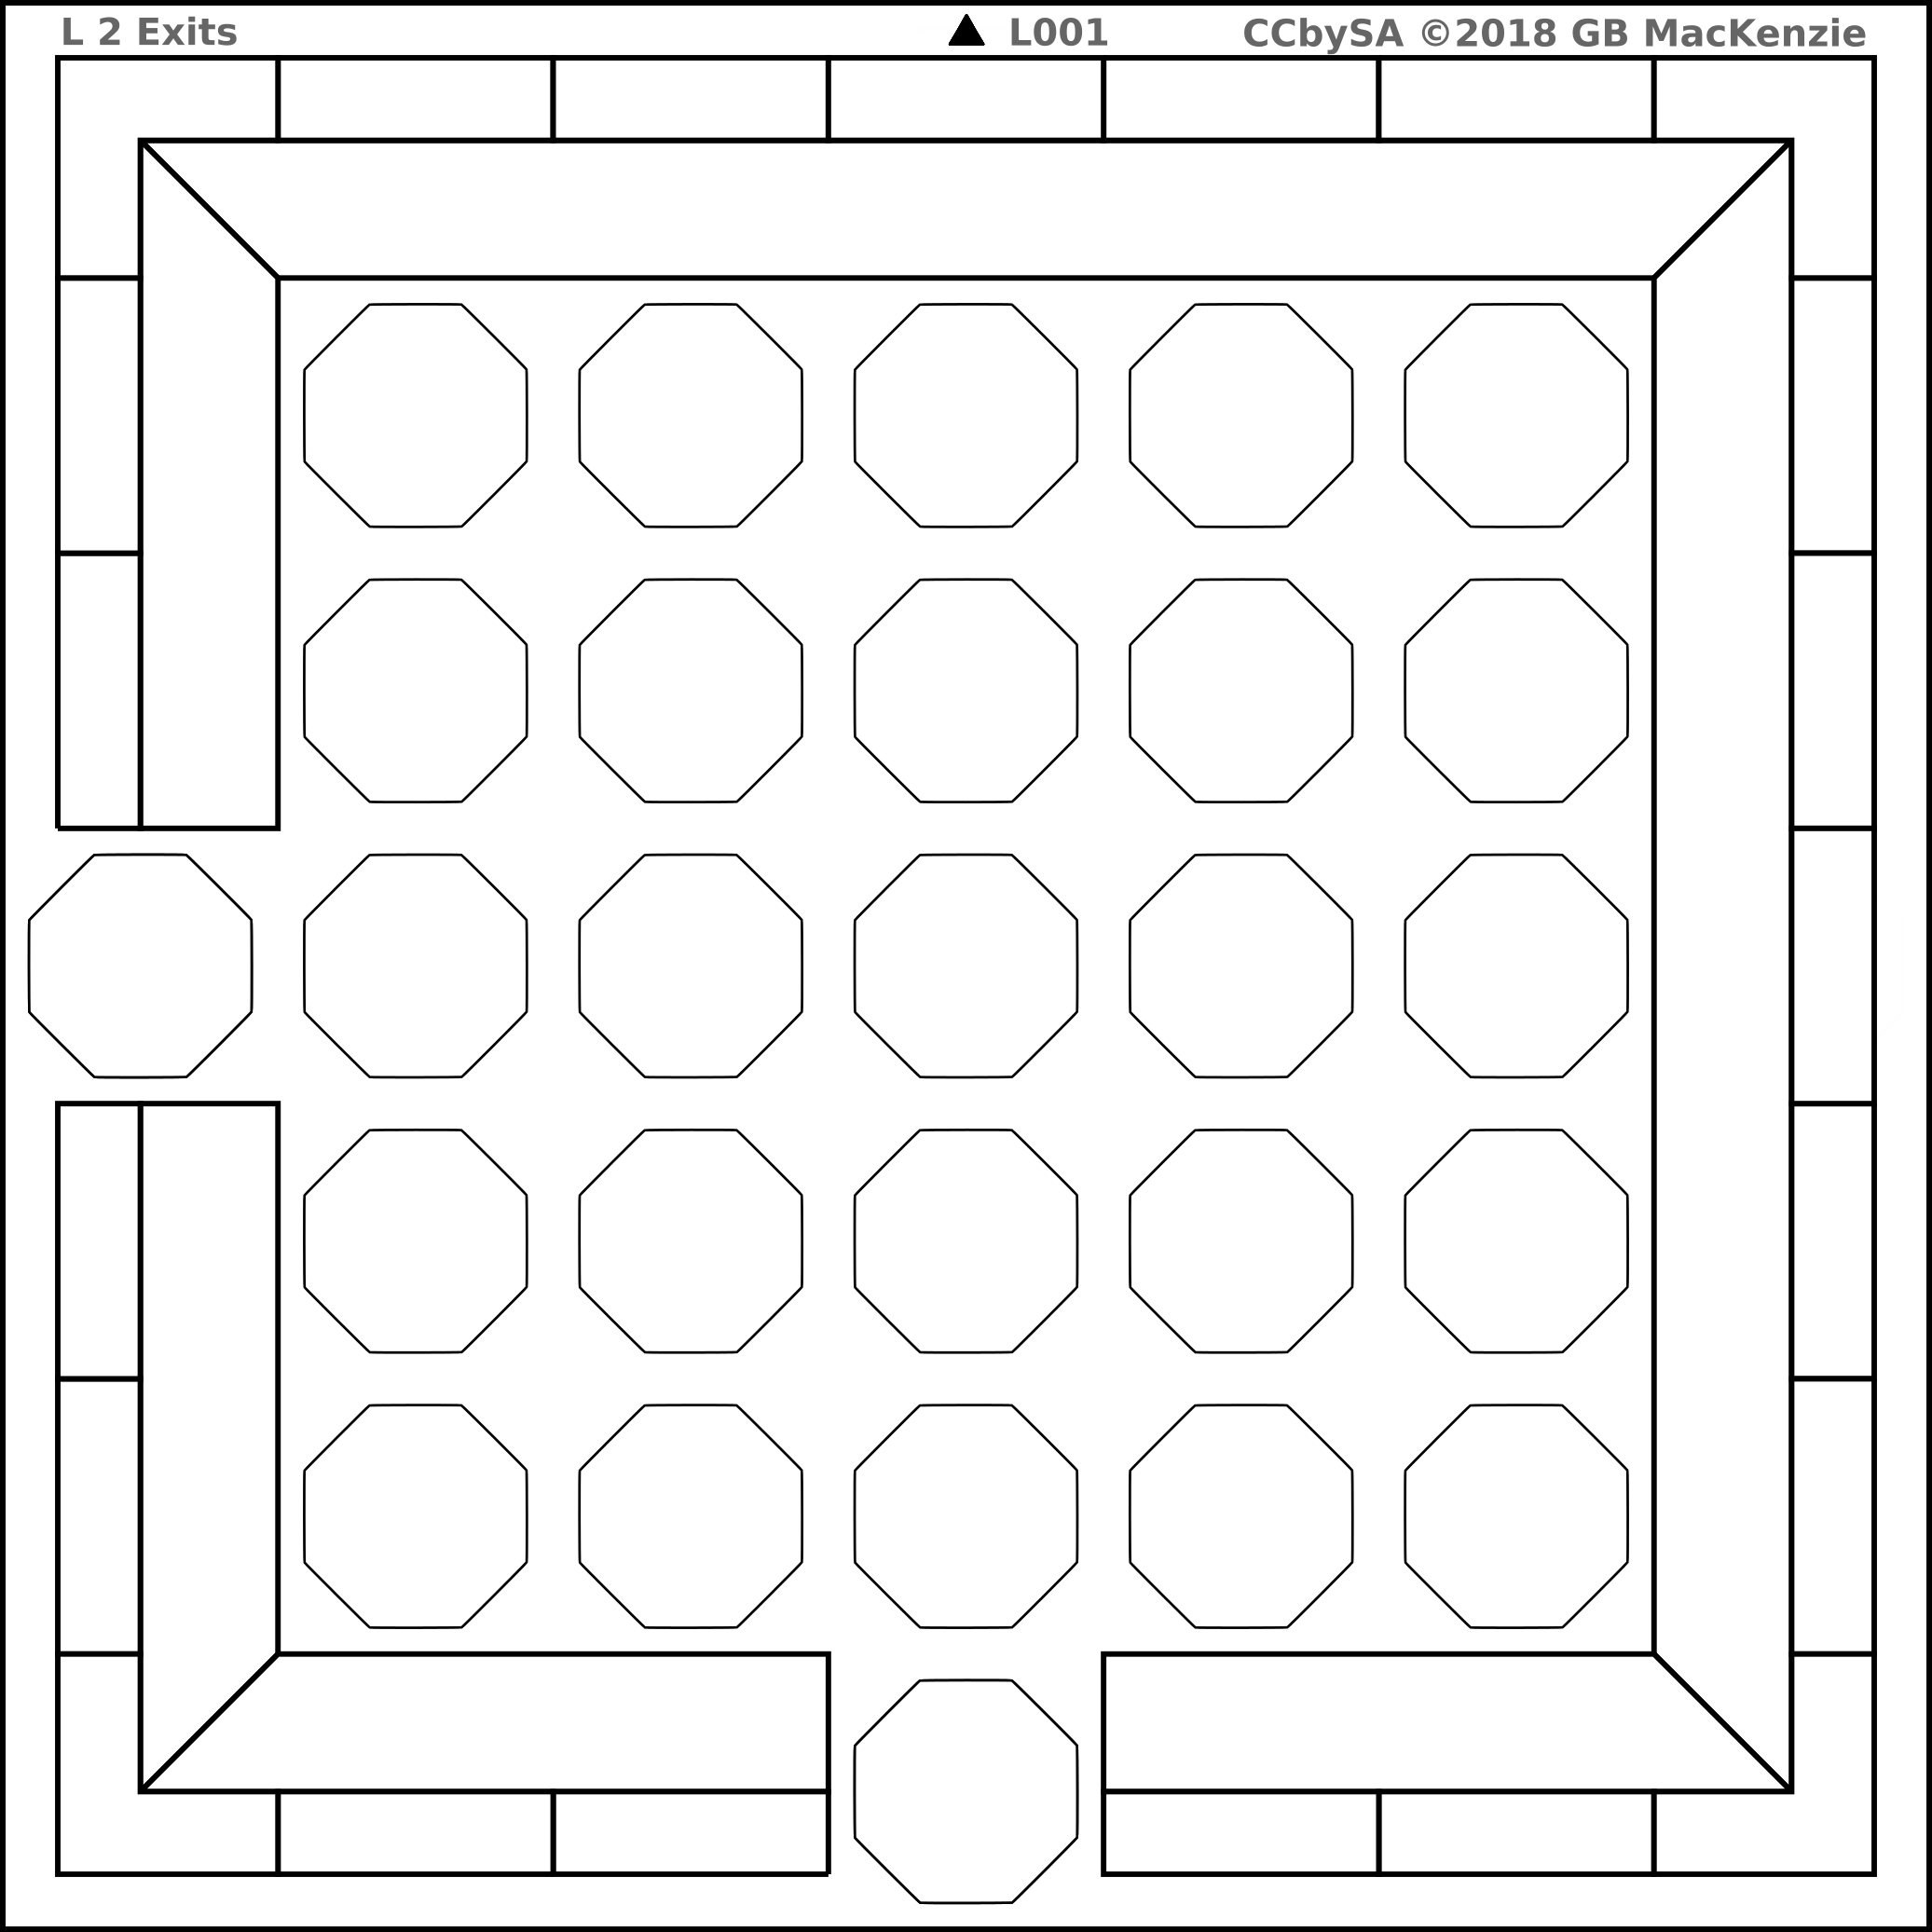
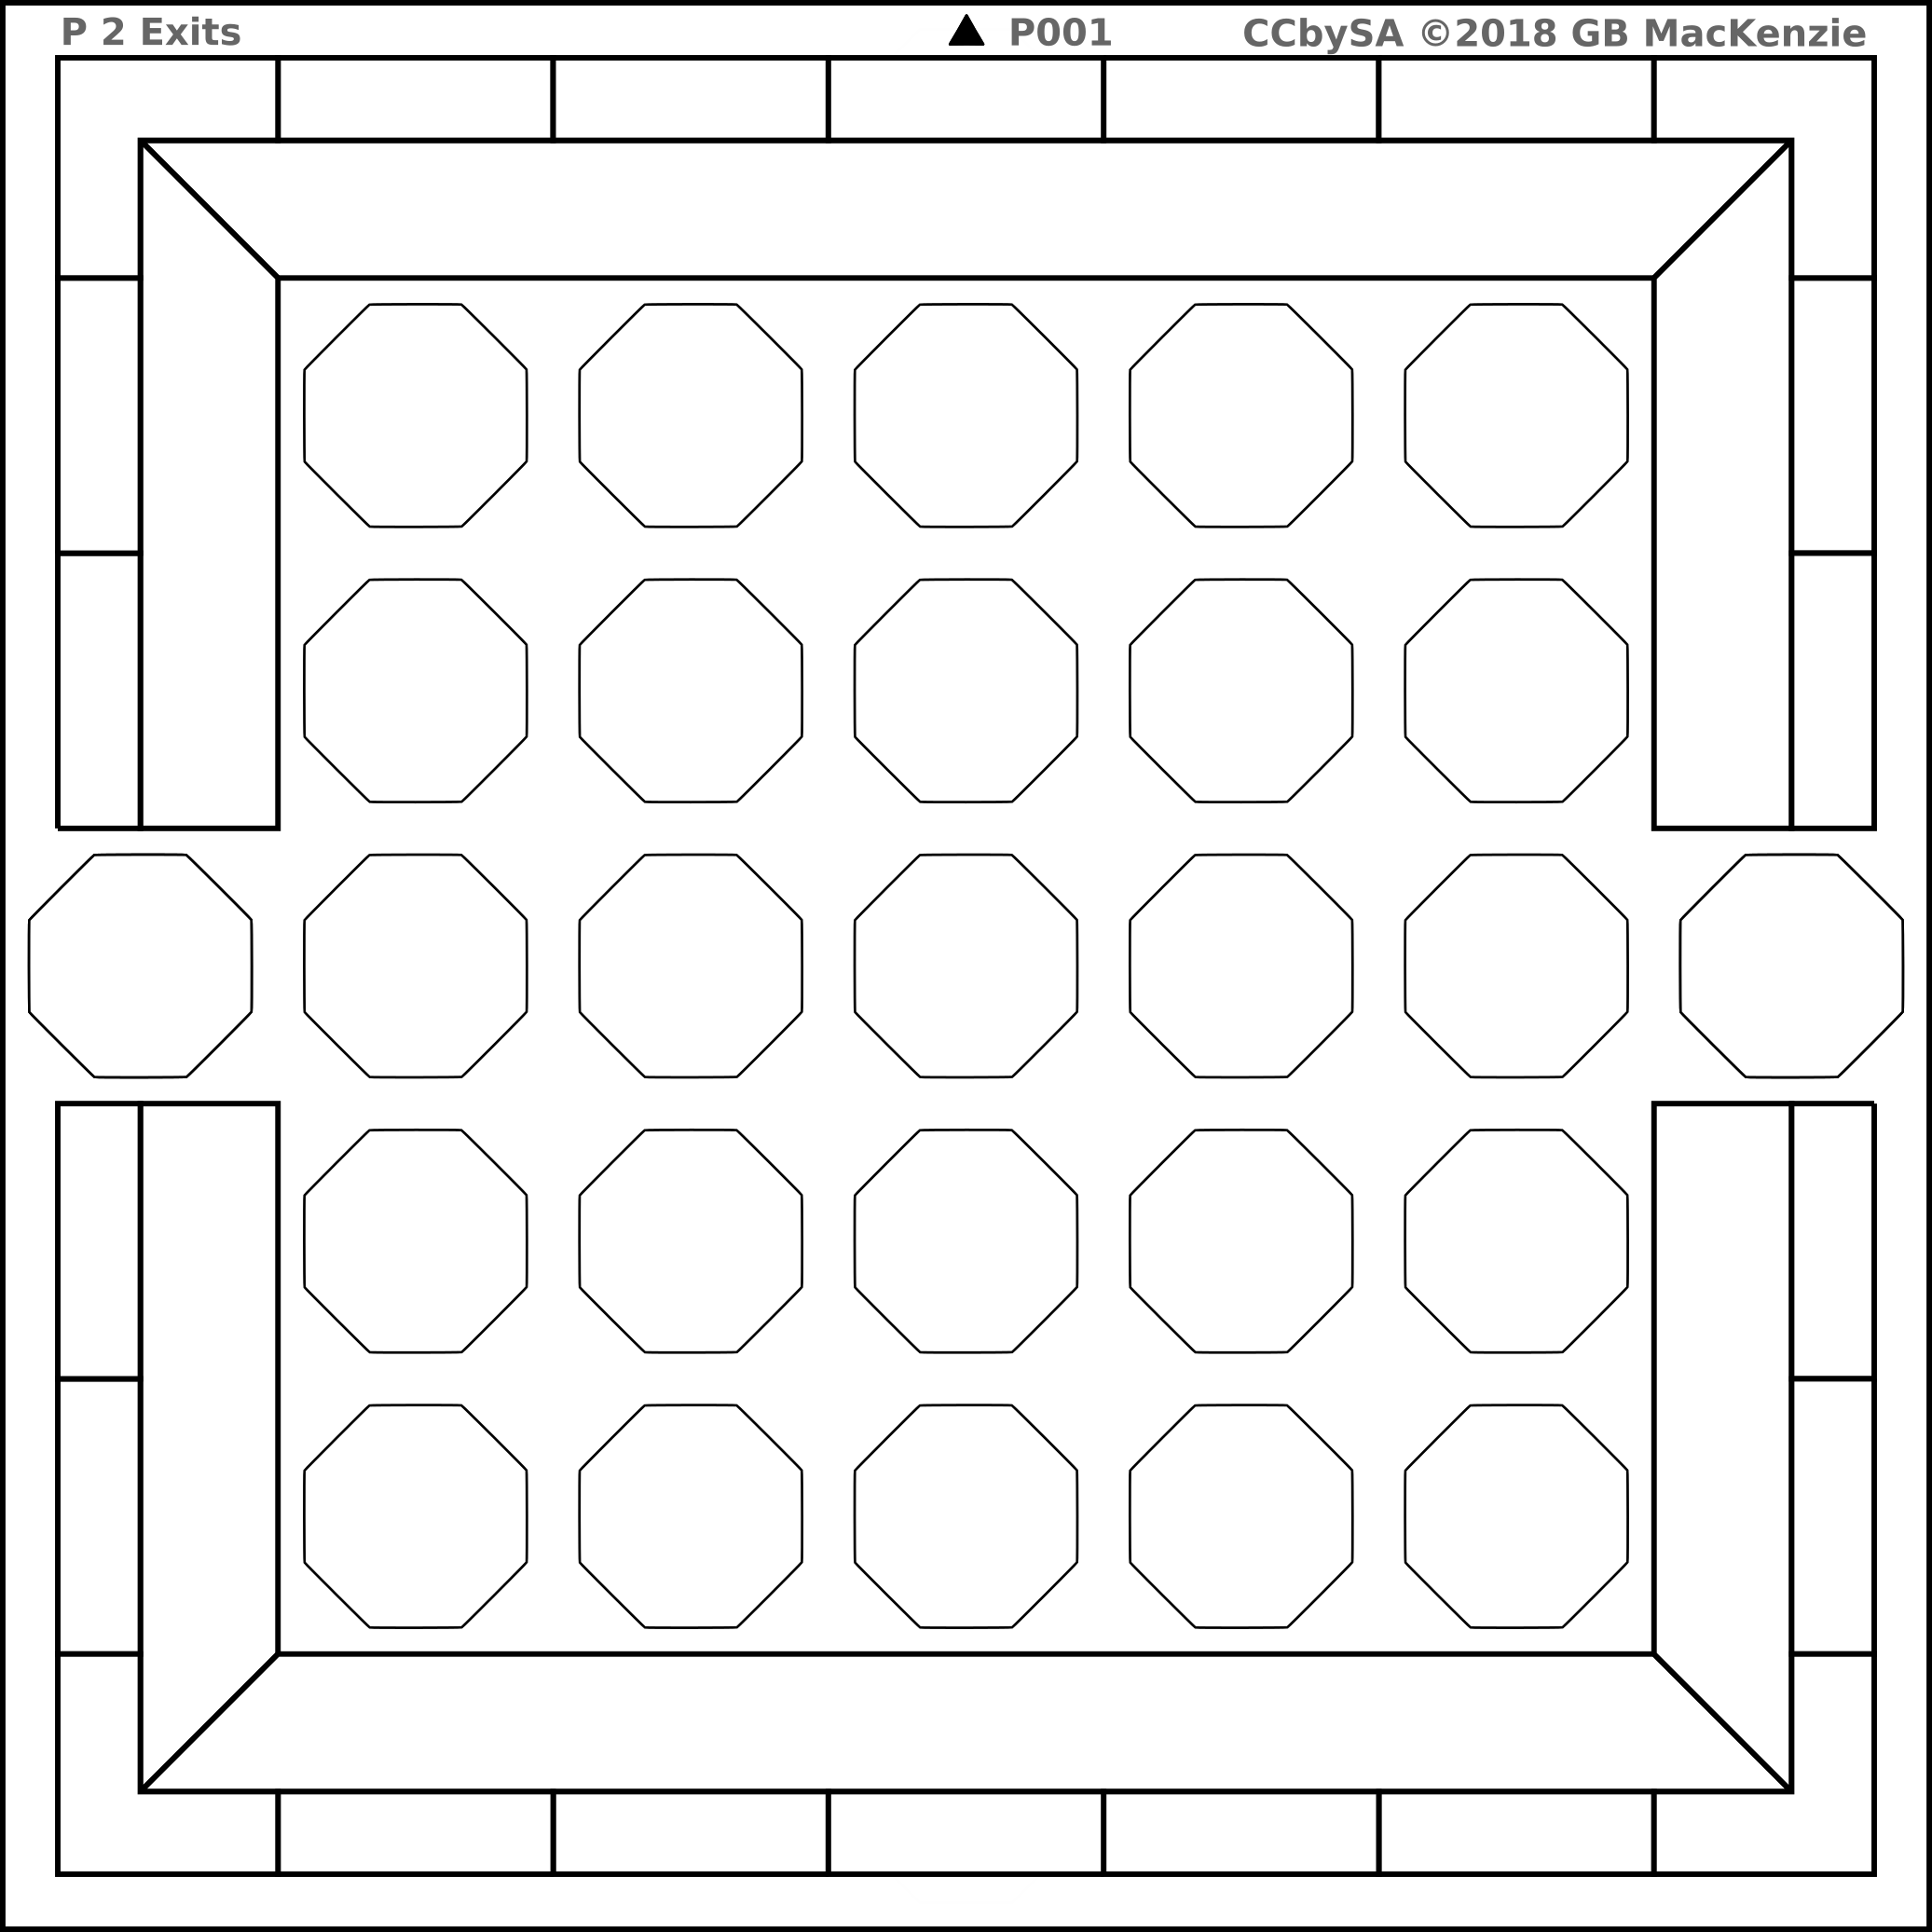
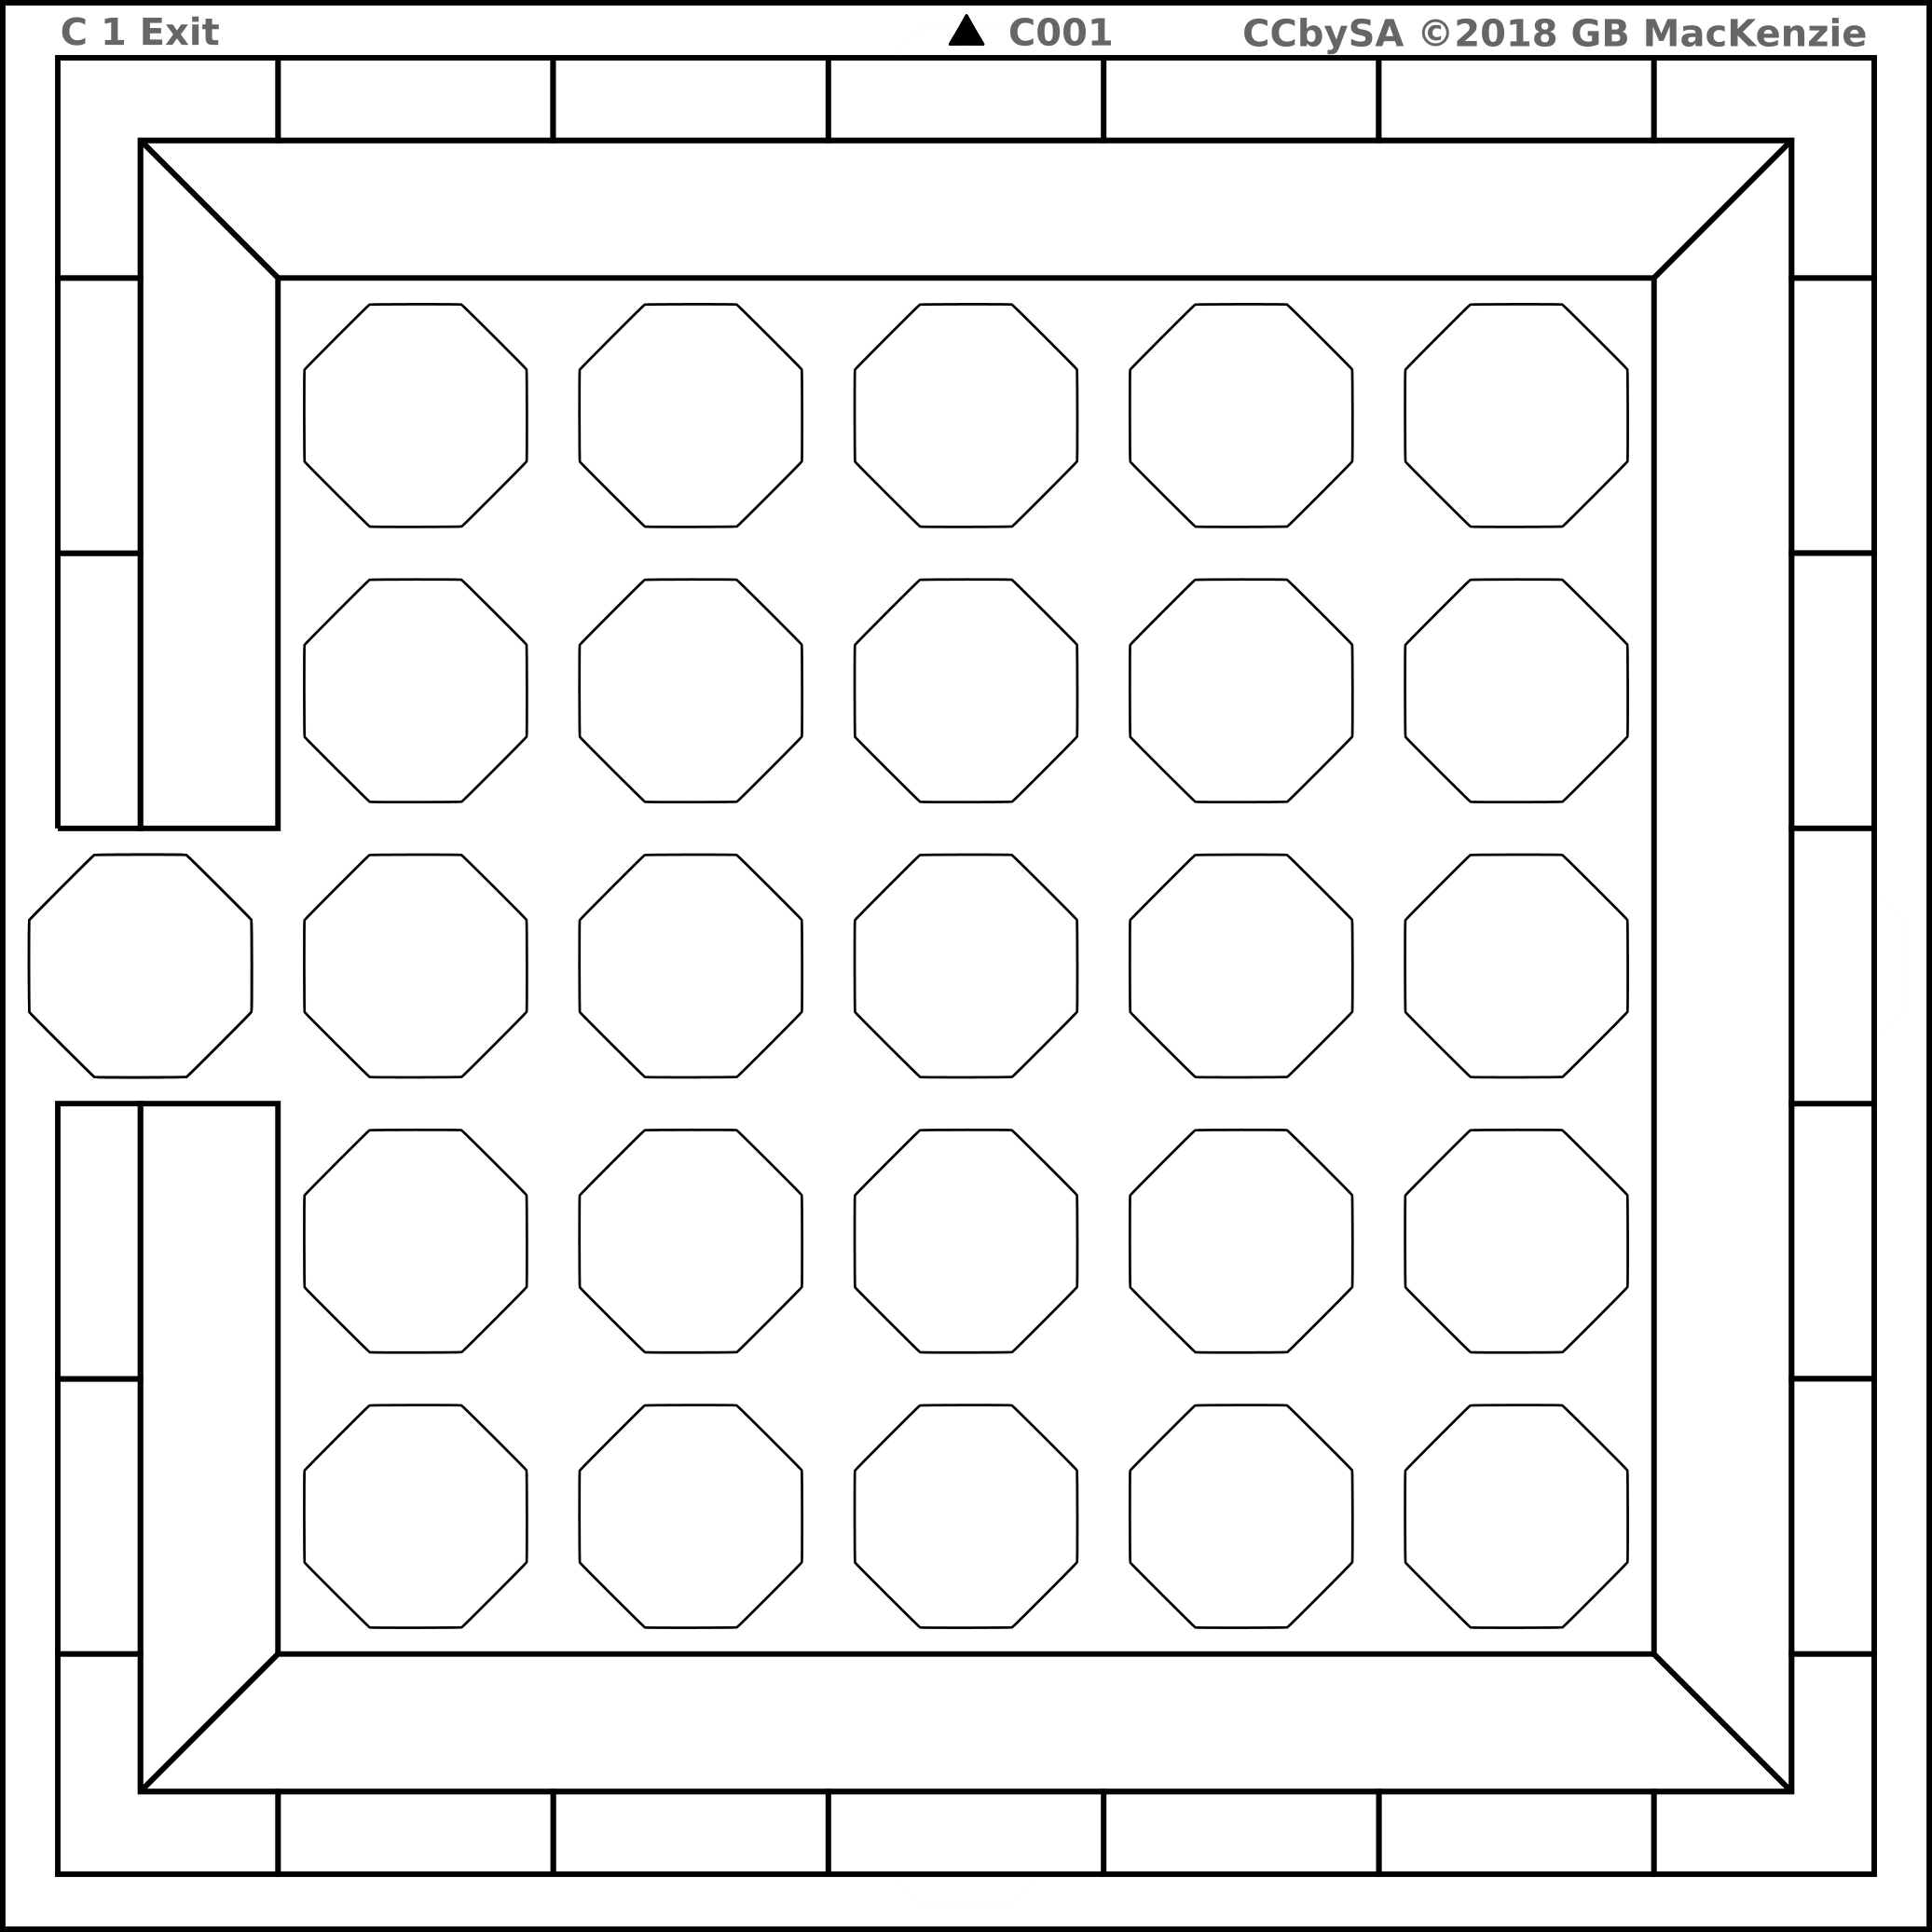
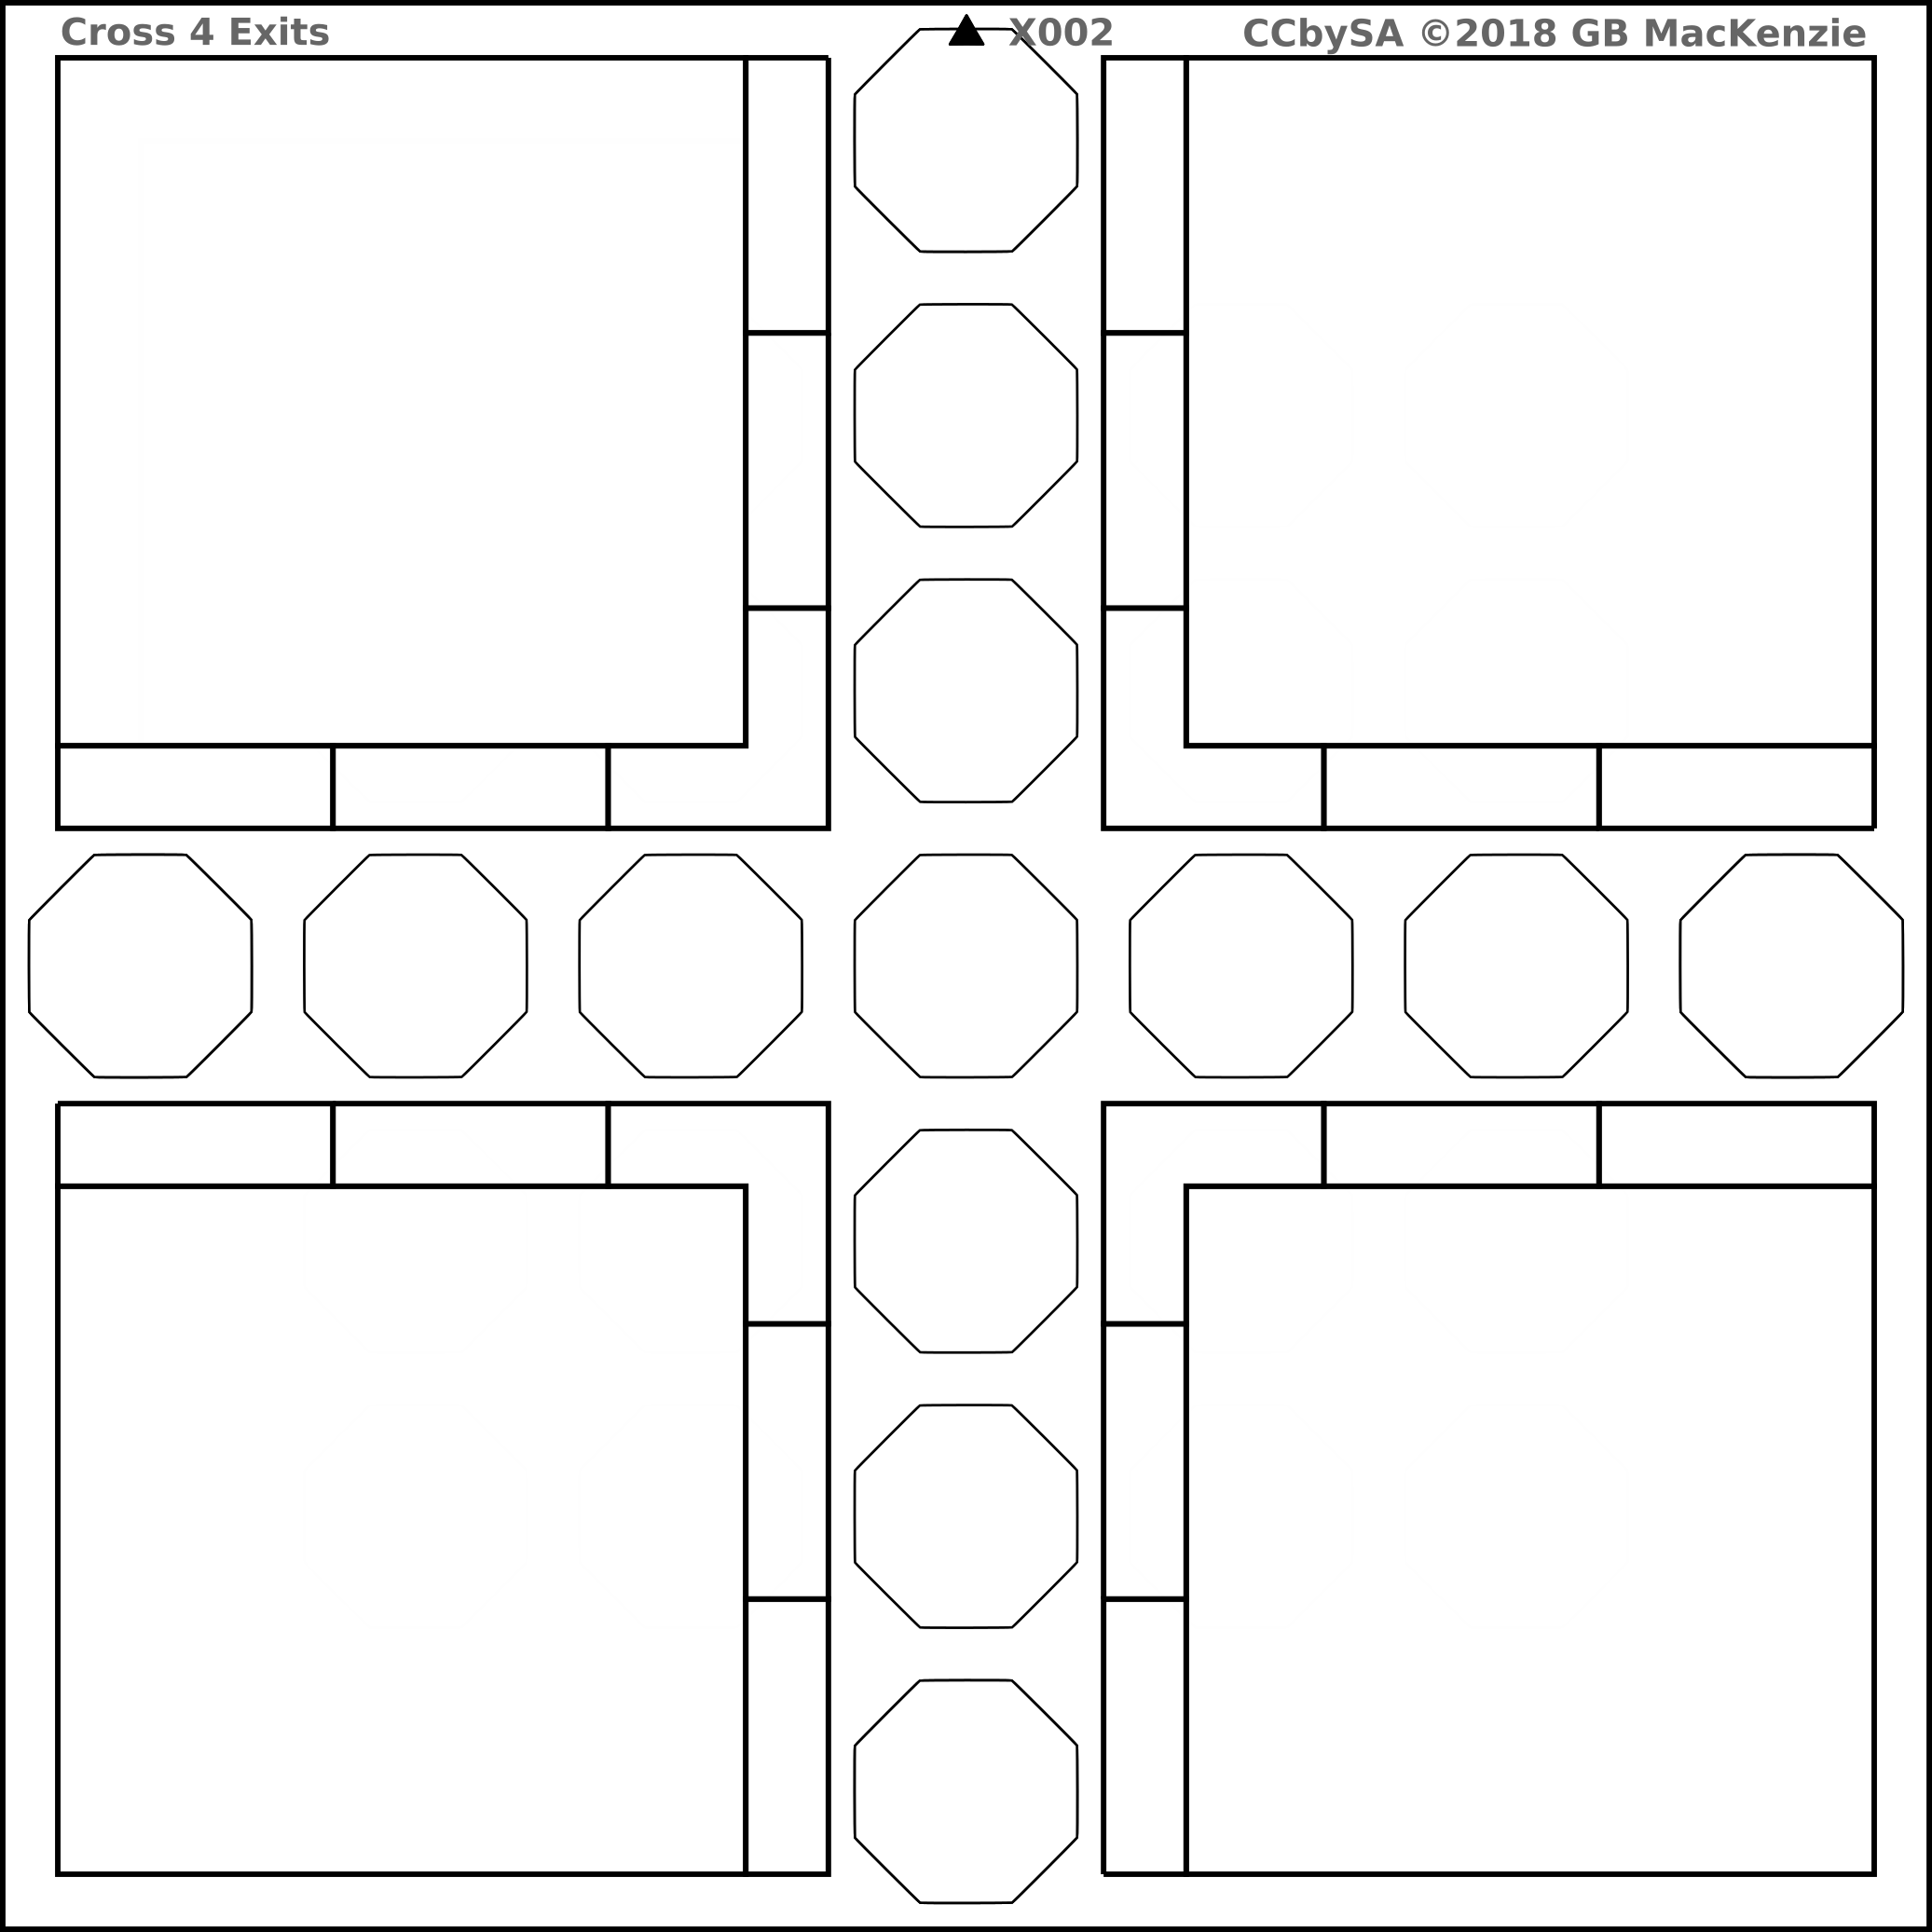
It is intended that template 000 provides the framework upon which the Root Join Types; X, T, L, P, and C, will be drawn. Within a tile it must be noted that part or all of the tiles area may be used, the main thing is that each of the types requires a fixed number of exits. These may be concealed or visible. Bear in mind that no matter how much or how little of the interior of a tile is used to illustrate a root join type the entire physical square of the tile is always used. The following are illustrations of the root join types,they happen to use all the available area within the tile but they are not the only possible examples of the use of such area:
|
X001, a Cross, 4 exits |
T001, a T, three exits |
|
|
|
|
L001, an L, 2 exits |
P001, a Passage, 2 Exits |
|
|
|
|
C001, a Cul-de-sac, 1 exit |
|
|
|
|
The following is an illustration of an X type that does not use all of the interior area:
|
|
|
Example of type X002, depicting a more limited use of the area within the tile |
Root Join Types and Identification Guidelines
There are a few considerations before beginning work on a set of tiles:They will have a standard id number composed of a letter indicating their root join type, a three digit id number – 001-999, and a single letter N, S, W, E,indicating orientation.The root join types indicate the number of entrances/exits present.
- X000, CROSS, 4 Exits
- T000, T, 3 Exits
- L000, L, 2 Exits
- P000, PASSAGE, 2 Exits
- C000, CUL DE SAC or DEAD END, 1 Entrance/Exit
- Q000, Large Format Group Base Tile, 2 Exits
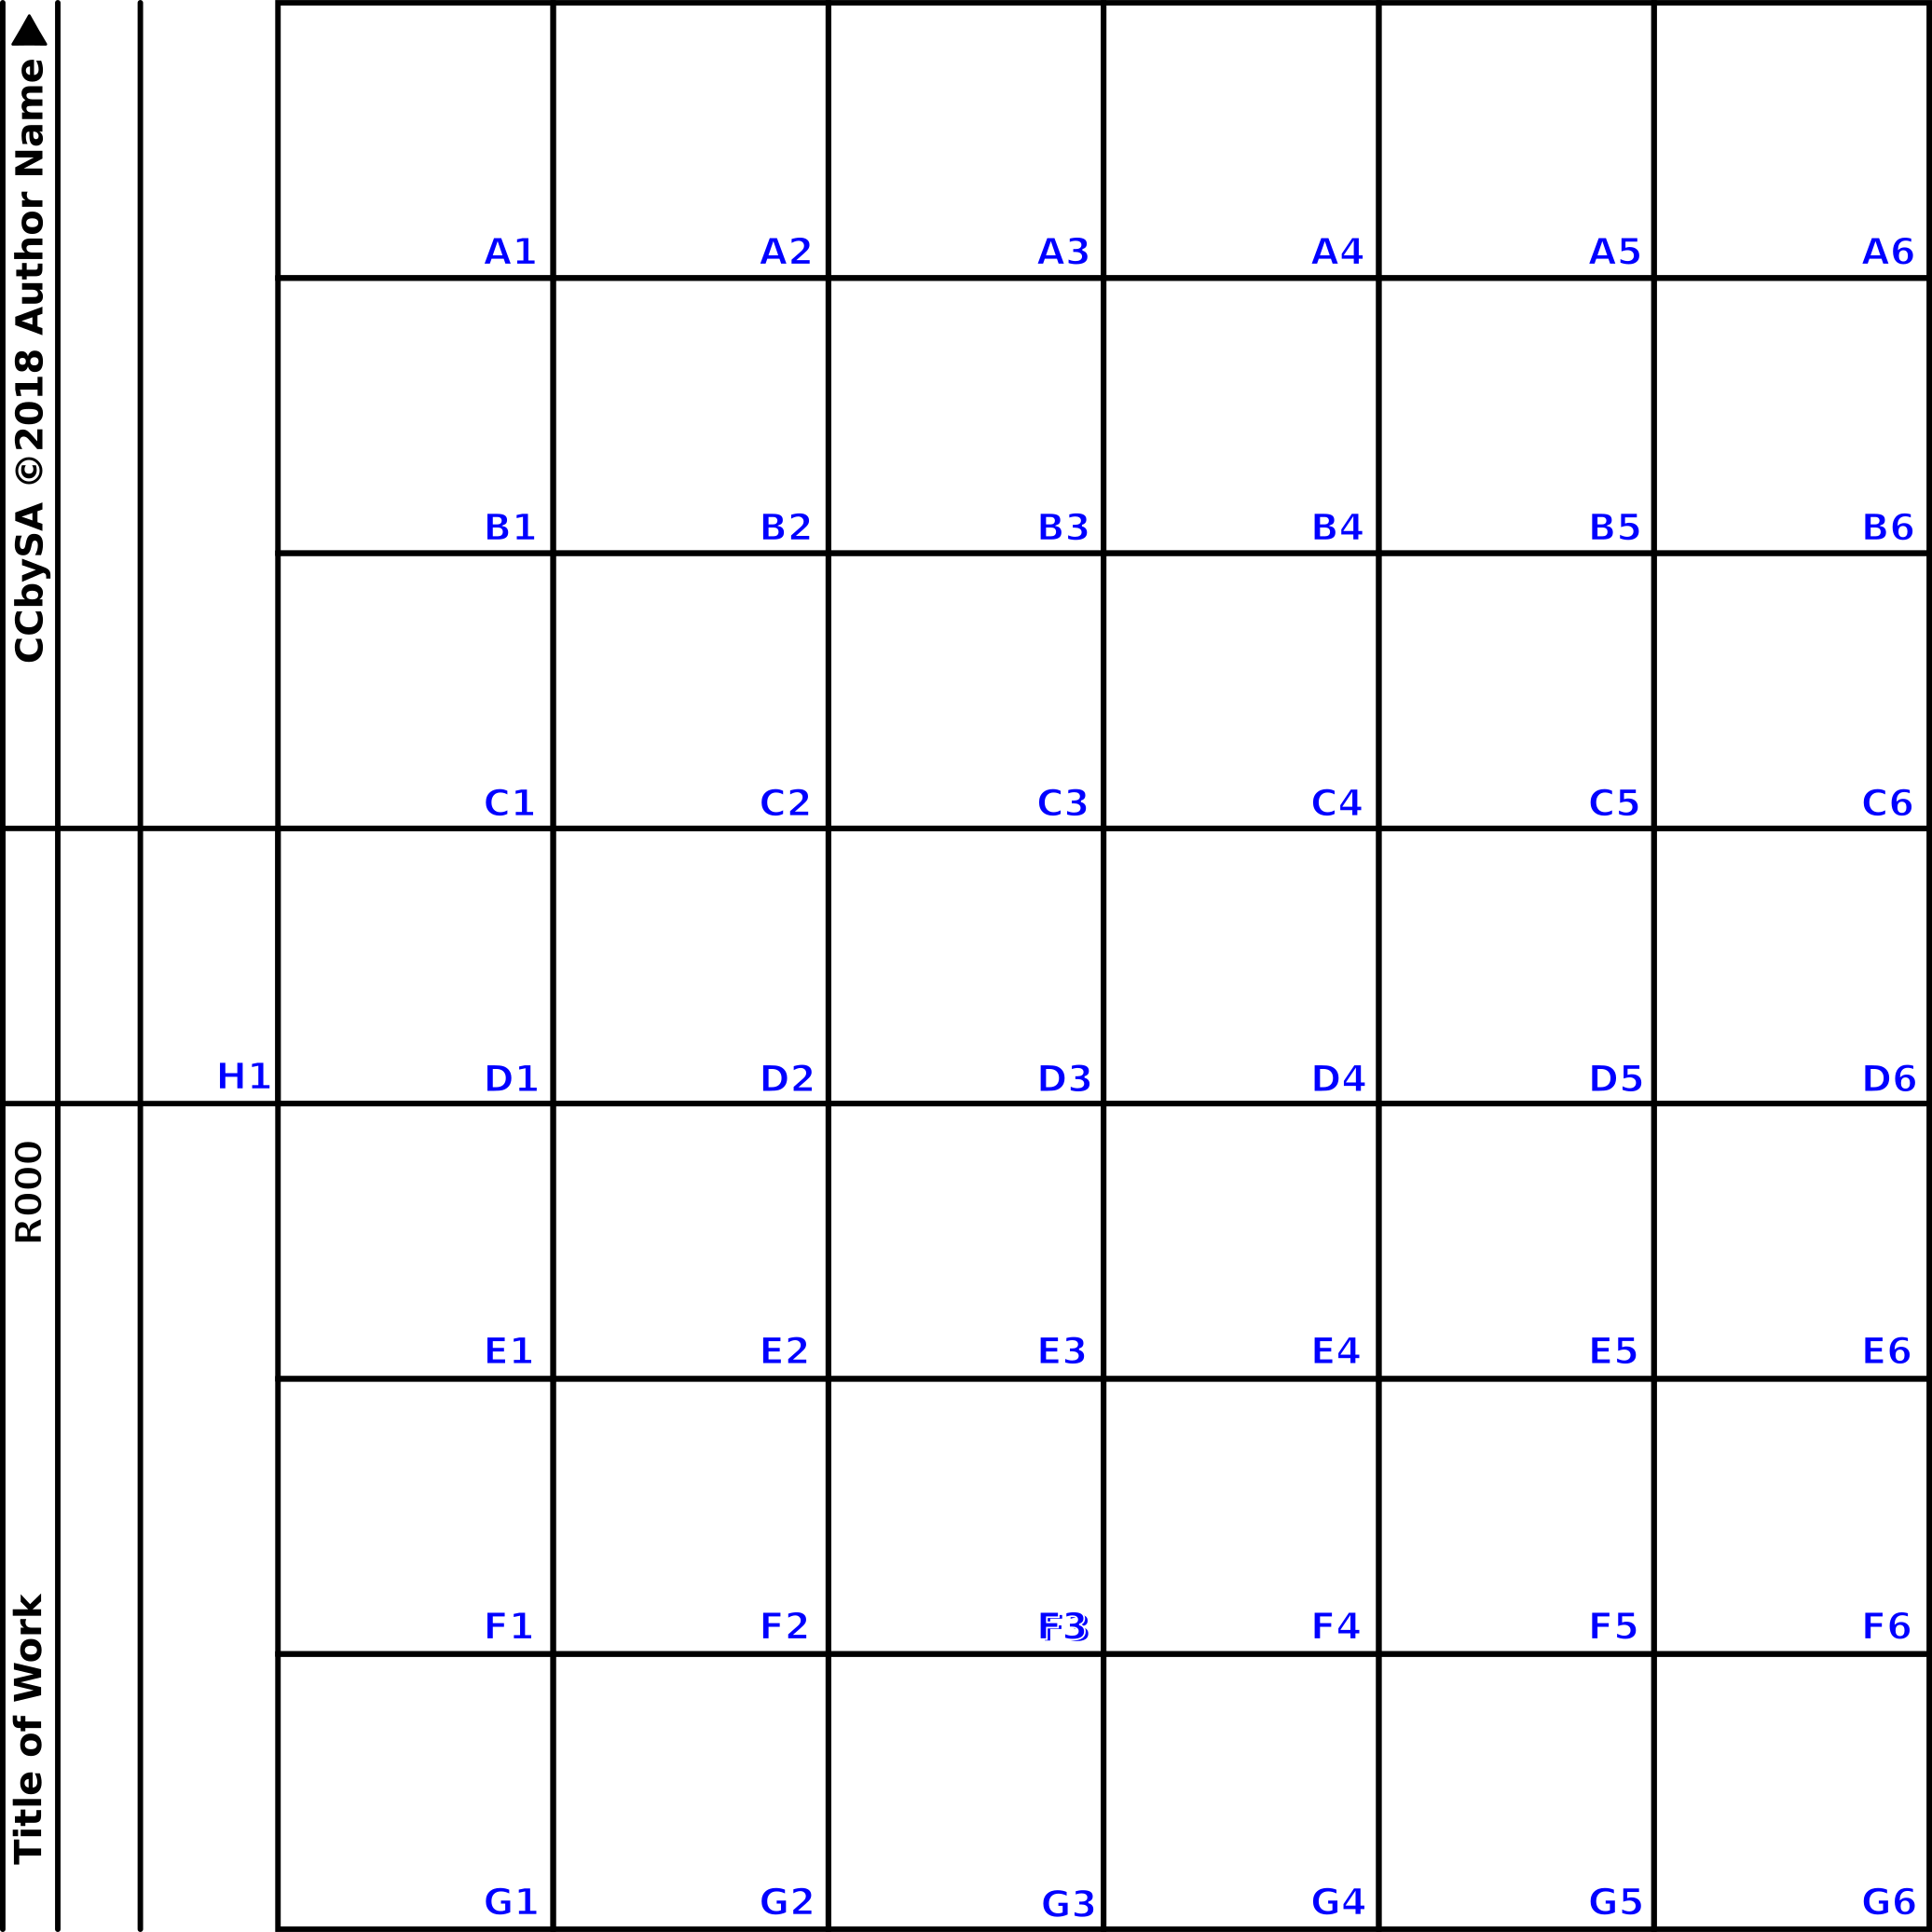
- R000, Leaf for the Large Format Group Base Tile, 1 Exit
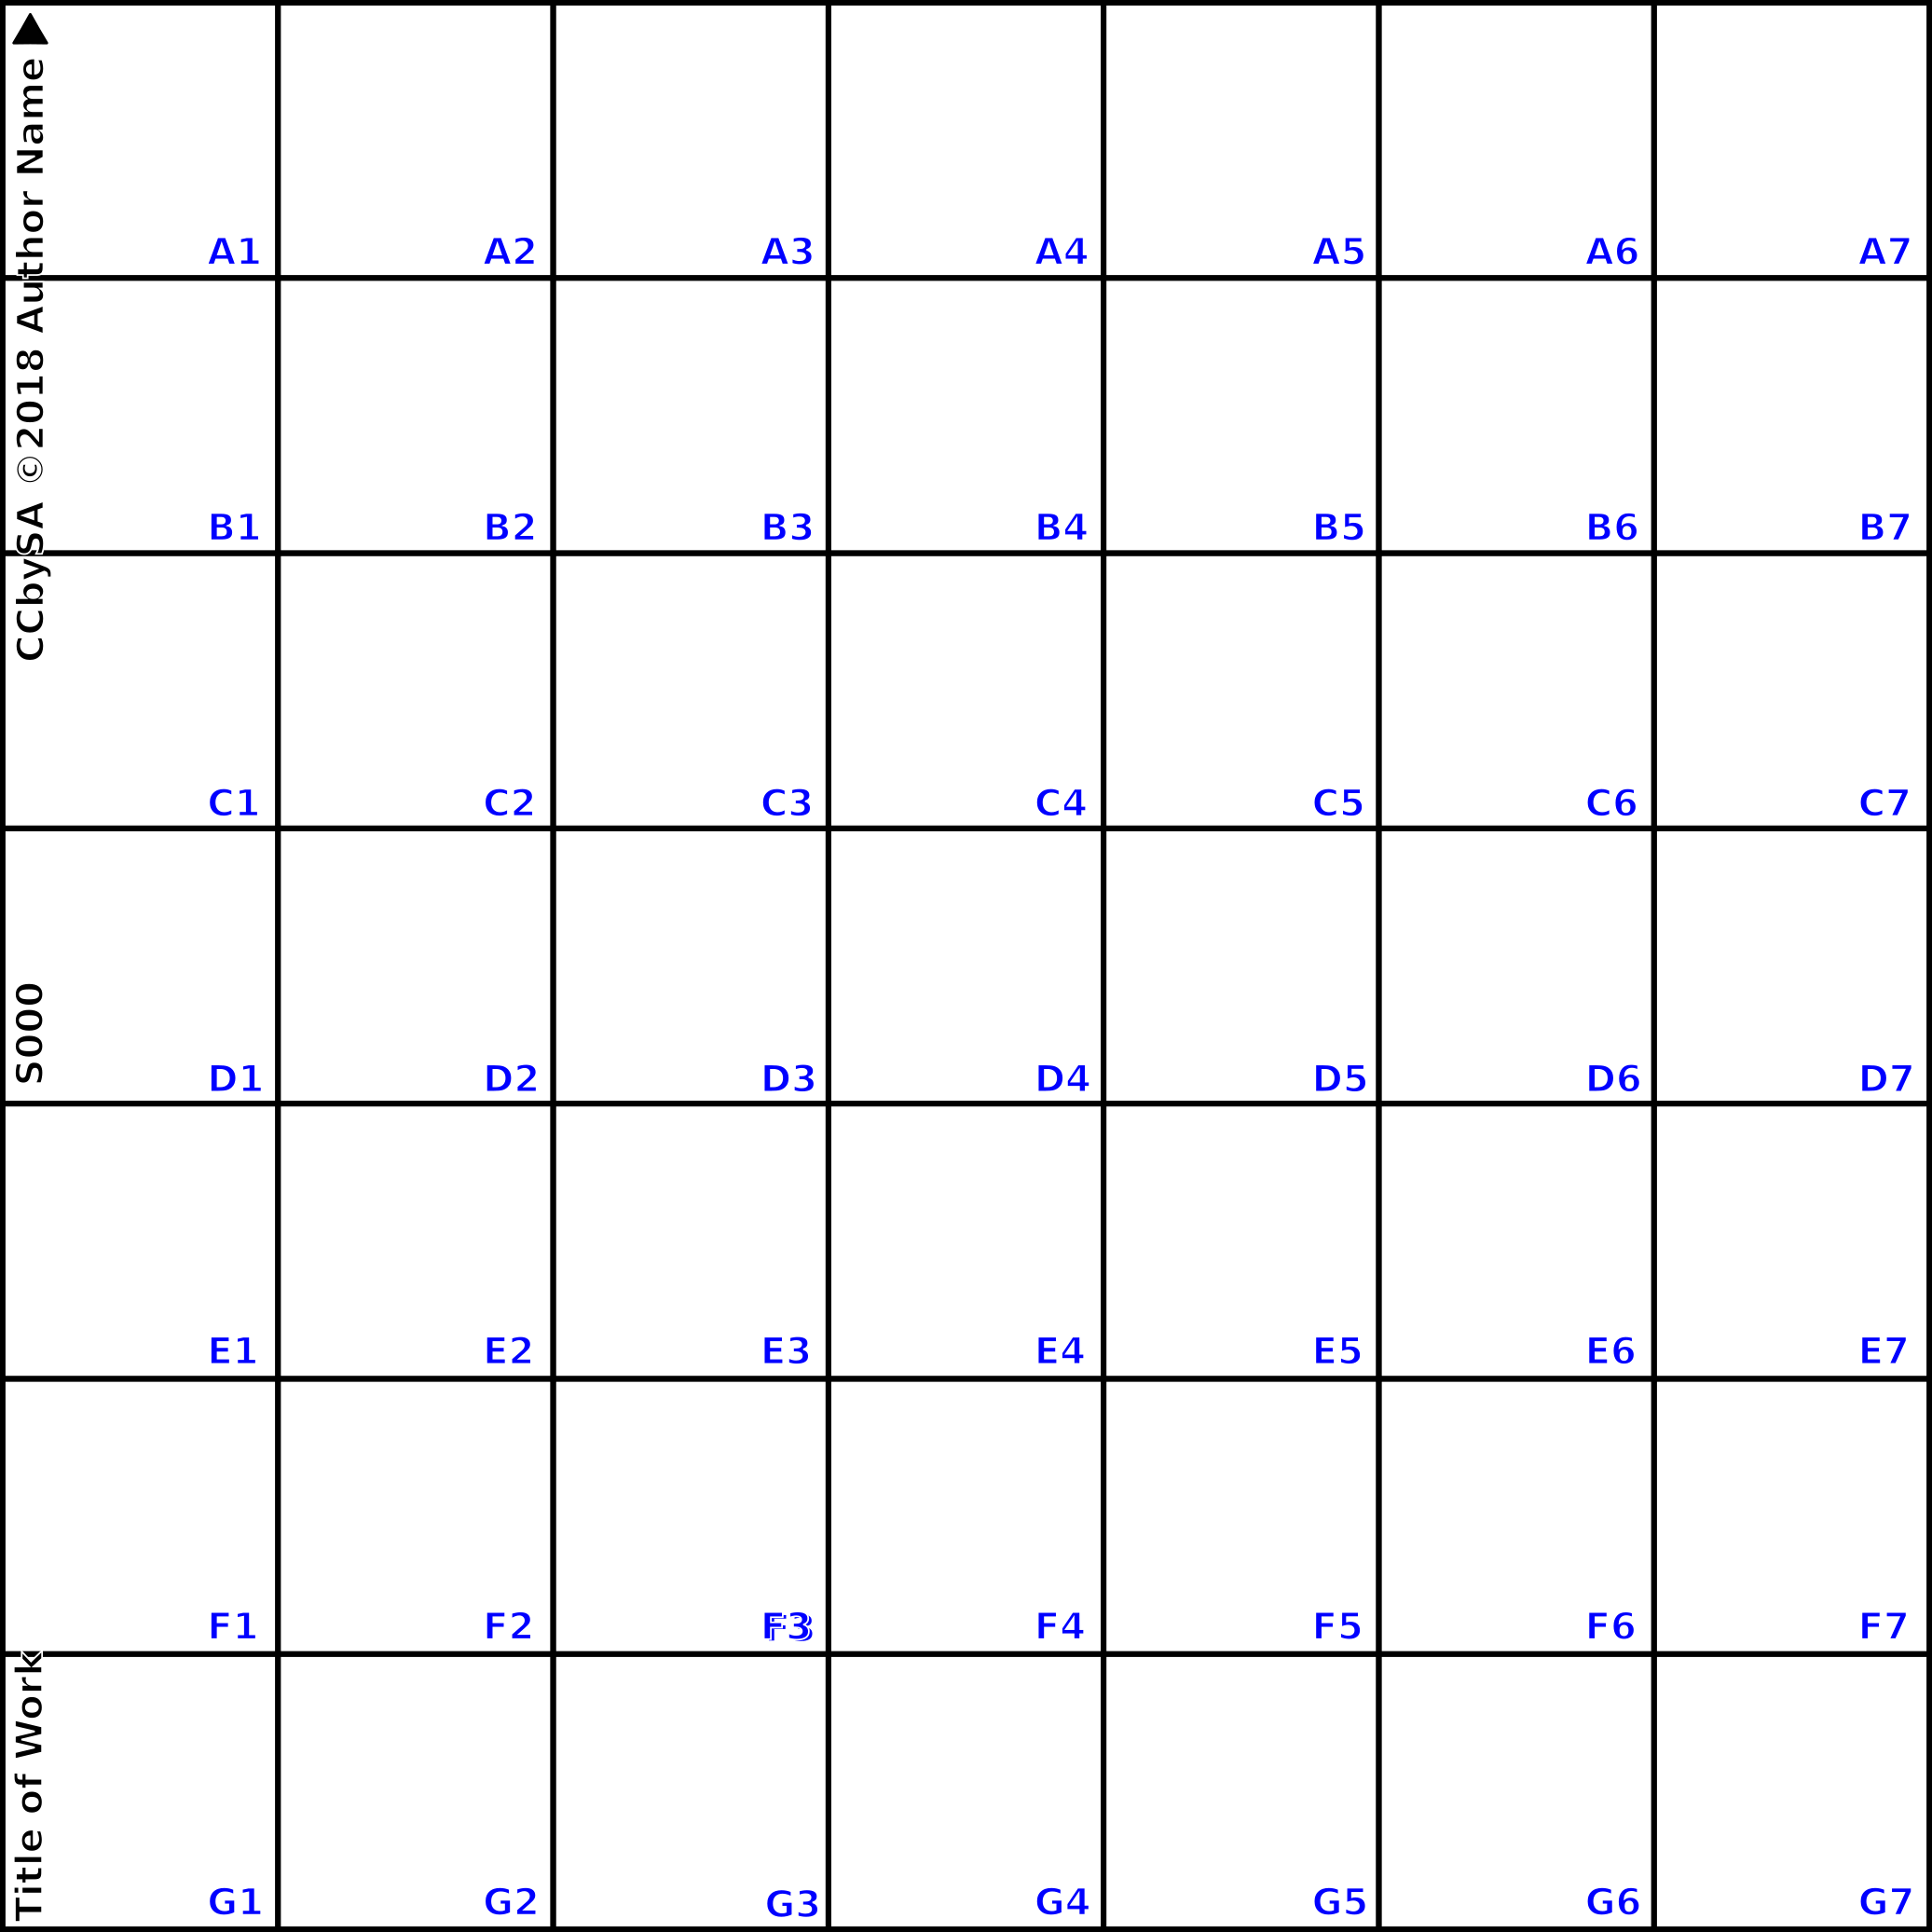
- S000, Square for the Large Format Group Base Tile, no Exits are used.
Note – The join type, as a base,enables any other matching join type to be substituted, in the even tone does not have a specific tile.
A tile’s default orientation is indicated by a triangle at the top of the tile border. A notation for orientation allows a tiles rotation to identified as required, 0º (North), 90º (West), 180º (South), 270º (West). Tile notations indicate orientation for example X001W:
- X – means the tile’s root join type is a cross,
- The tile’s number is 001,
- W – means that the triangle at the top of the tile is to be rotated such that it orients West.
Layout Table – to describe a layout, the tiles are arranged in a grid of notations. A blank spot in the grid is indicated by the word “Blank”, the letter “B”, or there is no entry.Example of using notations:
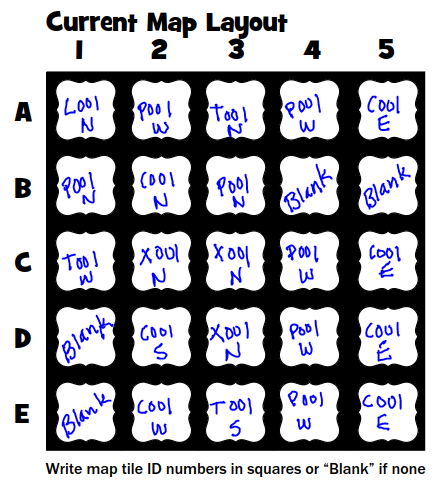
Examples of Notations in a Layout Table
Size – Tile illustrations are based on a 25mm grid with a birds eye view looking directly down.
Regulating Movement – One of three methods may be used to regulate movement, squares, truncated squares, or dots. Truncated squares may also be used to orient miniature figures.The walls and features of the tiles are drawn utilizing a perspective grid.
Metric – The metric measurement system is the default used for all measurements. The base floor square is 25mm.
License – In a spirit of open collaboration a Creative Commons license is suggested if tile creators wish to share their work. A CCbySA license attribution may be positioned within the border area. A creator can include their name or other information outside the tile’s border in 12 point type.
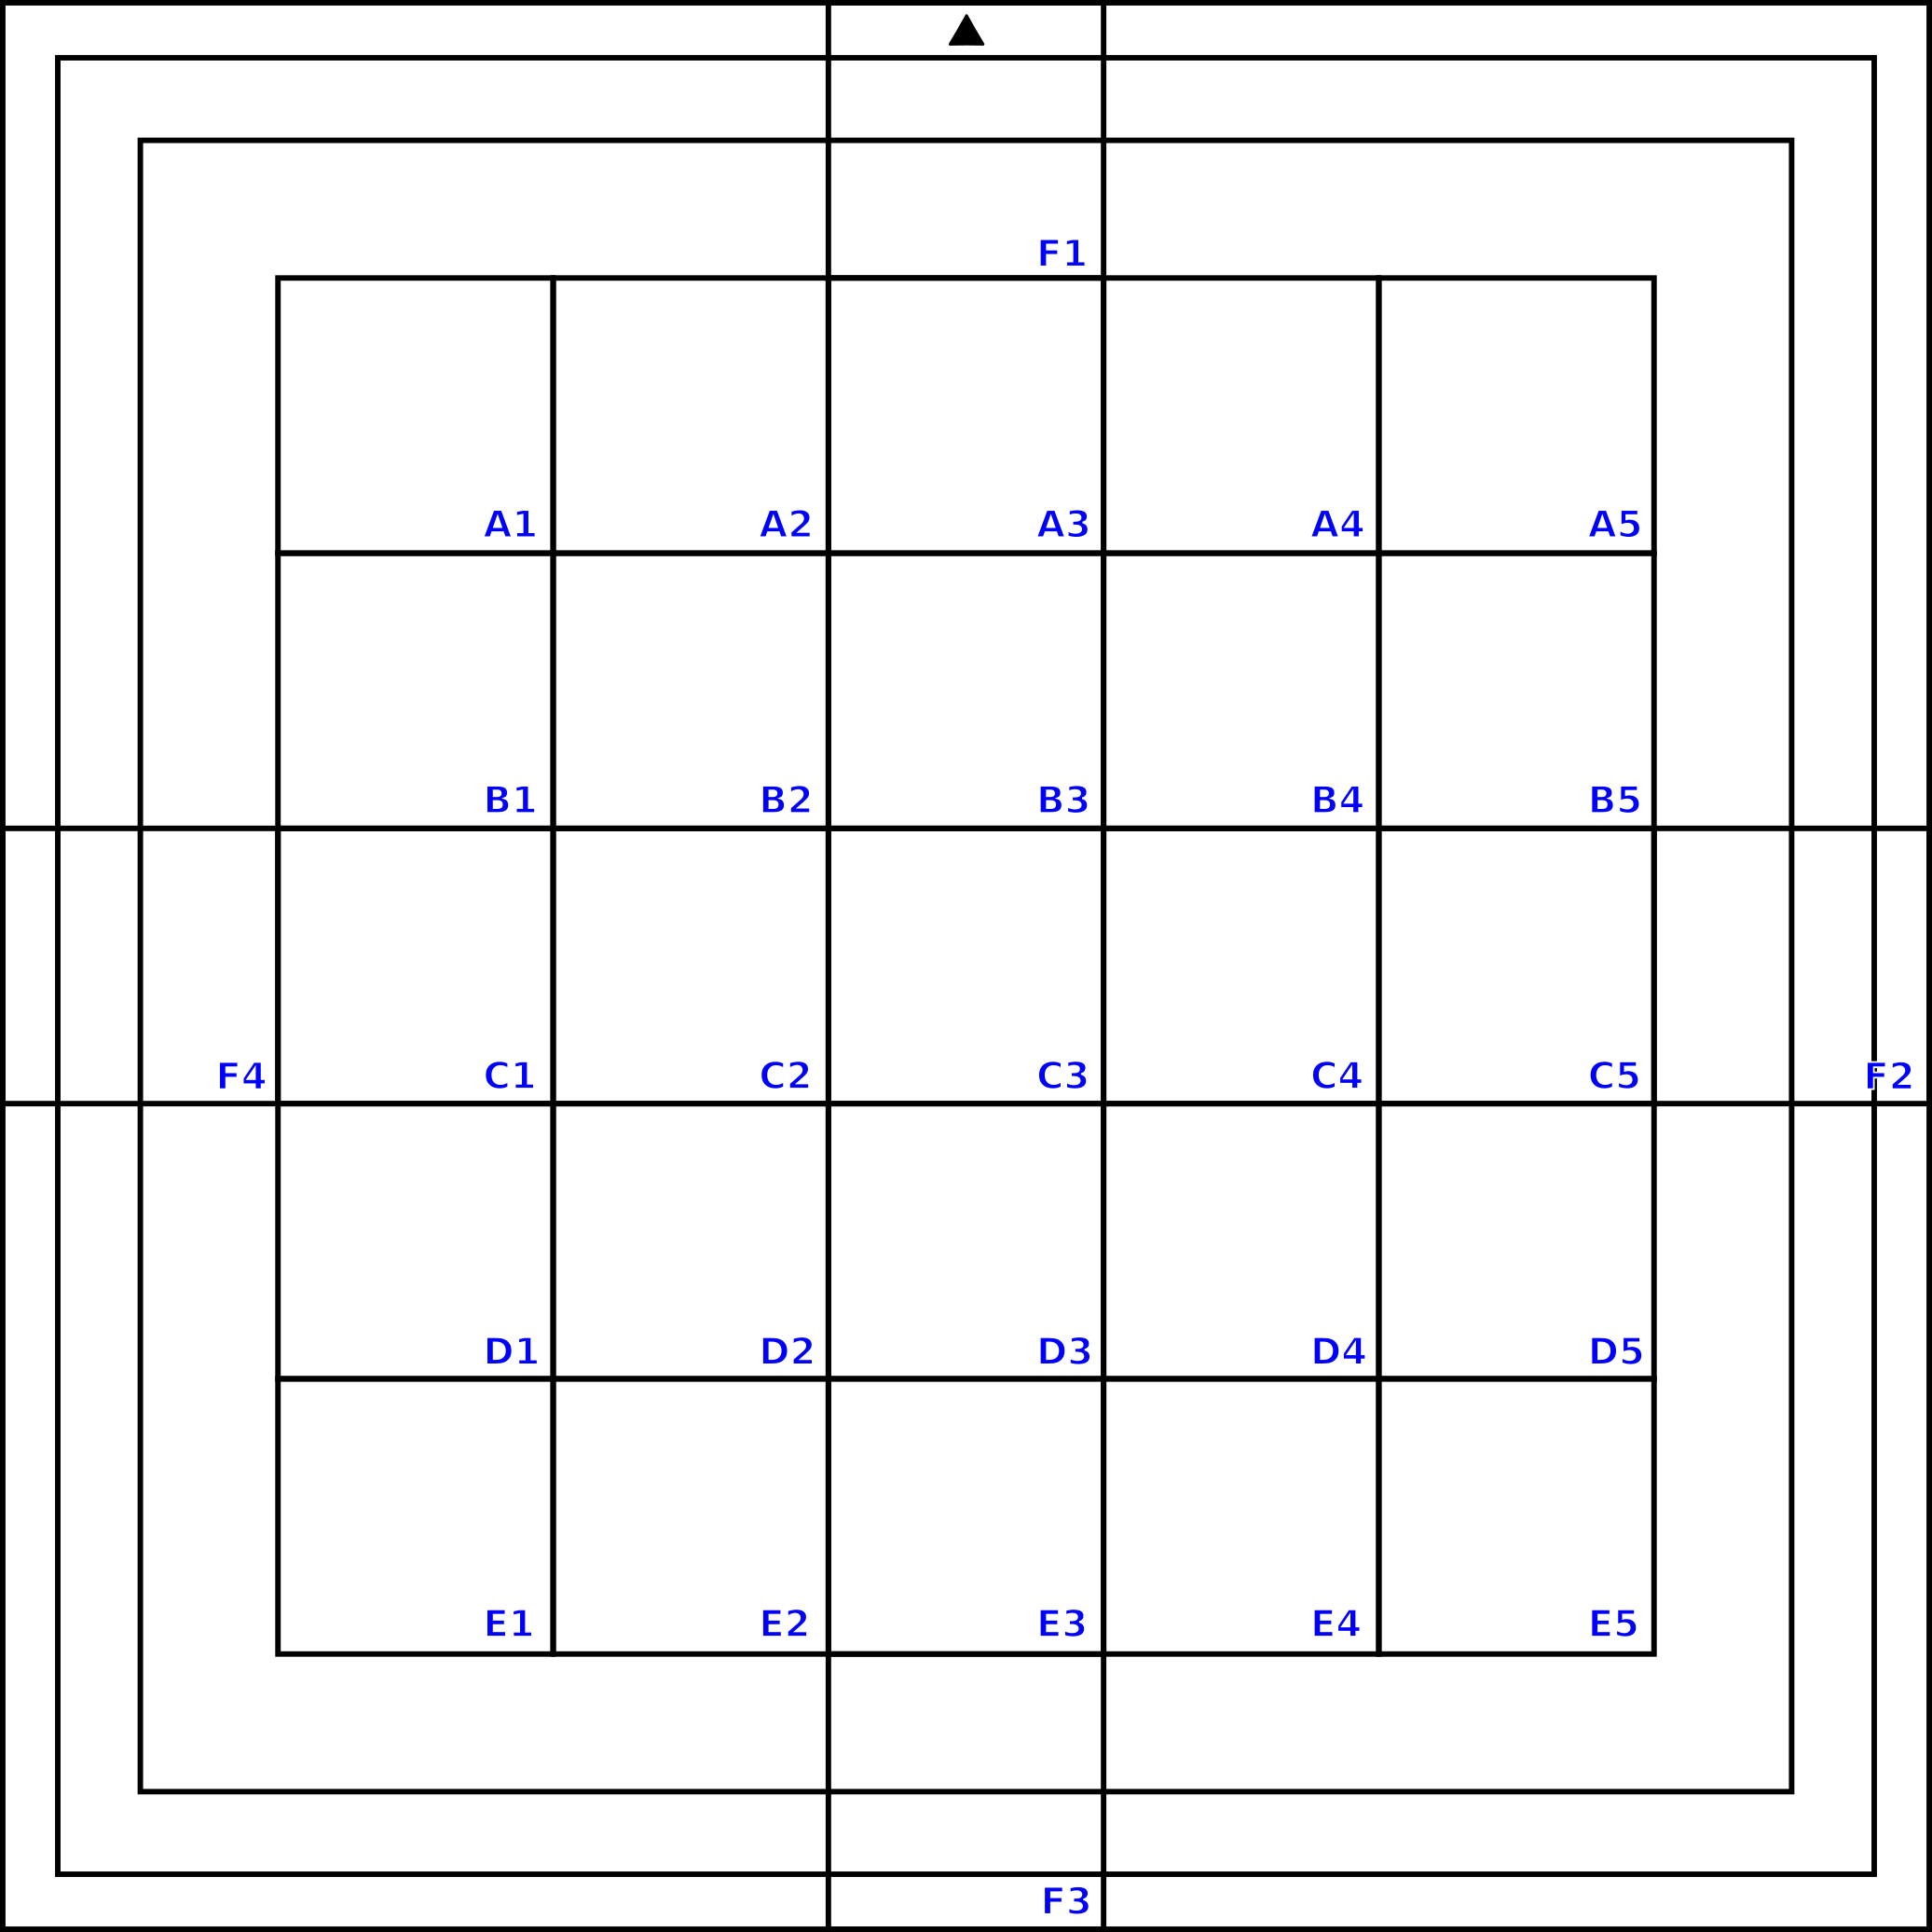
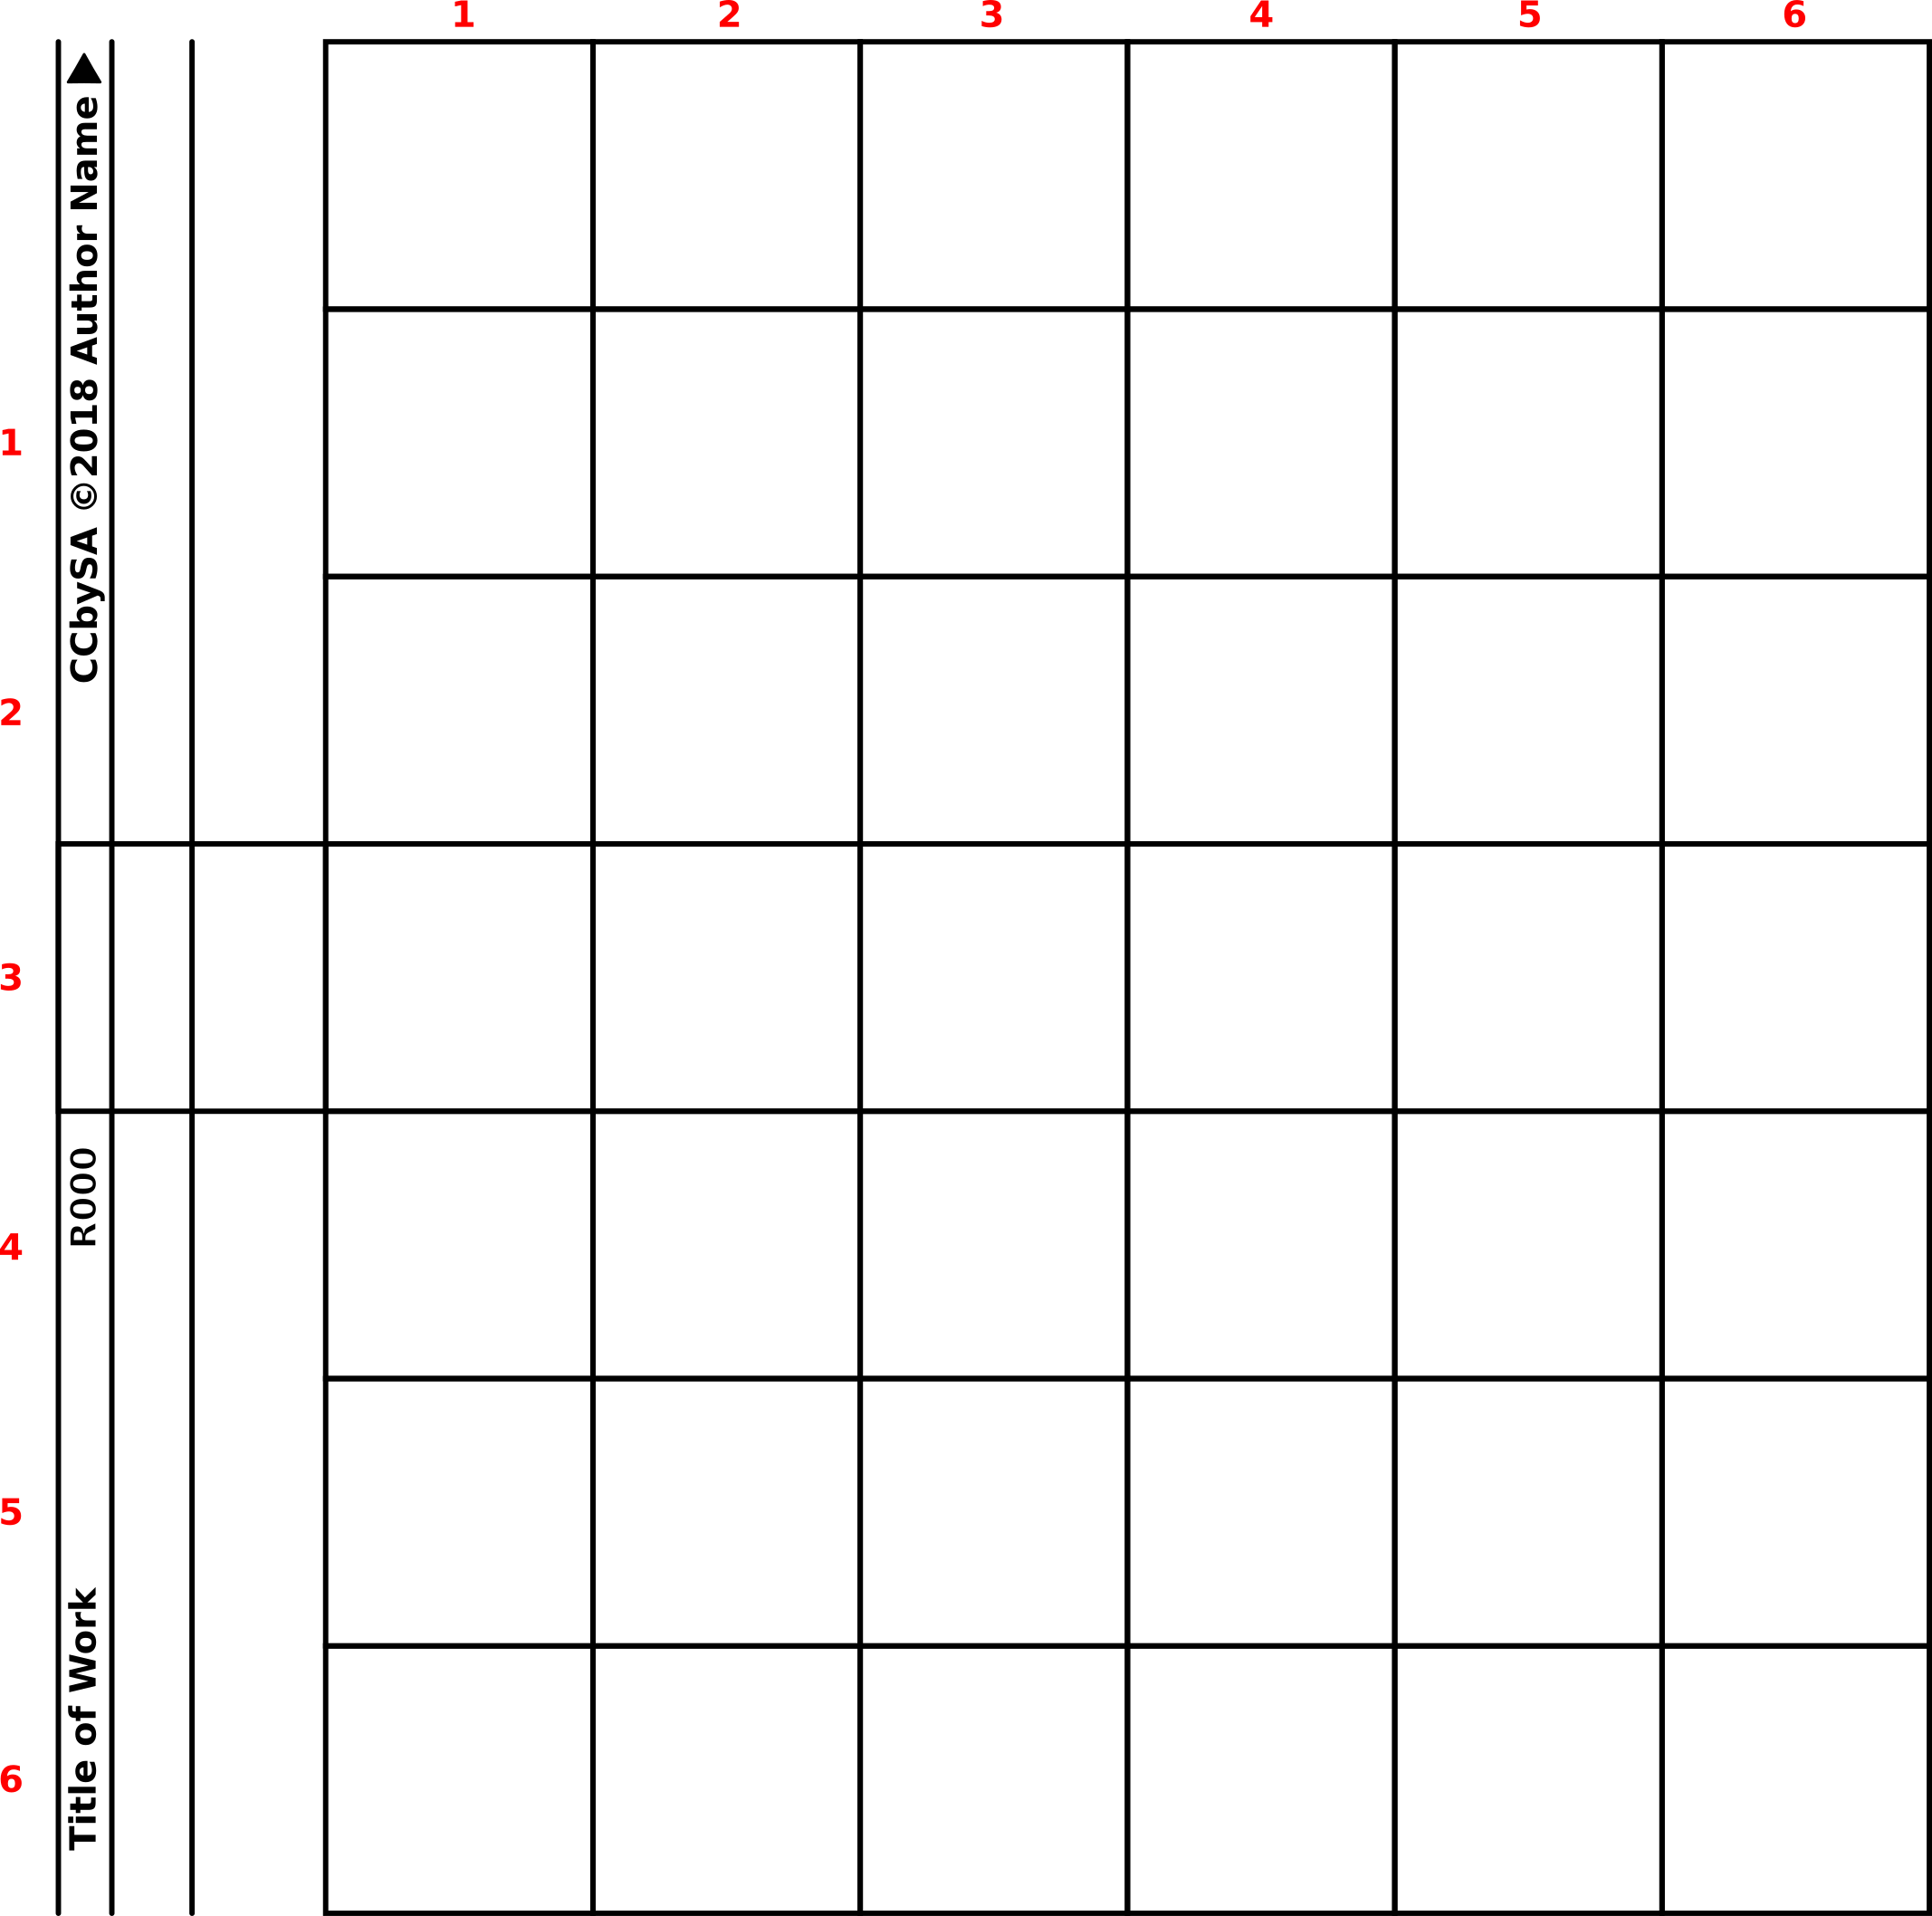
Square Identification within Tiles – Individual squares may be identified using a key. Per the first illustration below the tile is identified vertically A through E and horizontally1 through 5, therefore A5 is the top right square. This identification method always assumes the triangle indicates top regardless of the way a tile is currently turned and placed.
|
000Base 5 x 5 Tile |
“Q000”Corner of Large Format Tile 6 x 6 |
|
|
|
|
“R000”Edge Leaf Tile 6 x 6 |
“S000”Block Leaf Tile 6 x 6 |
|
|
|
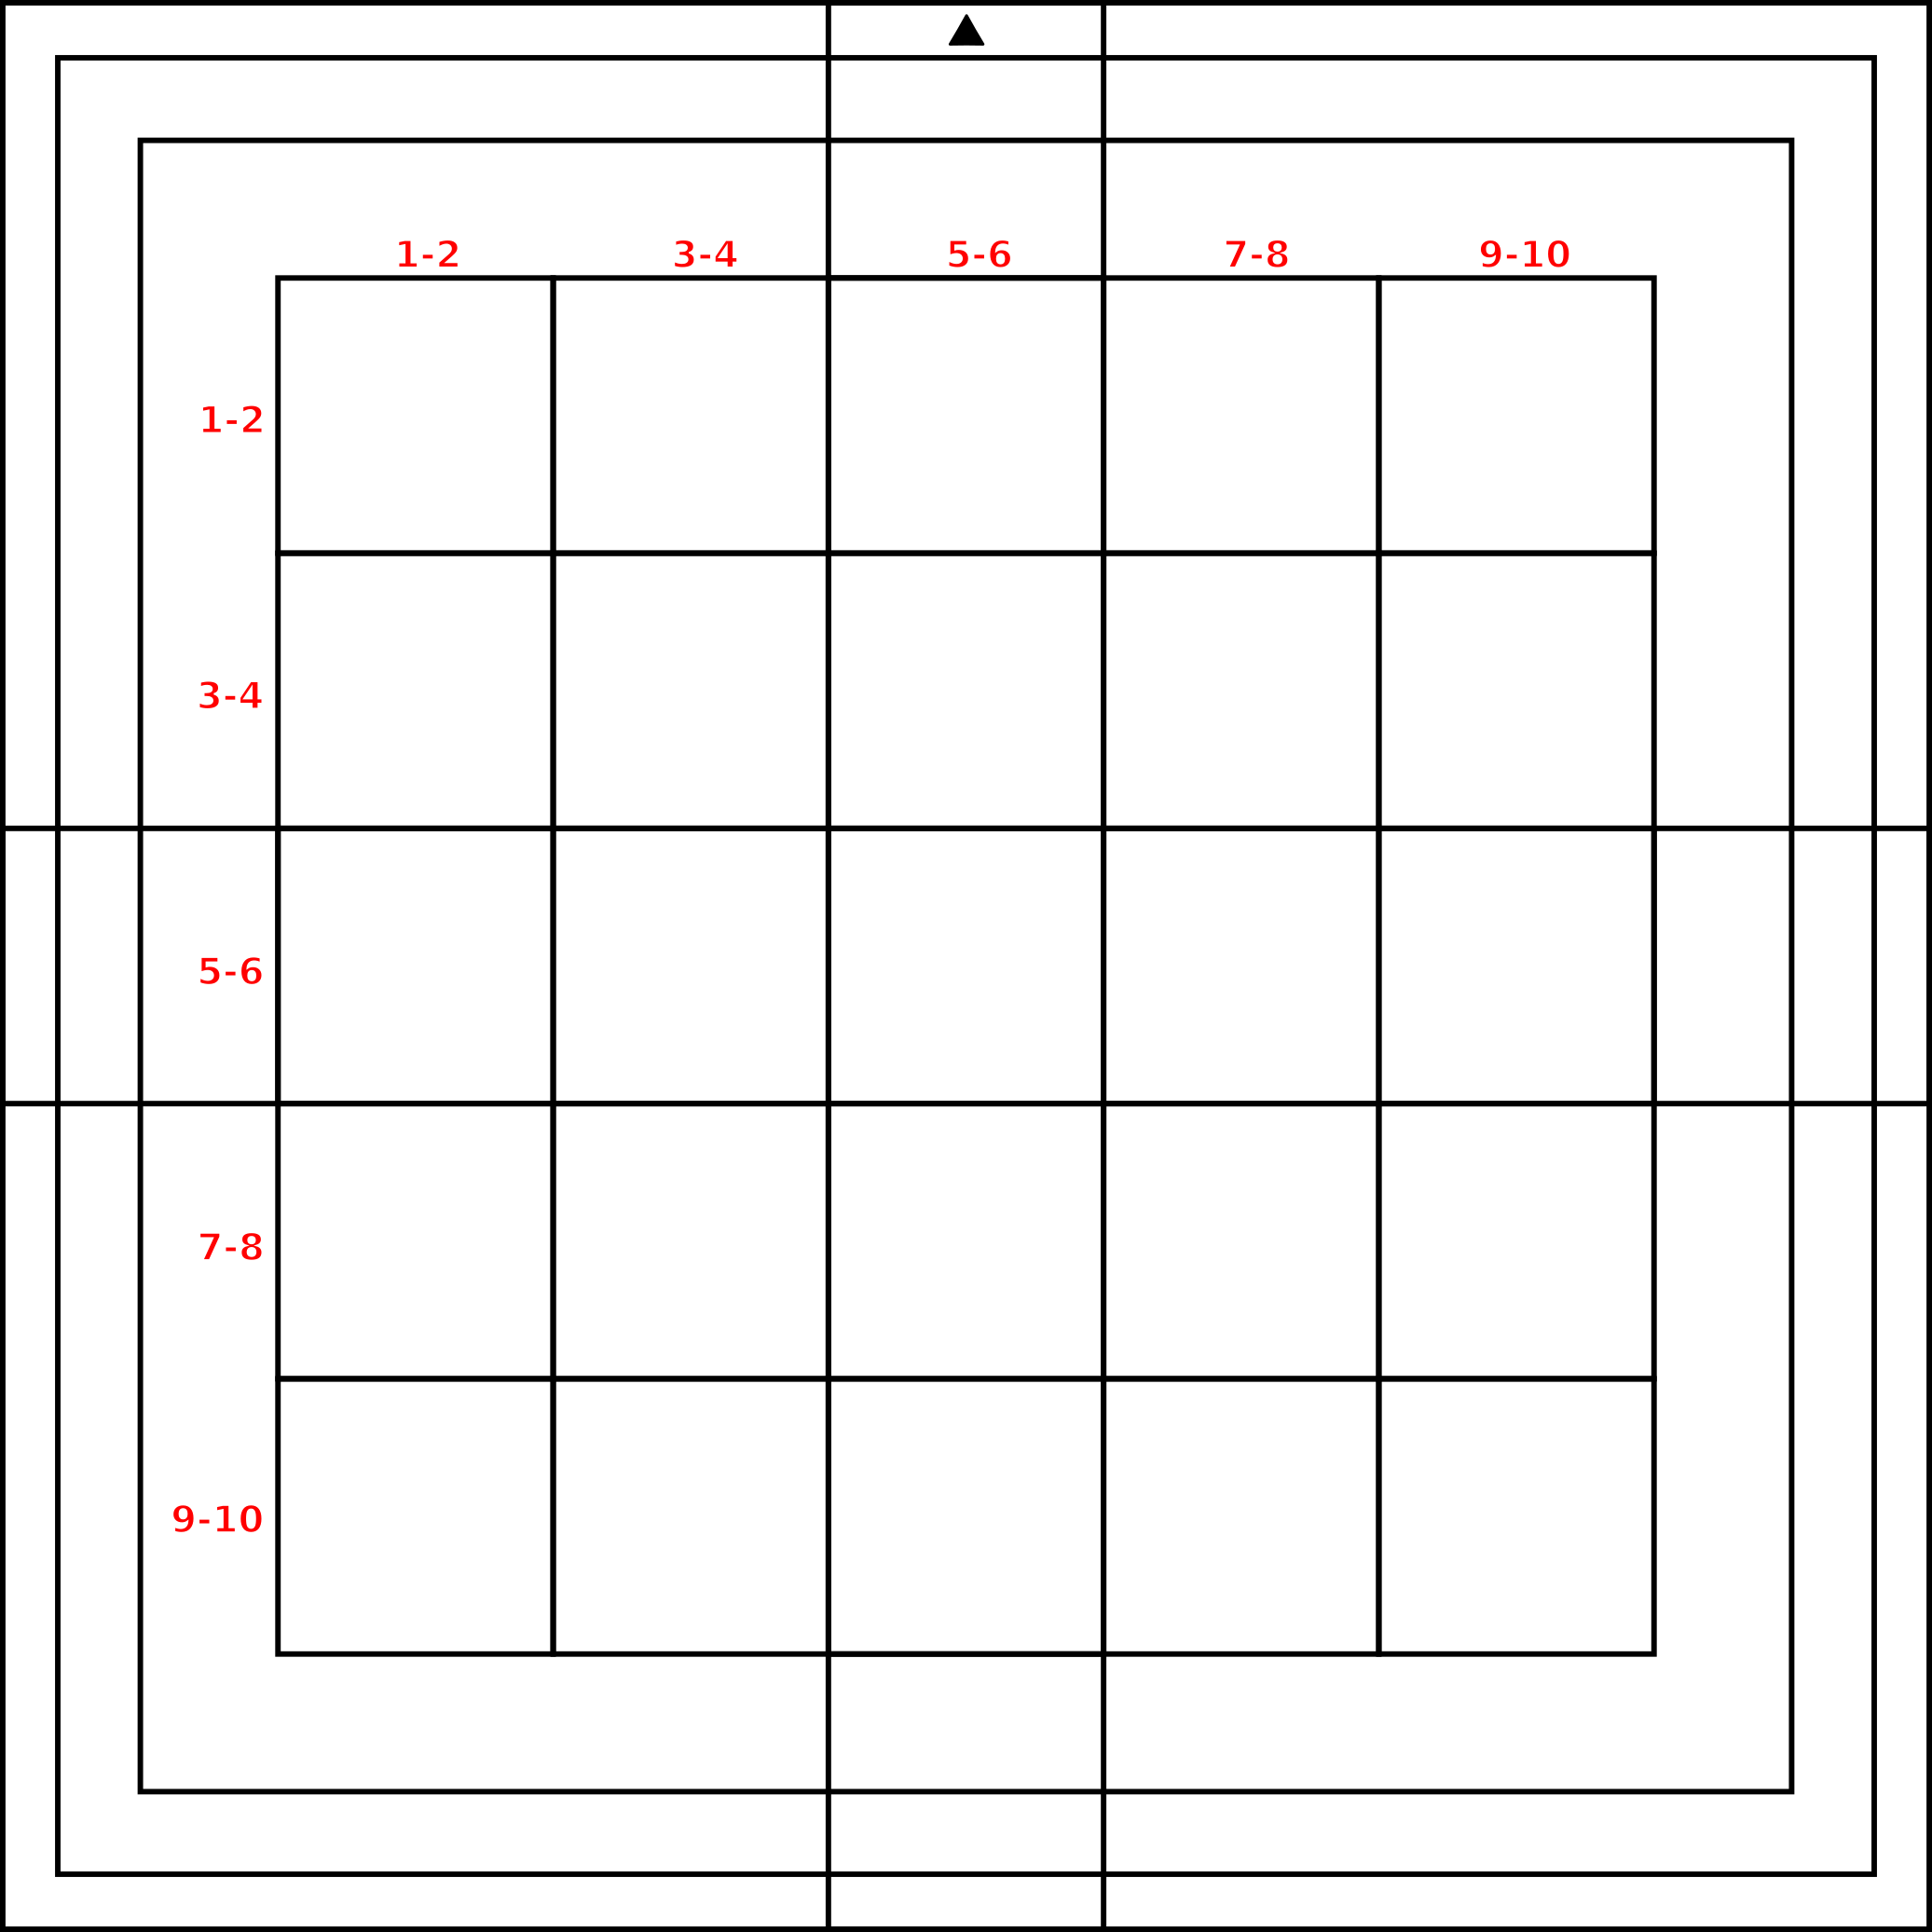
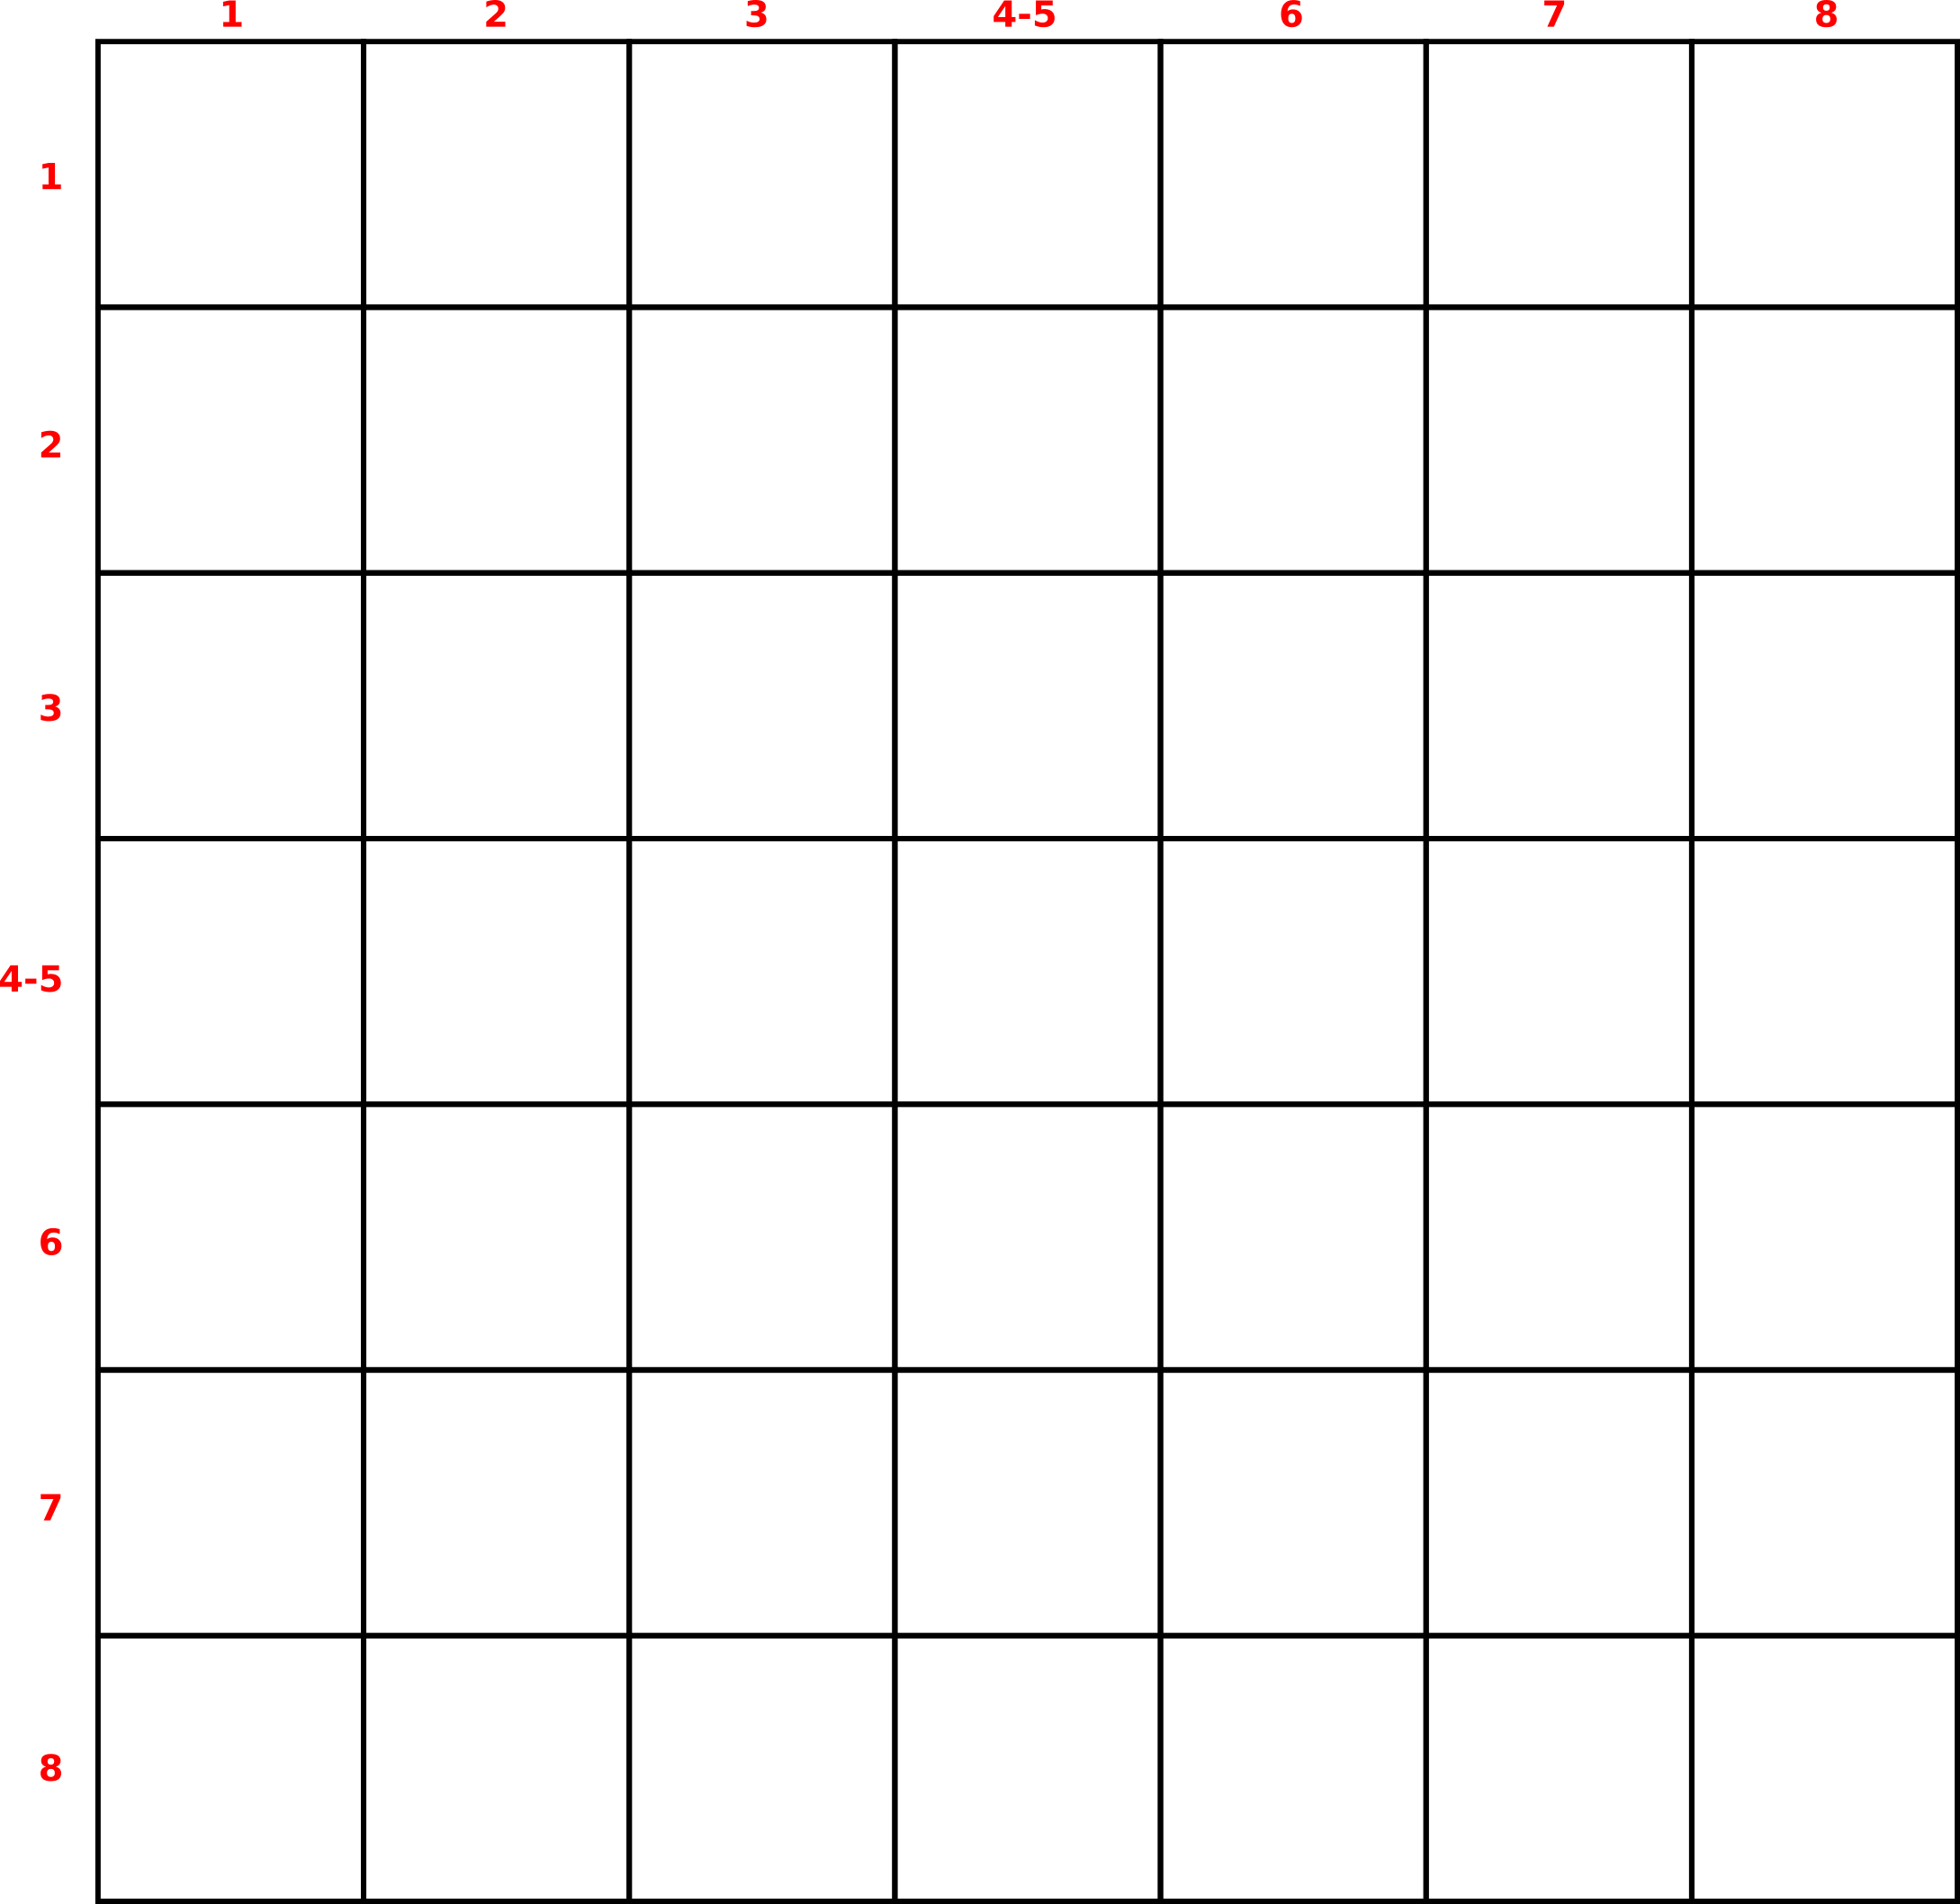
Randomizing Locations – A randomizing method allows random square determination using d6, d10, or d12, refer to the illustrations, roll the dice twice, once for the horizontal rows and once for the vertical columns.
Per the first illustration below, a dice roll of 2, 10 means row 1-2, column 9-10 and indicates the top right square with the notation A5. This identification always assumes the triangle indicates top regardless of the way the tile is currently turned and placed.
|
000Base 5 x 5 Tile |
“Q000”Corner of Large Format Tile 6 x 6 |
|
|
|
|
“R000”Edge Leaf Tile 6 x 6 |
“S000”Block Leaf Tile 6 x 6 |
|
|
|
Truncated Square Facing Randomizer – roll 1d8 and consult the provided illustration. This is useful for randomly determining facing or other orientation.
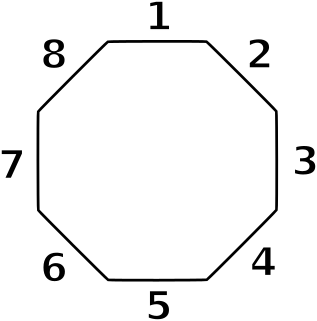
Filename – The file is named by its tile’s id number. Tiles, regardless of file type are named by their id number,e.g. “X001.pdf”, “X001.xcf”, and “X001.svg”are instances of the same map tile executed using different software. “L001.pdf” is not the same root join type of tile as “X001.pdf”
Assembling Large Format Tile Groups
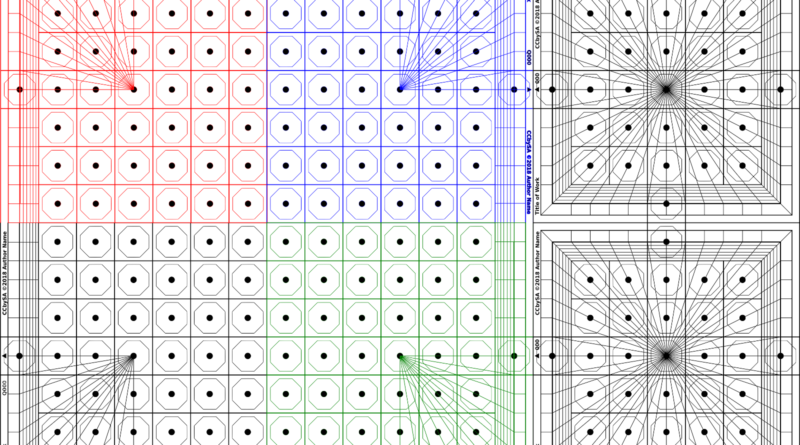
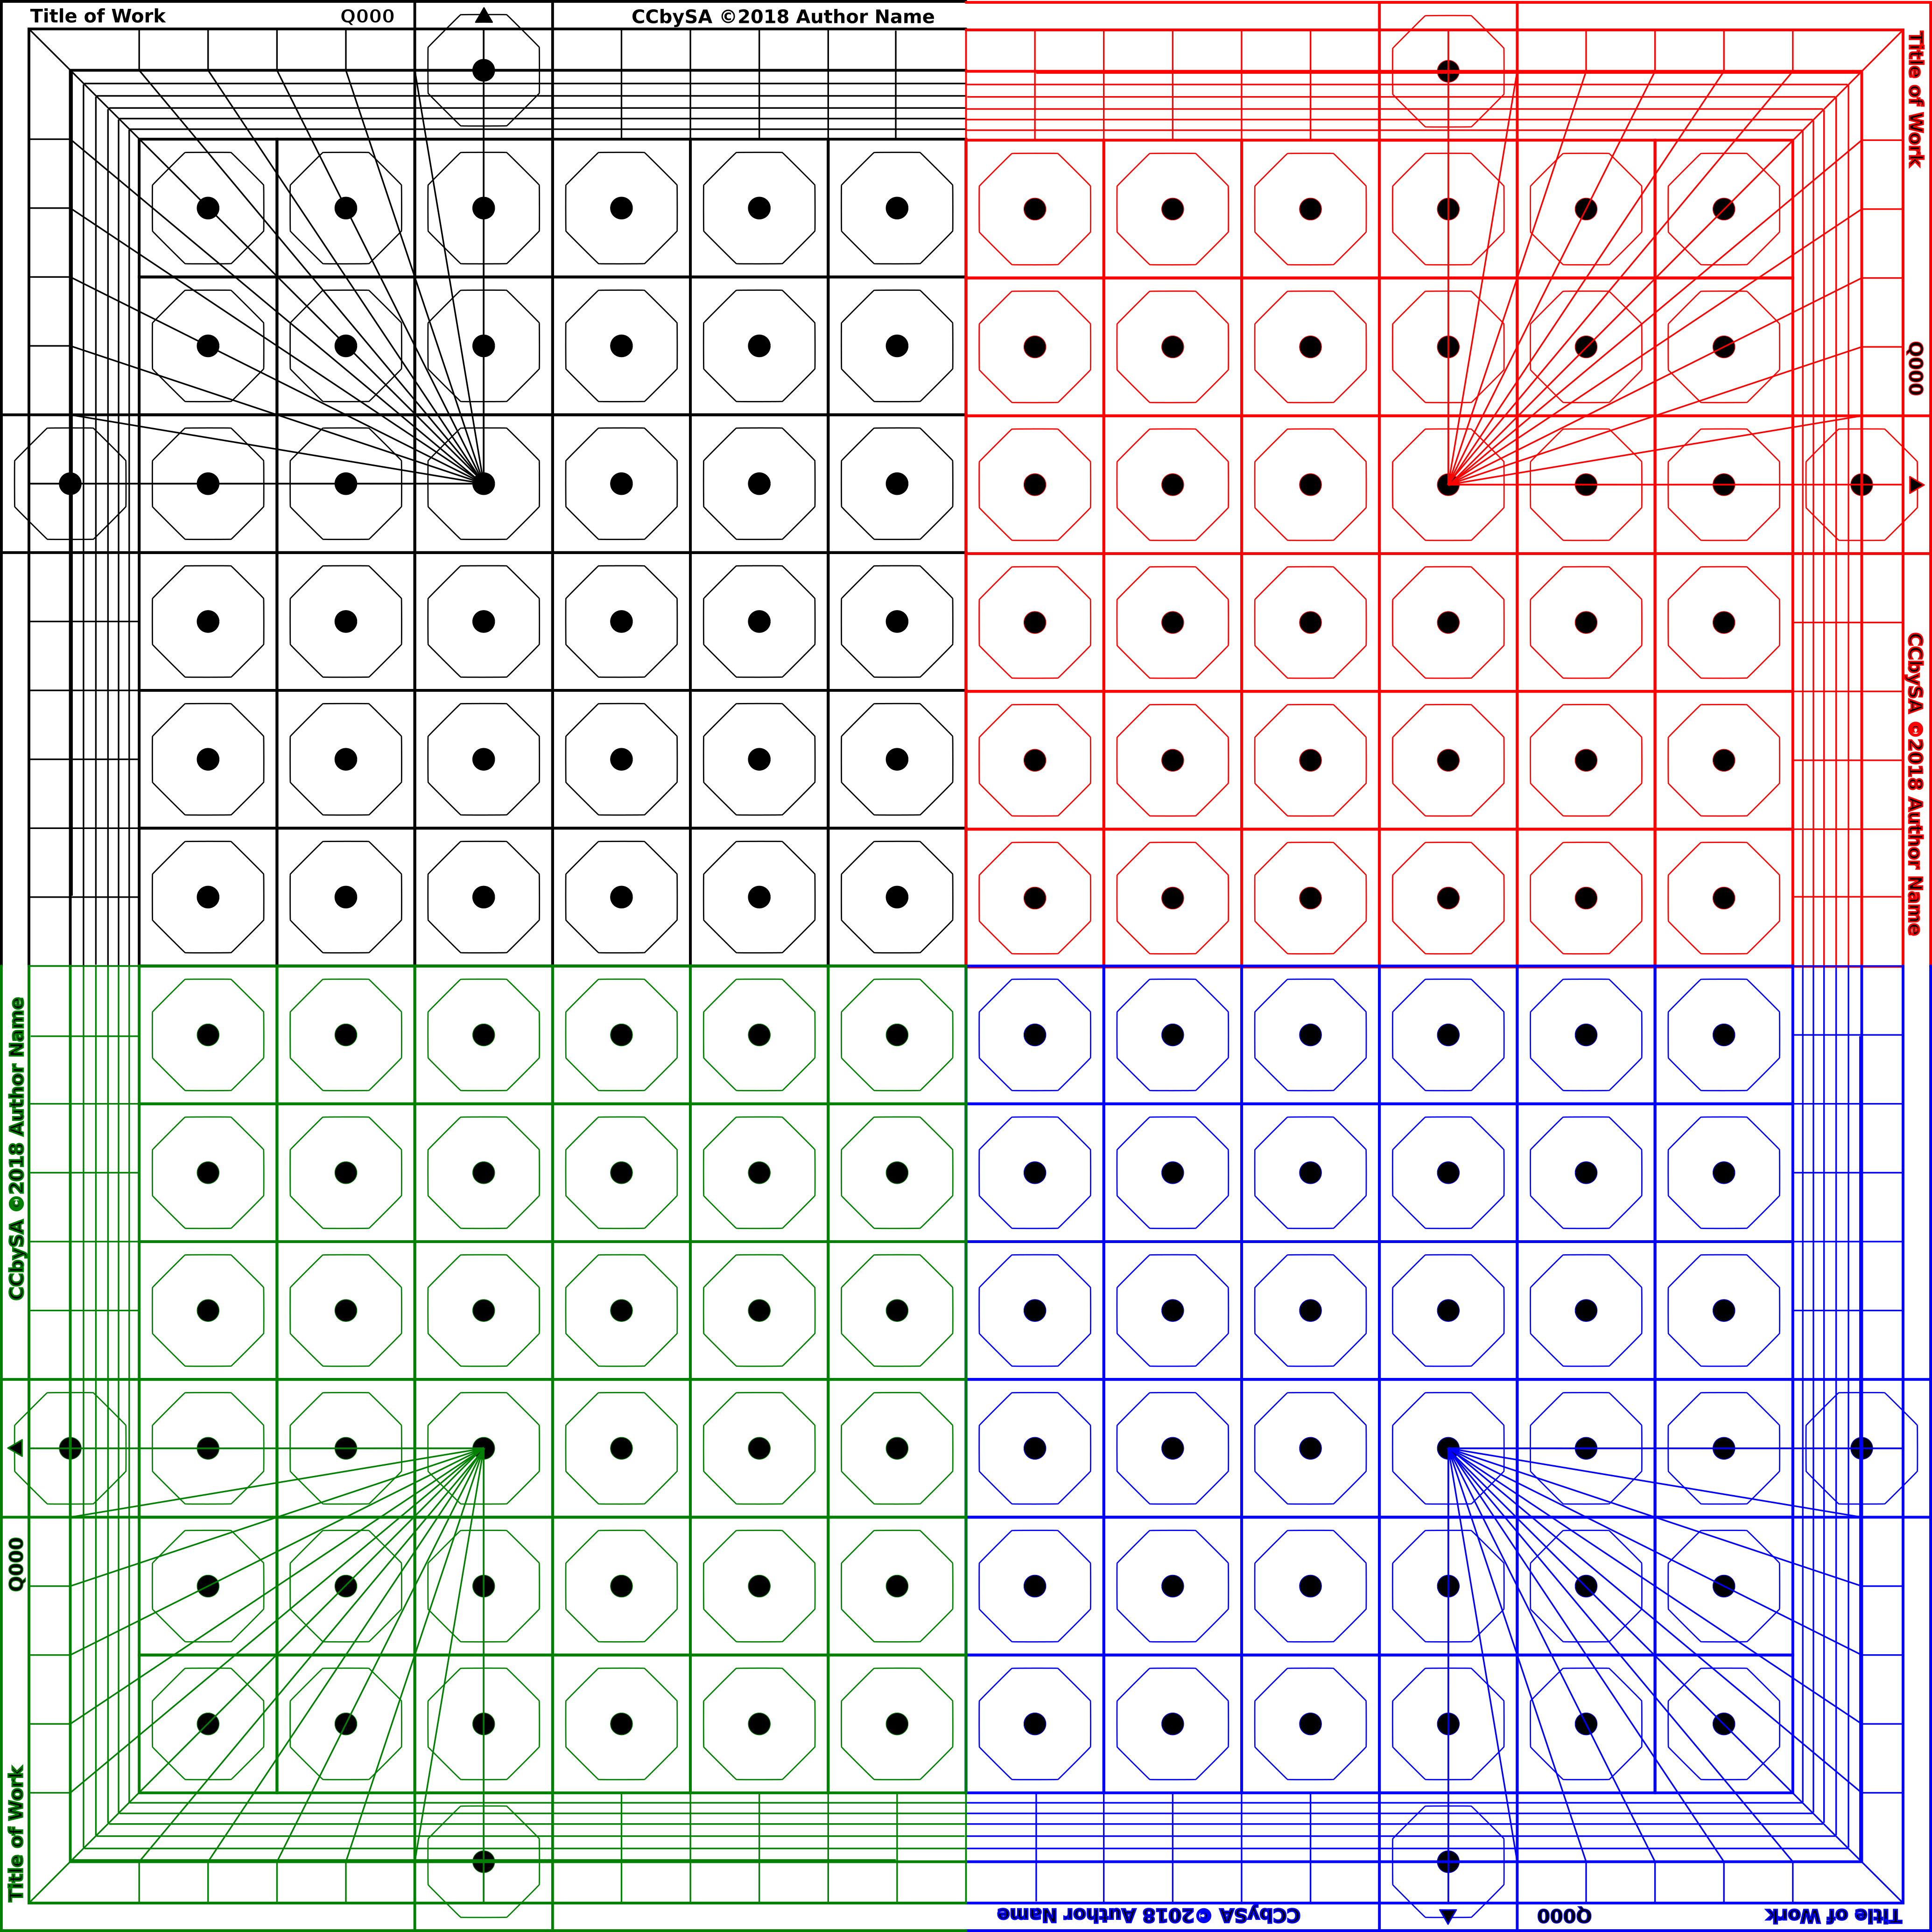
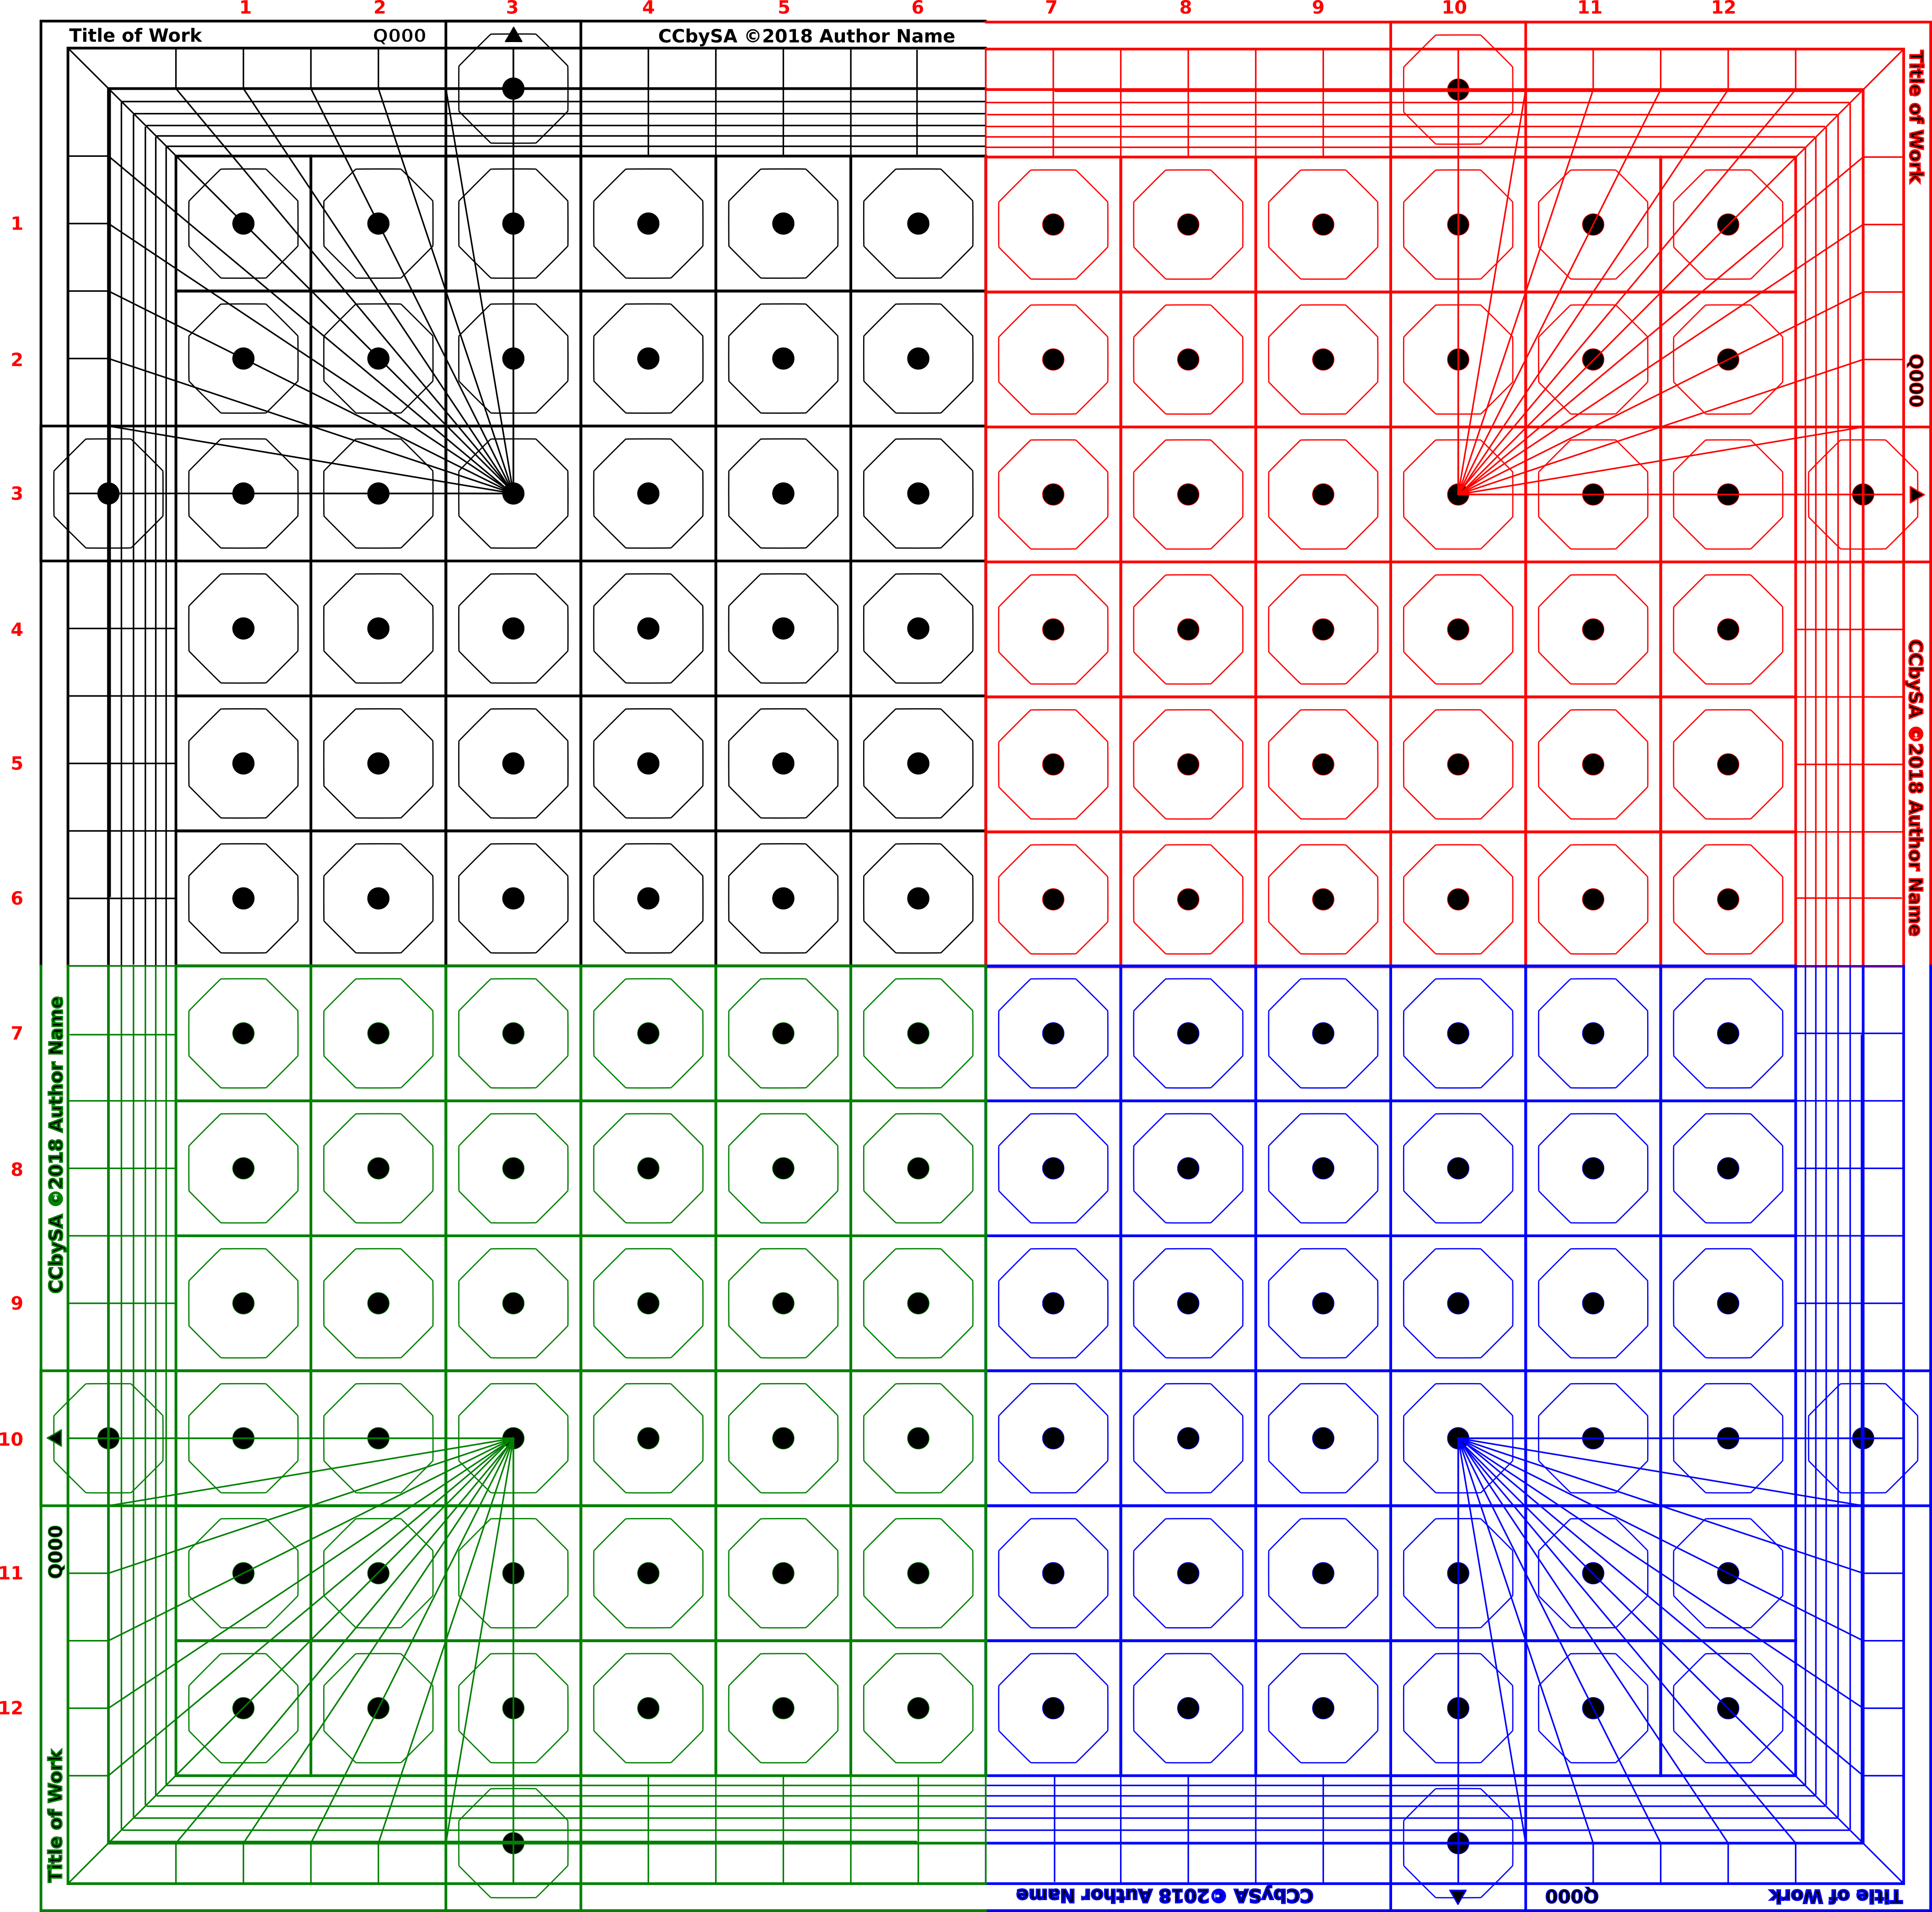
A quarter template is provided as the basis of a12 x 12 large format assembly. The prefix for the root tile is Q(quarter). Example of a Large Format Group assembly, the root tile is used repeatedly, simply duplicate and rotate the tile to complete the assembly:
|
Example of a Large Format Group Layout |
The Paper Space – When the 5 x 5 tiles are placed together it will be immediately obvious that a 25mm border is given over to wall illustration and border information. In order to place and assemble groups of tiles on the table for play in such a way that they join together seamlessly with the Large Format Tile Group this border must be accounted for by a gain of 50 mm expressed as 2rows and 2 columns. As can be seen from the following illustration the 5 x 5 and 12 x 12 assembled Large Format Tile Group join nicely together. The gain of 2 rows and columns is the reason the Large Format Tile Group must be 12 x 12 squares.
|
Example of paper space fit |
The construction of the tiles is firstly a practical necessity of accommodating the physical paper space. The walls between all tiles are considered 2 squares thick in order to “rationalize the construction.” There is a 2 square passage between the tiles,meaning that within the border a single square behind each exit is in play, and this is to be indicated by a dot on the map tile. The passage between tiles may potentially have closures at either end as indicated by the illustrations on the tiles, for example, doors or portcullis. It may be in the interest of simplicity to have only one closure on one of the two adjoining tiles as defeating two closures is doubly difficult.
Identifying Individual Squares of a Large Format Tile Group – Individual squares within the Large Format Tile Group are identified by map tile using the system of notation allocated to each tile.
Large Format Tile Group Randomization -Randomization within a large format tile group may be accomplished with d12 as follows; after all we do not have enough use for the dice type! As stated previously each sub tile type of course has its own provision for randomization.
|
|
|
Example of Large Format Randomization |
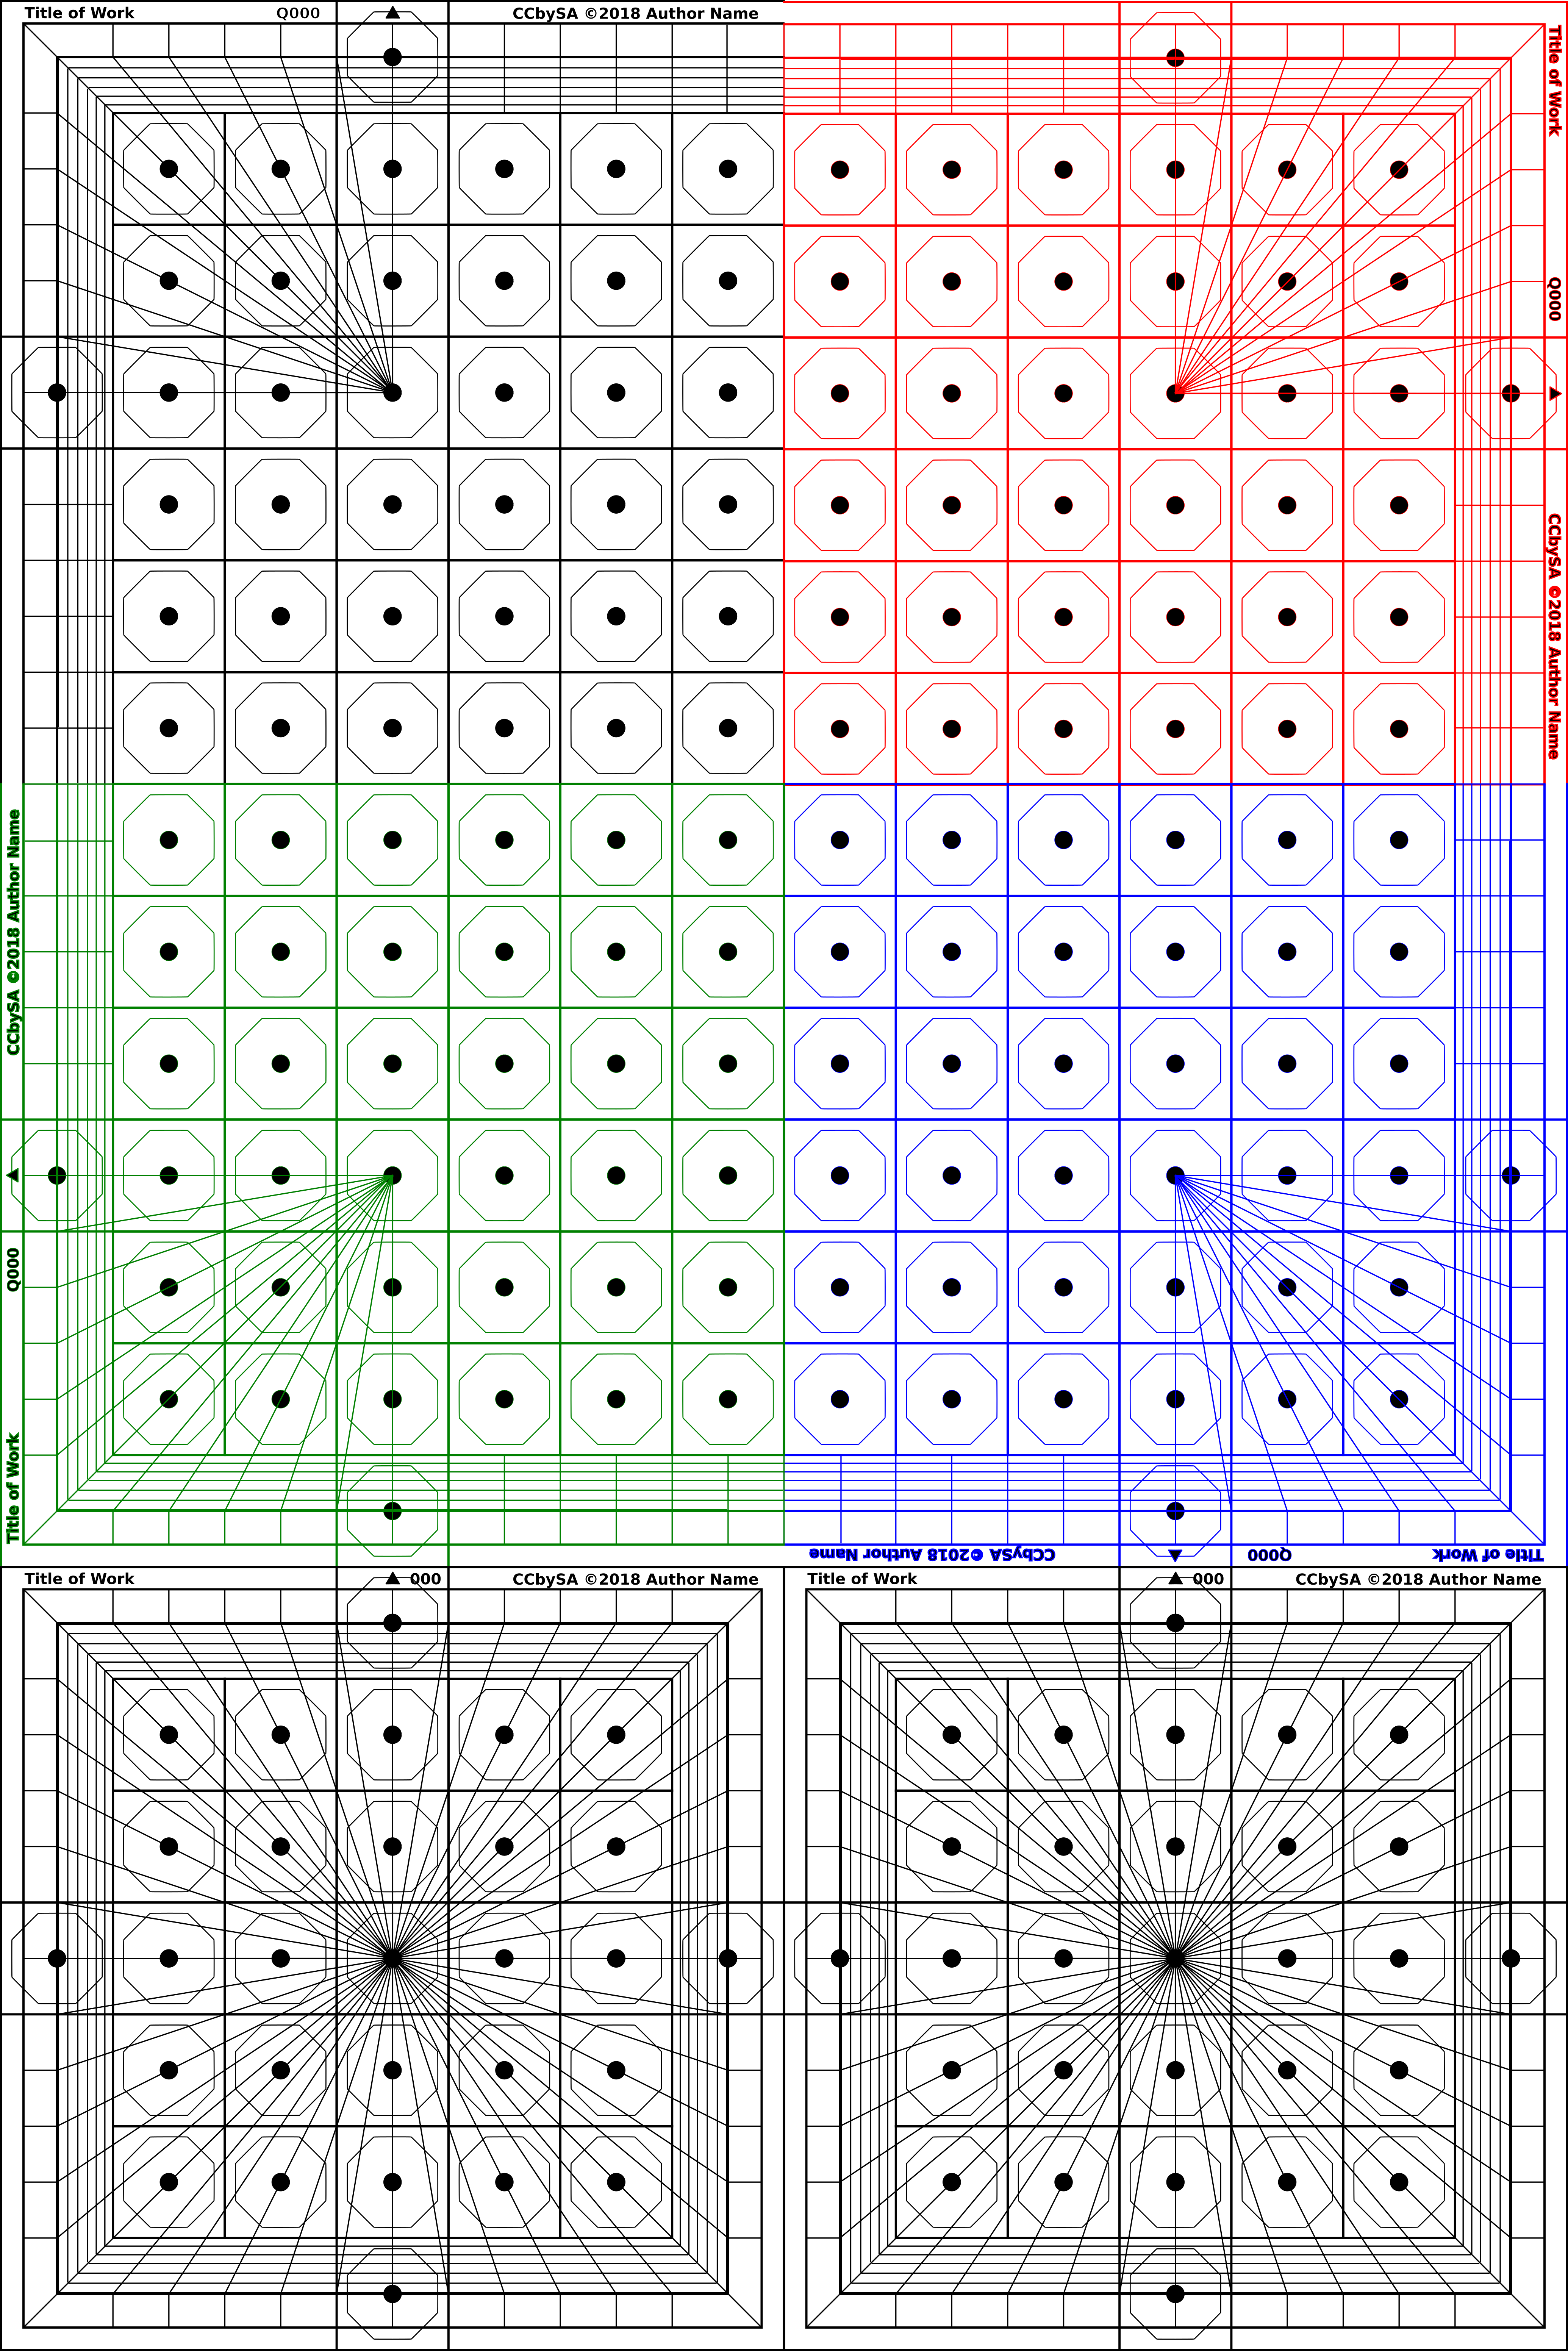
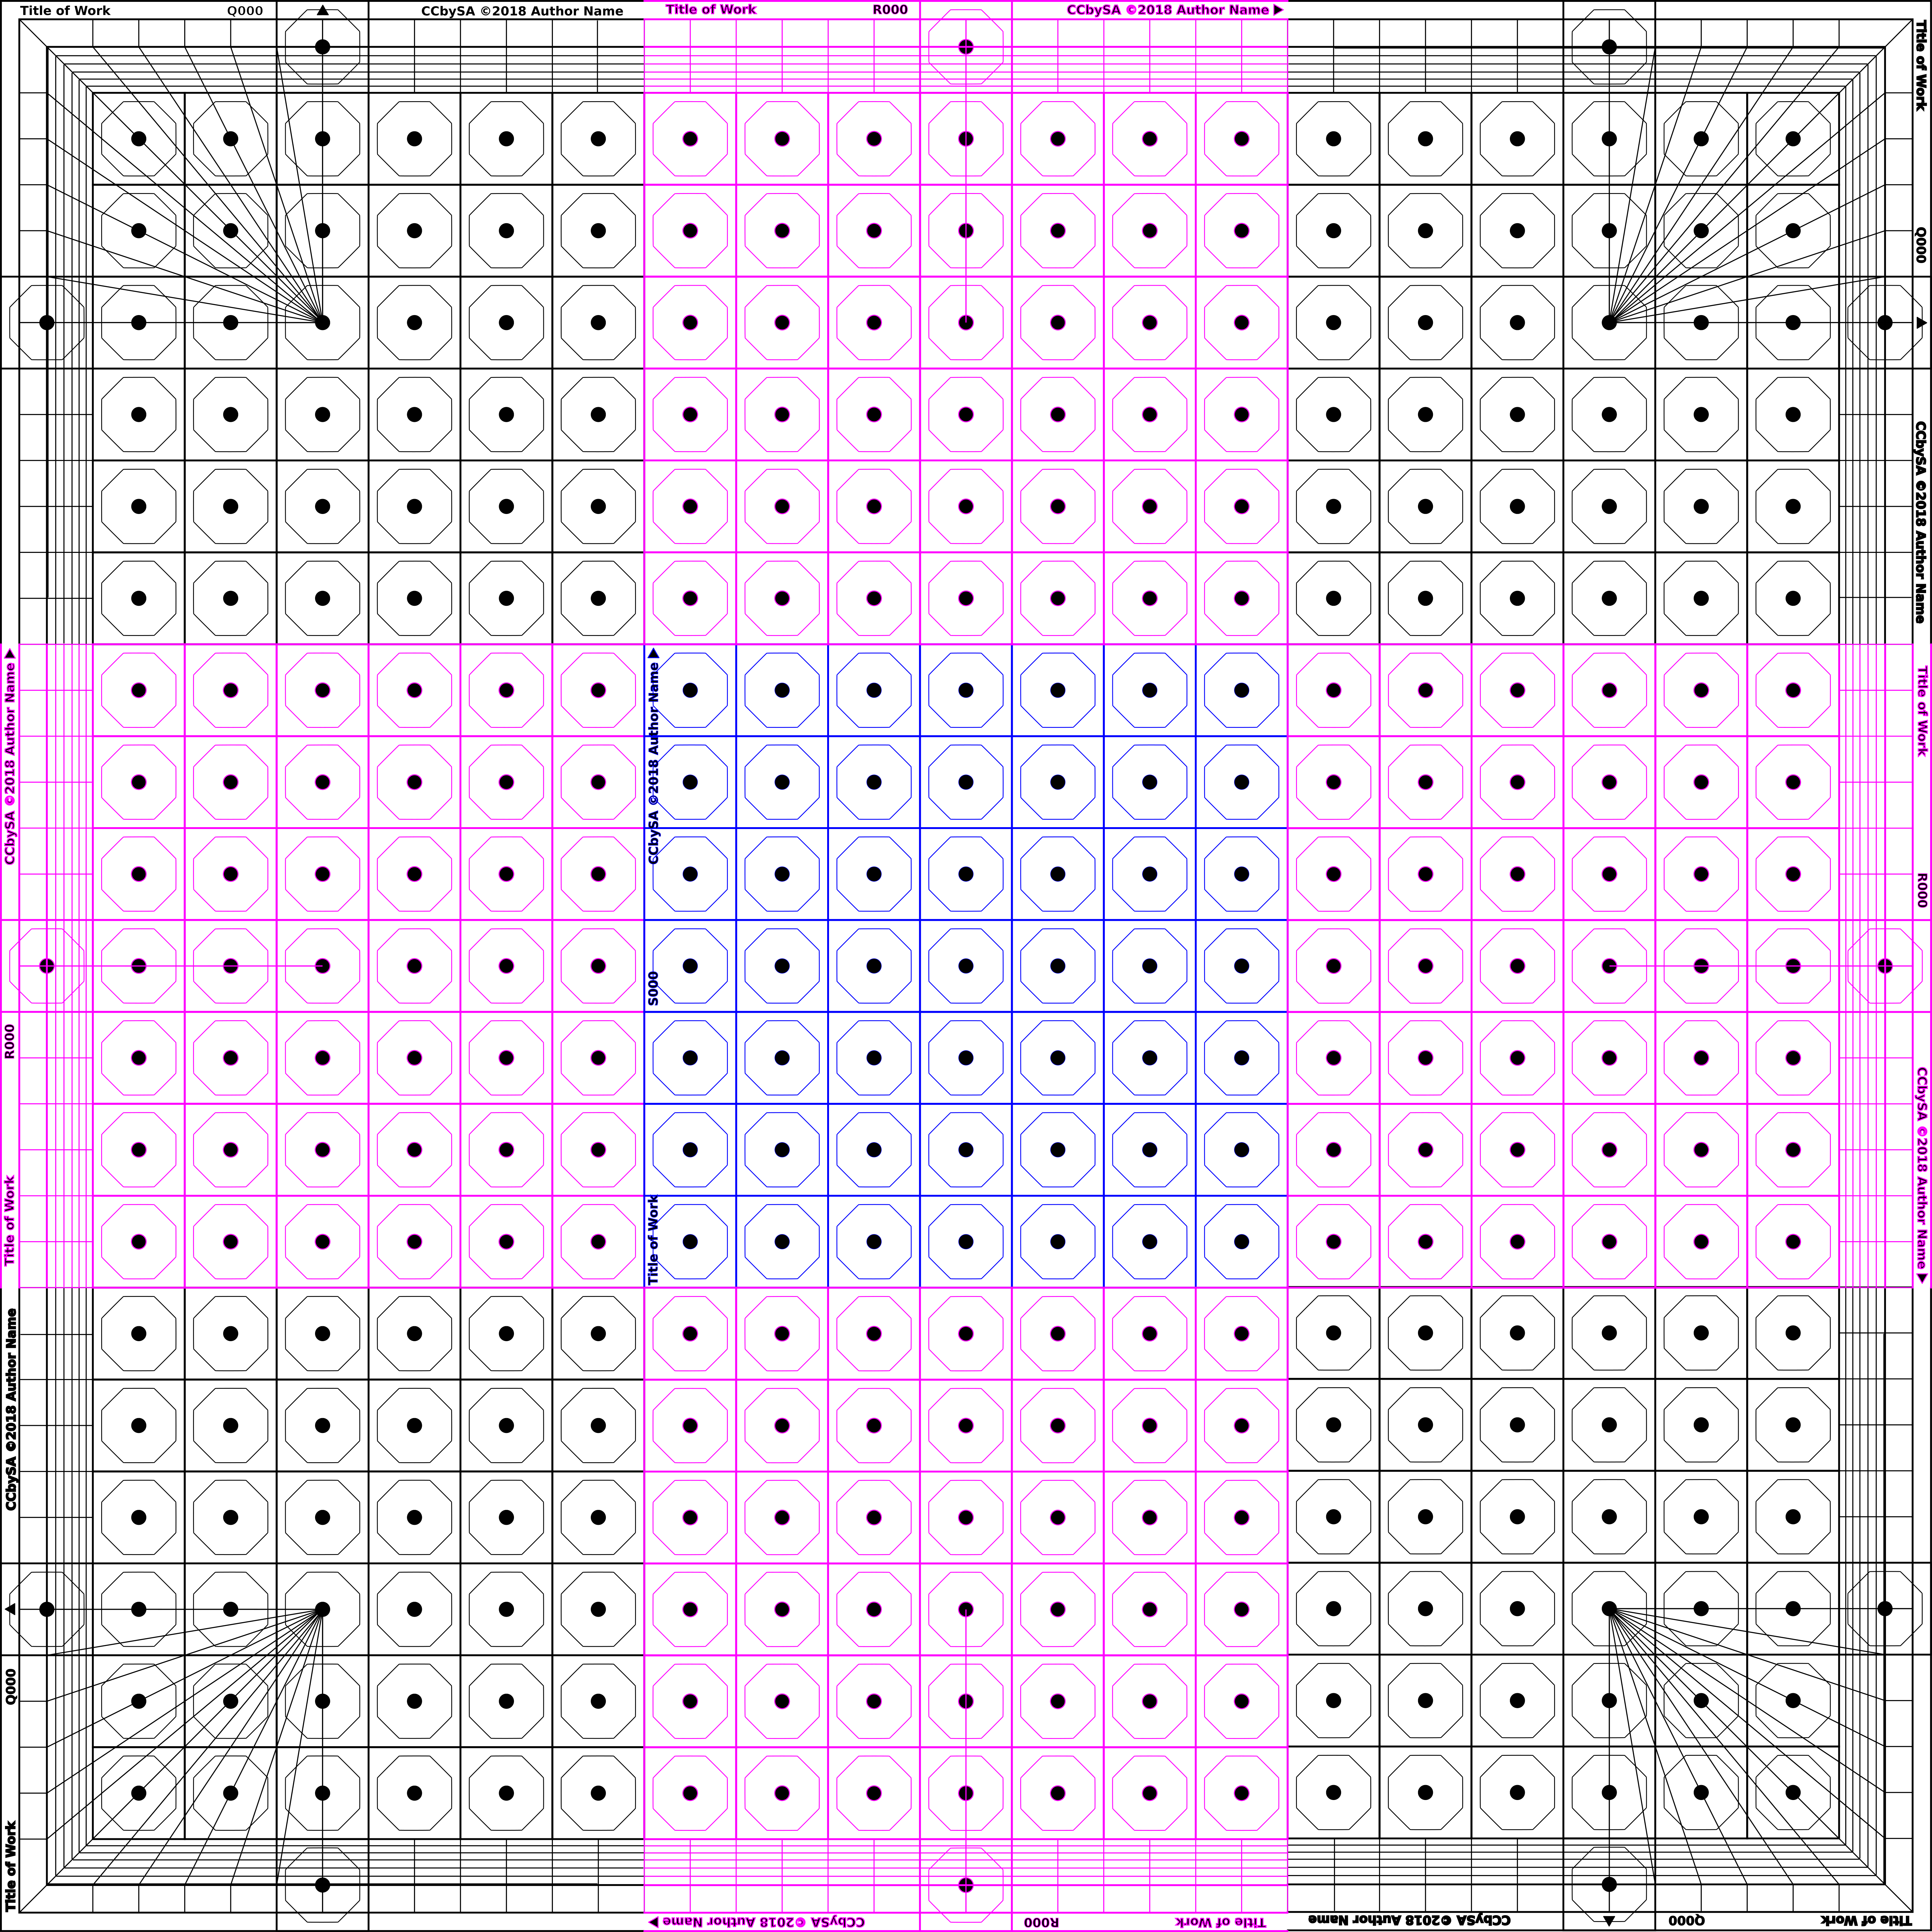
The Large Format Tile Group Leaf Tiles – The leaf tiles are additional pieces which may be inserted between the quarter tiles in order to make even larger map layouts.
|
Edge Leaf |
Centre Leaf |
|
|
|
Layout showing the use of the Leaf tiles:
|
Example of a Large Format Group Layout using Leaf Tiles |
Recording Forms
The following is an example of one of the five forms used to describe map layouts, dungeons, forest paths, etc. These forms may be found below at the bottom of this article. The PDF files use the metric A4 page size.

Random Dungeon Generation
The methods cited raise the possibility of random dungeon generation and coupled with a content population routine such might well provide the basis of a dungeon. However, I am of the school that random content, without judgment, does not a dungeon make. Most of my work as an author revolves around the building of stories. The time honoured who, what, where, when, why, and how, provide the basis for story building. I would consider auto-generated offerings only as a good starting point. In that spirit new Game Judges may well need a helping hand to start and I heartily suggest the following dungeon building flowchart as an example of away to begin by describing the map tiles. It is not the only possible method!
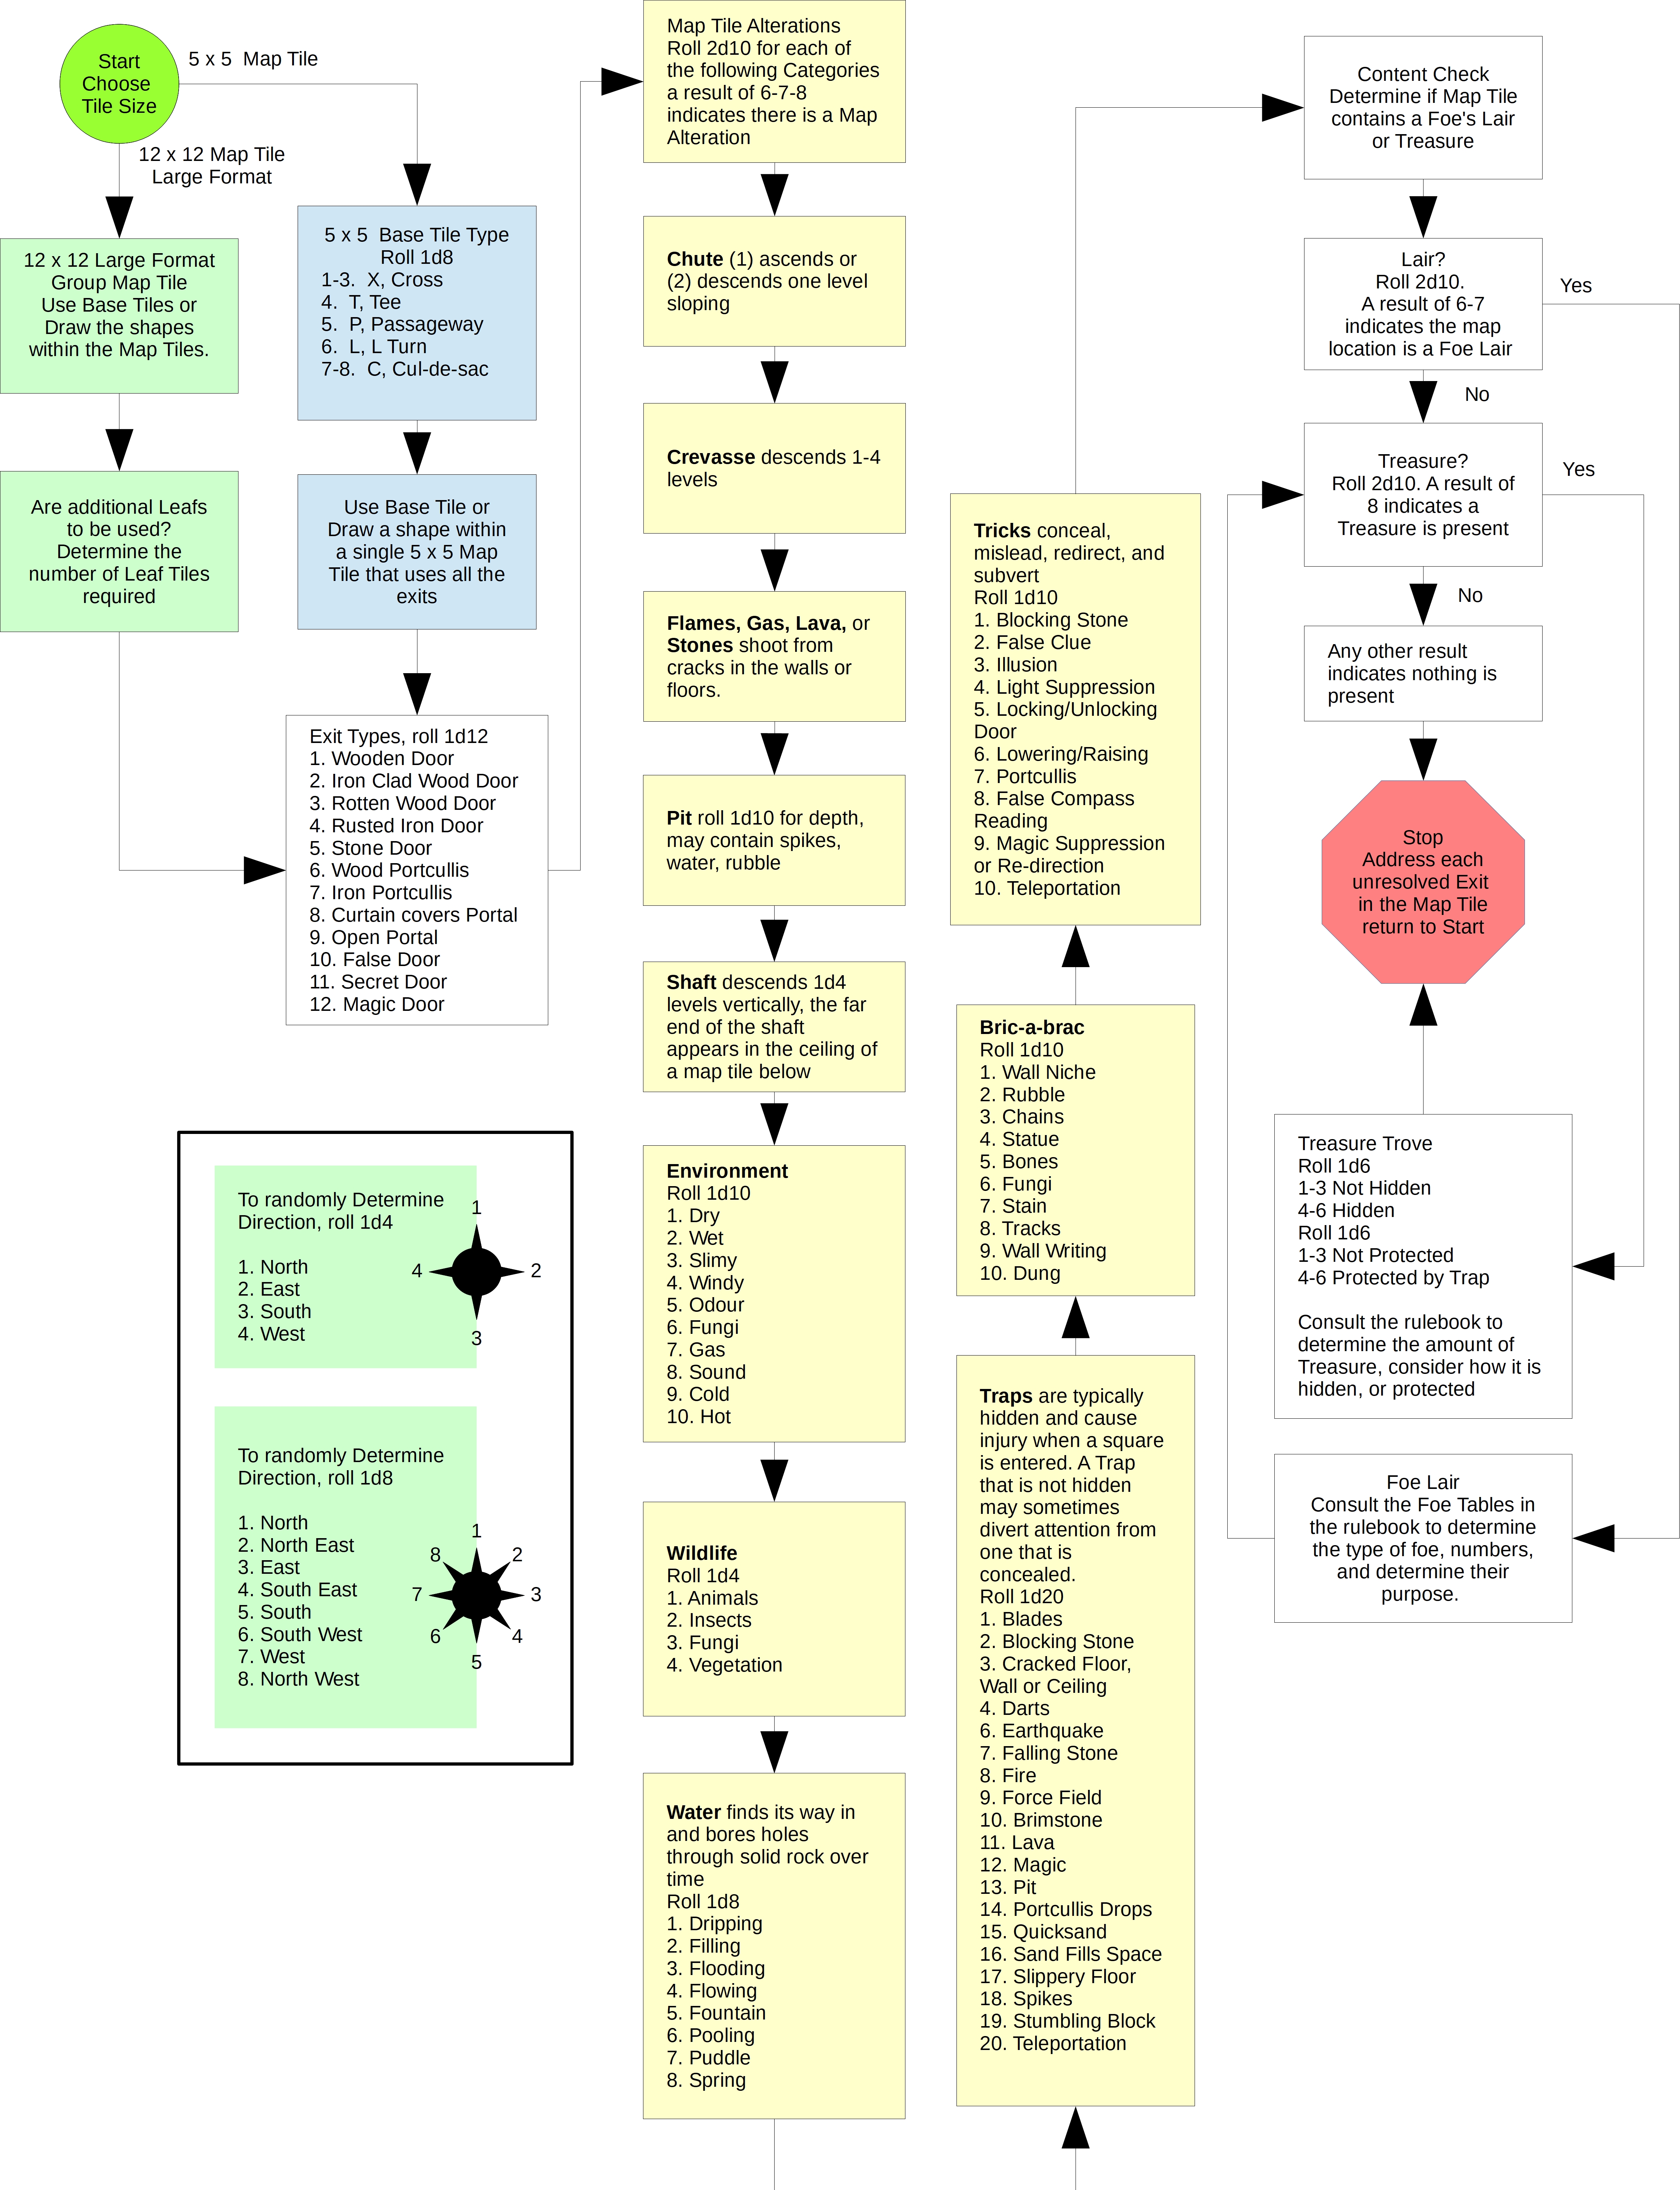
Templates and Forms
© 2018 by Gregory Bruce MacKenzie. Map Tile Templates and Forms are made available under a Creative Commons Attribution-ShareAlike 4.0 International License. Creative Commons Attribution-ShareAlike 4.0 International License.
- Map Templates, this is a single GIMP file with multiple layers.
- Map Tile Forms, PDF format.
I hope the reader has enjoyed the article. The next in the Tile That Dungeon! series will present some examples of tile artwork. Breeyark!
